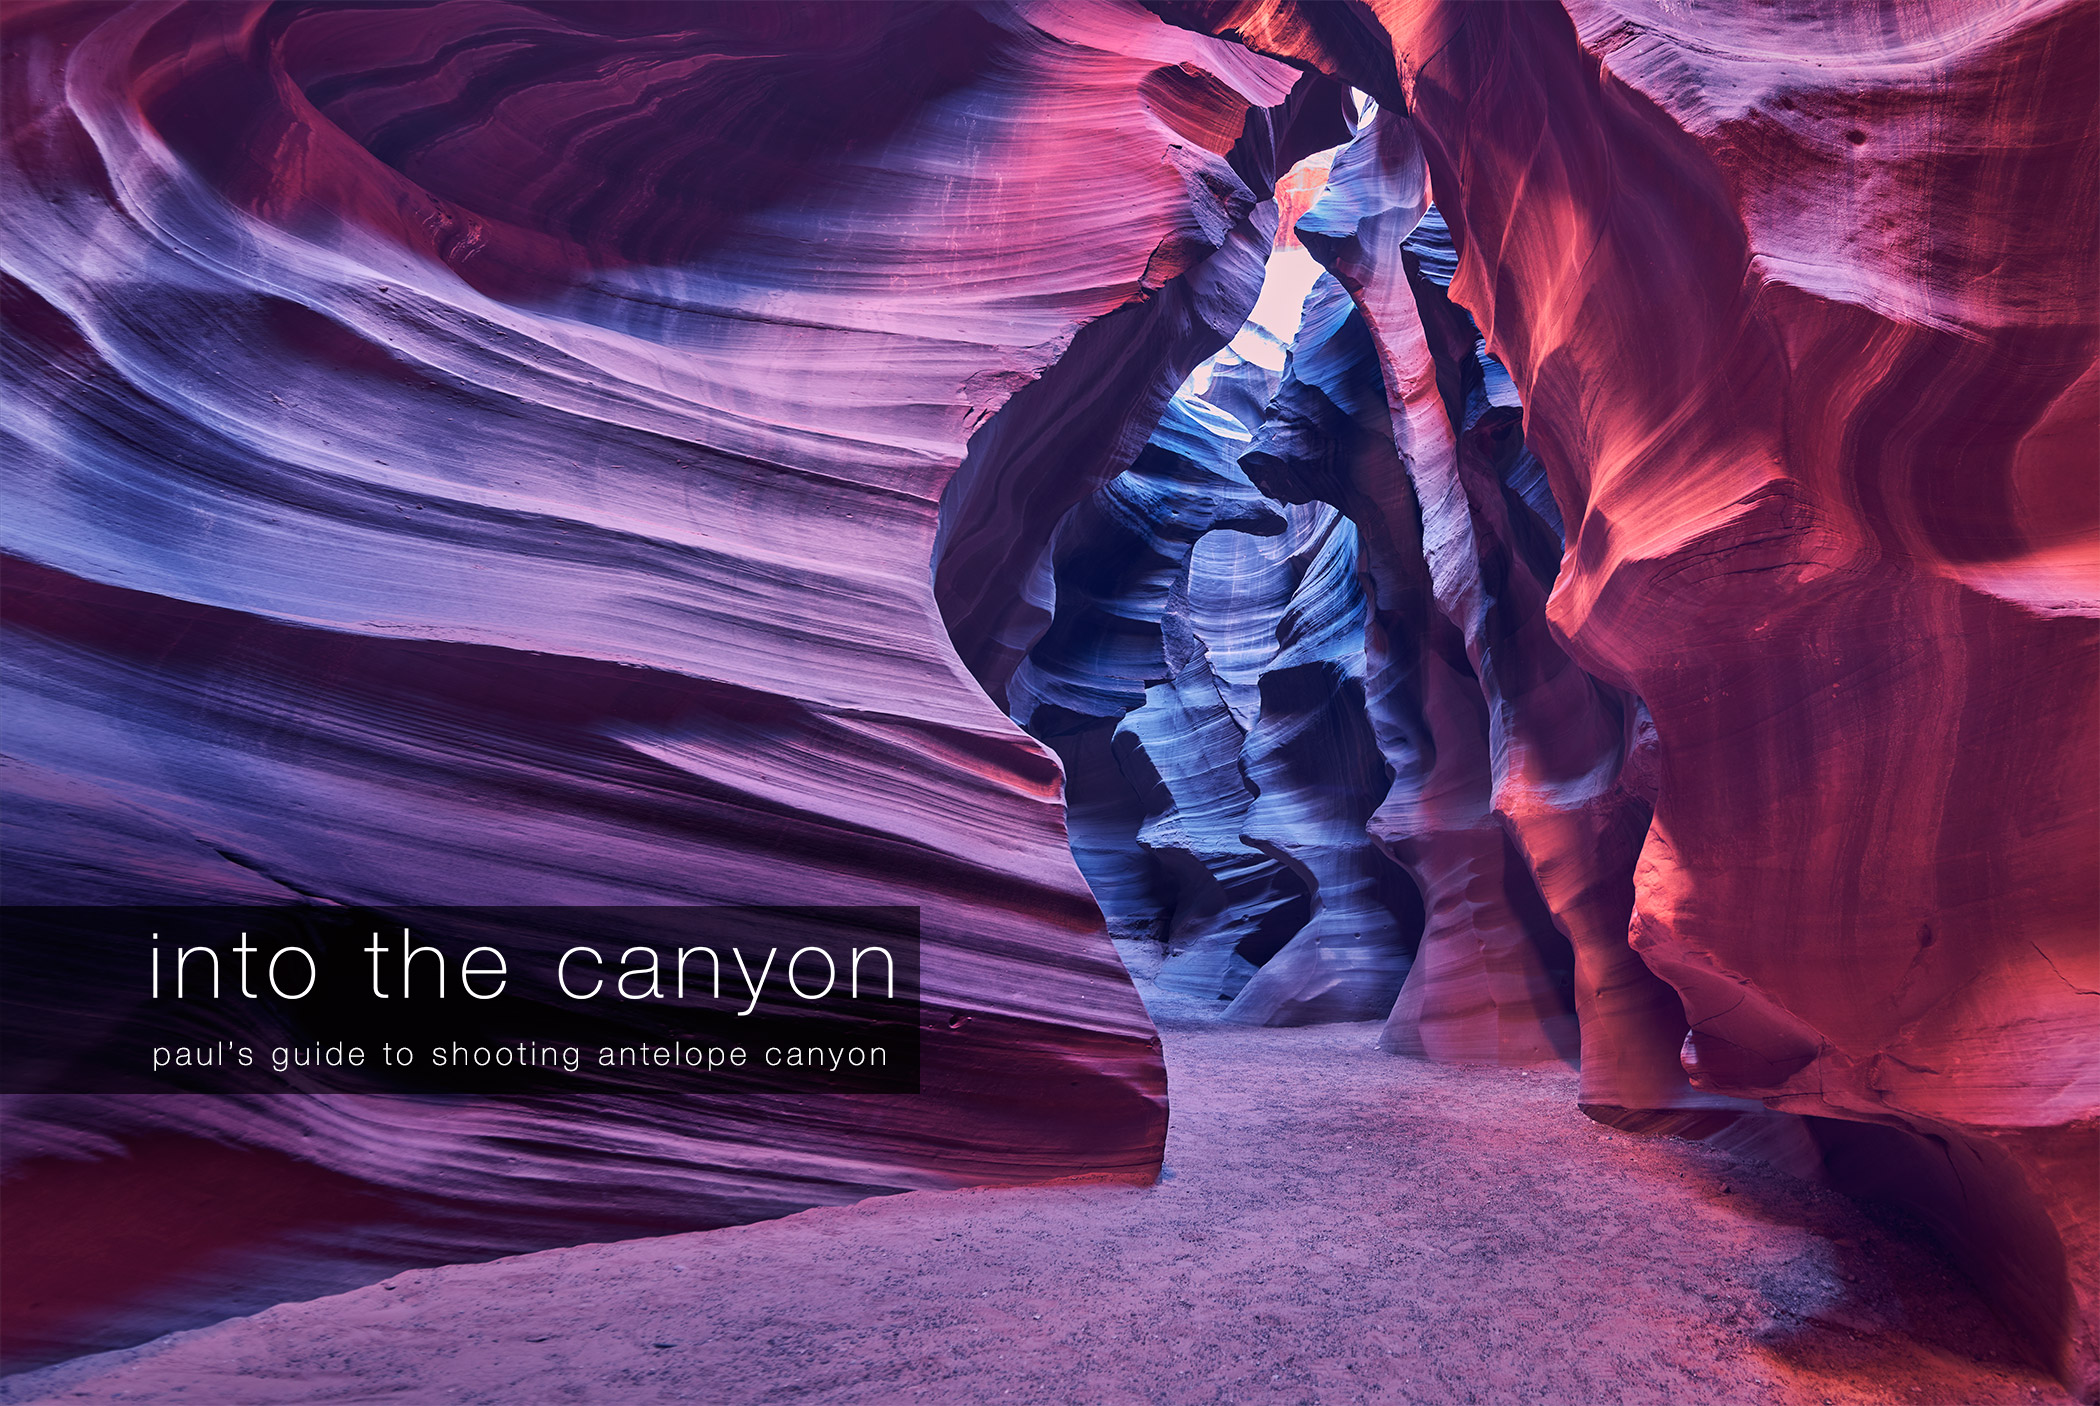
It’s a location that features on the bucket list of many photographers, and it’s a magnetic one at that. Having already visited both Upper and Lower Antelope Canyon 6 or 7 times since my first visit in 2011, I still have the urge to return every now and then to capture the other-worldly scenes of light-trails, stunning rock formations and shadows throughout these two natural wonders just outside of Page, Arizona.
Sadly, there is a lot of incorrect information around, and I’ve noticed many people asking questions about how best to capture Antelope Canyon, only to be dissuaded from even visiting as a result of the answer they were given.
So, with that in mind, following my last trip in November 2015, I decided to pull my thoughts and experiences together into a guide with the hope that it will help others get the best out of their time inside the canyons.

some facts
Let’s start with a few statements of fact – I guess, in a way, to put all the issues out there before we go any further…
- There are TWO canyons – Upper Antelope Canyon and Lower Antelope Canyon
- Both Canyons are on Navajo Nation tribal land, and you may NOT self-guide, you must book on a tour
- There are limits to the number of tourists (and photographers) allowed inside the canyons each day
- Tours DO get booked up, especially around peak season for the famous light beams
- Upper Antelope Canyon is generally busier than Lower Antelope Canyon with many more people inside
- It is NOT a serene or peaceful experience inside – you will be with (at best) 20 others, at worst, several hundred
- Camera equipment is sometimes damaged inside the canyon due to the dusty environment and tight spaces
- The colours of the canyon are often portrayed in the way the photographer wishes, by “tweaking” the white balance (as I’ve done in this guide) – you may not see the same with your eyes
- A phone camera, while better than nothing, is NOT sufficient to capture the sharp detail inside the dark canyon walls
- To photograph commercially inside the canyons (or any Navajo land), you MUST hold a filming permit beforehand
- The canyon is still known to flood at times (a YouTube search might scare you!) but the guides are clued-up on what to do.
- You should be aware of the local wildlife, nothing too serious, but listen out for nature
- There is a fee to pay, regardless of commercial intent, to access the Navajo land – some tours include this fee, but everyone must pay
Now, with all that said, the location really is a photographic gem. The texture on the walls of this natural slot-canyon (formed by water and massive flash-flooding over the years) is incredible. In the summer months (May-August) the light beams streaming through the top of Upper Antelope offer an incredible scene to capture and display, and you’re also nearby other amazing scenery such as Horseshoe Bend, to visit while you’re there.
which canyon?
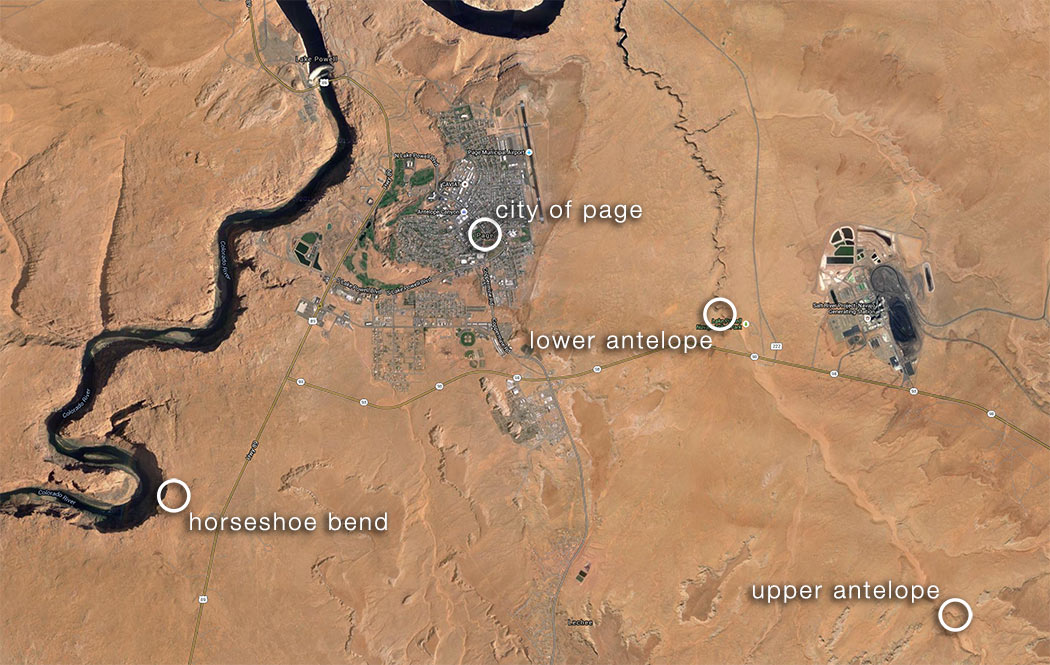
The first thing you really need to decide (if you have the choice, and left enough time to book ahead) is “which of the two Antelope Canyons do I want to visit?”. On the face of it, Upper Antelope is “the famous one” due to the dramatic light streams and is typically the one displayed in artwork around the world – but that doesn’t make Lower Antelope any less spectacular in comparison when the sun isn’t directly overhead. The canyon parking lots are actually situated opposite each other, on either side of the road, a few miles out from the town of Page. Upper Antelope Canyon is accessed via raised passenger pickup trucks that drive you across sand for 20 minutes from the meeting point to the actual entrance. Lower Antelope Canyon is accessed by a quick walk to the entrance, then a hike up and down to get in and out of the canyon itself.

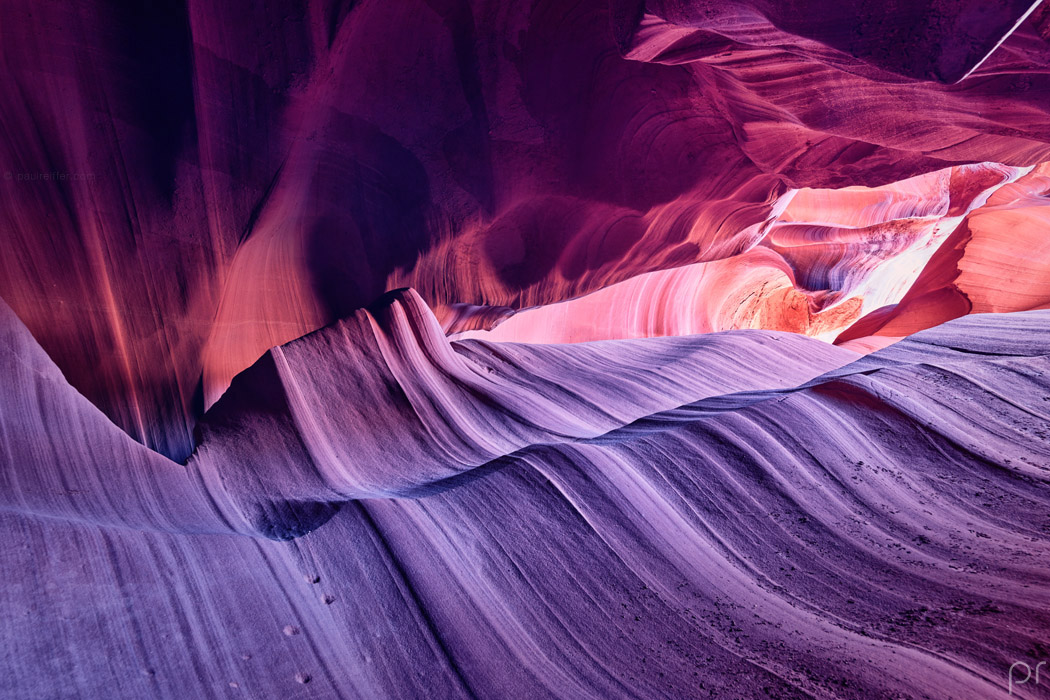
Both canyons are carved out of the same sandstone, and while the colours and scenes are slightly different, if this is your first visit to a slot-canyon, neither will disappoint.
Upper Antelope Canyon
- Light streams throughout the summer months, beaming down through the open slots in the roof
- Much more crowded, with more tour operators running people in and out all day
- The more well known of the two canyons, with (arguably) more dramatic scenes
- Easier access (it’s a 1/4 mile flat walk from entrance to exit, then back again on level ground)
Lower Antelope Canyon
- Much less crowded, less tours operating in the canyon itself, and cheaper to visit
- Narrower access and walkways throughout, plus a collection of steep steps to get in and out
- Less chance of dramatic light-beams (although it’s possible to pick up a shaft of light with thrown dust at certain times of year)
- Fantastic textures and light on the walls, with some interesting angles when set up with a tripod
Your initial meeting point may vary based on which tour company you select. The Lower Antelope companies tend to meet at the parking lot near the entrance of the canyon – but if booking a trip to Upper Antelope Canyon, check your booking confirmation carefully! Several of the tour operators have pickups in locations around Page itself, or offices in the town, from where you’ll start your journey into the canyon.
the tour guides
As mentioned above, the only way to enter Antelope Canyon is via an approved tour guide. A quick google for “Antelope Canyon Photo Tours” will bring up a selection of operators who offer packages for visitors and photographers.
If you’re heading to Antelope specifically to capture the scenes on a camera, regardless of which canyon you choose, you must select the “photographer’s tour” that most companies will offer. The standard tours do not allow tripods or sufficient waiting time in locations to be able to get the shot you want, and are more of a tourist-conveyor-belt. While still not exactly calm, the photography specific tours allow (in fact, require) you to bring a DSLR and a tripod with you, last longer, and will be led by an experienced photographer guide.

The guides themselves come into their own when you get a really good one – and I’ve experienced the full range. The best I’ve known (in the picture above with me) has been there protecting my shot when I’ve been doing 20-25 second exposures, by politely talking with other customers and holding them back for those precious few extra seconds to finish the shots. The worst, rushed our larger group of 12 photographers through, ruining shots with his green laser-pointer and generally not providing any additional help to those who needed it. Recommendations are key here, so I would suggest a search to find the best one for you.
when to go
Both canyons are stunning all year round. If you’ve never been inside a slot canyon, the environment itself is captivating once inside, and there are photographic opportunities everywhere you look (if you can avoid the people!). That said, there really are only two seasons, “light beams” and “no light beams”, and your choice will depend on whether you want to capture the dramatic light streaming down onto the canyon floor, or if you’d prefer to shoot the detail and colour in the canyon walls instead.
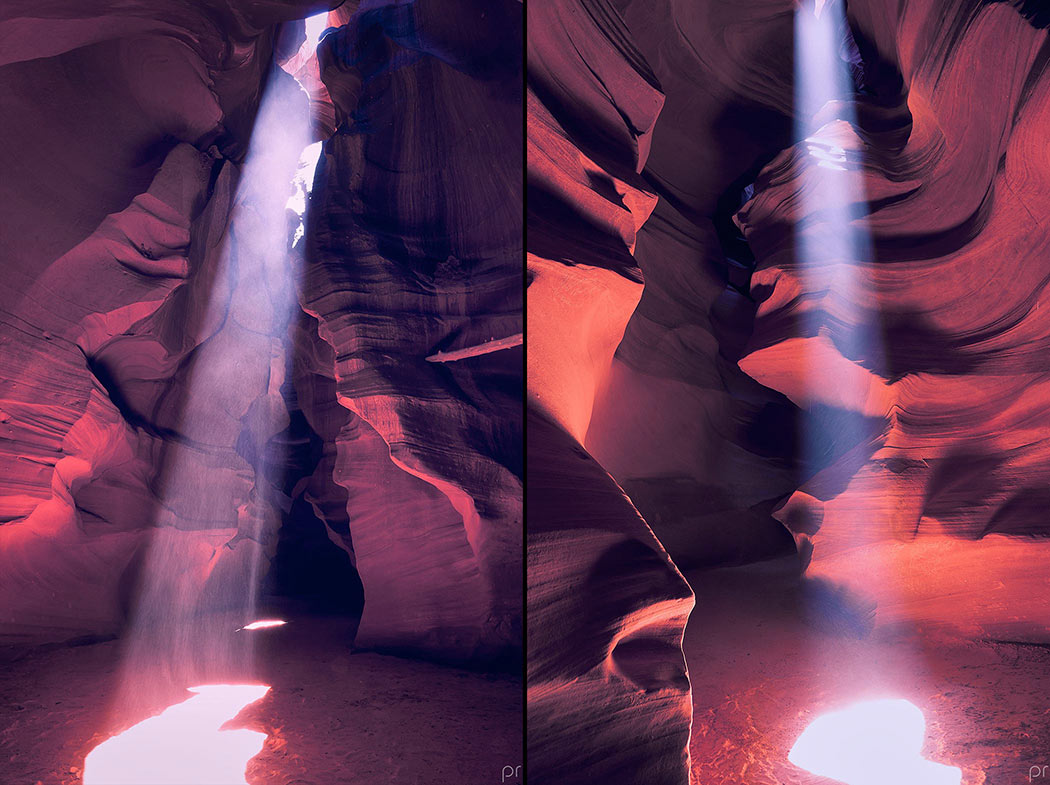
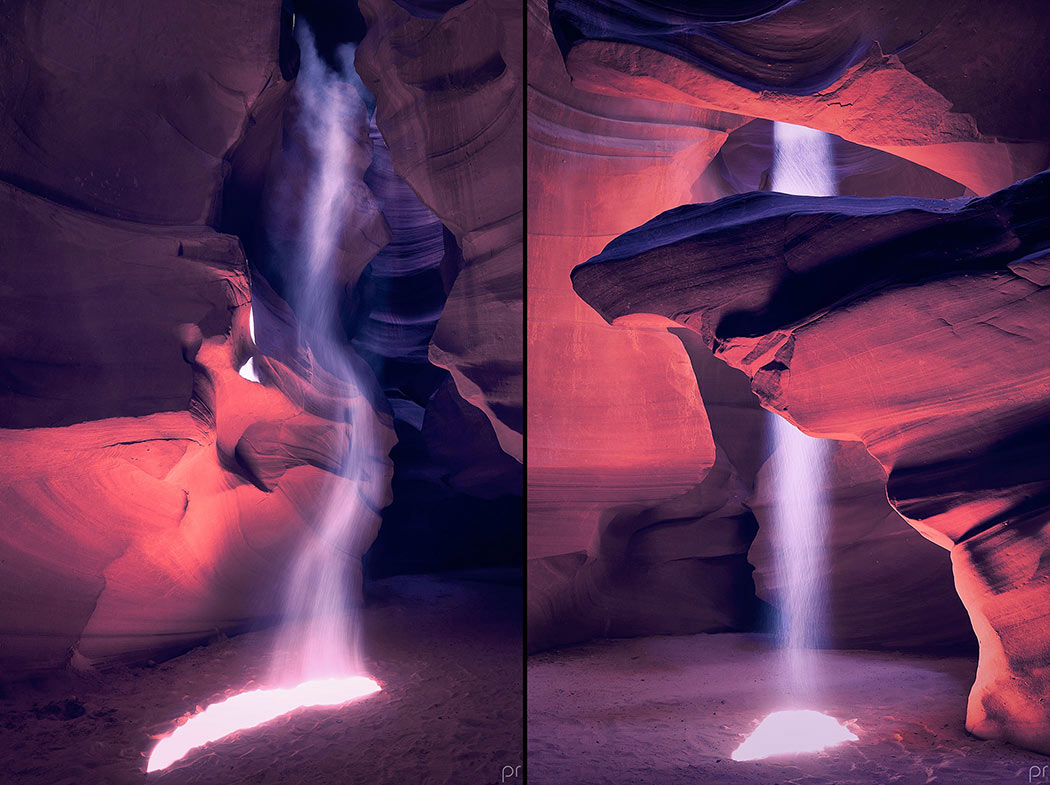 Light beams
- The beams only appear in the summer months (May – August), considered peak season
- To see them it requires a clear sunny day when the sun is at it’s highest point in the sky
- Photo tours tend to be between 11am – 1pm to get the best light, but get booked up quickly
- In Upper Antelope Canyon, the beams are very dramatic, in Lower Antelope they’re more subtle
- Either side of midday, the canyons appear as they do in the winter months all day long
No light beams
- Generally outside of the summer months (September – April)
- It’s possible to see more colour in the walls without the harsh light bouncing around inside
- Textures seemingly become more interesting, as the softer shadows spread across the rock
- Colour temperature changes from bright yellows and oranges to deeper reds and cool blues
- Tours tend to be less crowded
what to bring
Ideally, you need to bring the best camera and lens combination you own.
You’re going to be in an environment with bright highlights and dark shadows, so dynamic range is important (this is one of the reasons camera phones struggle). A full-frame sensor is the best bet if possible, but I’d suggest going for low-light performance over sheer megapixels if you can. If not, don’t worry, as on the photo tours you’ll be given enough time to get the shot, even if that involves a long exposure, as long as you know your gear well.
I say that, because while these are photo tours, they assume you know how to set your camera up and be as quick as possible about it. It is not the time to learn the functions of your camera once inside the canyon, and you’d be better off using one of the program modes (Av, Tv etc) if you’re unfamiliar with your equipment.
For lens selection, if you have one, plan on taking a wide-zoom lens, something around a 16-35mm equivalent on a 35mm full frame sensor. If you’re sticking with primes, something in the range of 35-50mm will give you intimate images of the rocks, but you won’t fit any full light beams into a single shot, so I tend to stick with my 28mm medium format (16mm equivalent) lens whenever inside the canyons, as I can always crop later.
You’re not going to need any filters. In part, you won’t have time, but even if you did there isn’t a graduated filter out there designed for a tunnel of light beaming down from top to bottom of the frame at an angle. Some photographers have historically recommended a polariser, but I’ve never seen the benefit of doing so and it’s going to lose you a stop of exposure in the process, which isn’t a good idea in this environment. What I would recommend, if your lens will take it, is a UV/Protector filter on the front for one simple reason: It’s better that the filter gets trashed than the front element of your lens!
As mentioned above, if you’re planning to shoot commercially, or intend to make money from the images in any way whatsoever, you need to contact the Navajo Nation Film Office prior to entering the canyon to shoot, and pay the appropriate permit fee. It’s not a difficult process, and not that expensive, but it really is the only way of being sure your images are OK to sell or use in that way.

Keep a dust-blower handy, or a can of compressed air (but be careful with this as sometimes it can initially jet out as liquid – so a manual dust-blower is often safer).
For clothing, bear in mind the canyons (Upper more so than Lower) can be significantly cooler than the surrounding towns. Unless it’s an extremely hot day, when the sun disappears from sight it can get cold on the canyon floor, so bring a hoody or lightweight jacket if possible. You’ll likely need jeans, to avoid grazing against the rock walls, and also protect your knees when kneeling down on the floor – it may be called sand, but it’s not soft!
For Upper Antelope, you won’t need sunglasses inside the canyon and while it’s tempting to leave them on top of your head, they will get scratched when you bump into a wall, and likewise covered in dust and sand. For Lower Antelope, I found it warmer inside, and brighter in general – so many people kept their sunglasses with them, but as a rule – if you don’t need them, leave them behind.
preparing your camera
So, you have your fancy new camera, sharp (and expensive) lens, and a booking to go and shoot inside Antelope Canyon? Great!
But first things first, you need to PROTECT YOUR EQUIPMENT! Allow me to introduce you to the concept of “the camera condom”, and why it’s so important…
The canyons themselves are sandy and dusty. Very sandy, and very dusty. Three things then combine to make that issue even worse:
- The wind – while walking through the canyon, or even during the ride in to Upper Antelope, you’ll likely be sprayed with dusty air from all different directions.
- The light shafts – ever wondered how they’re made so vivid? Simple – the guide will be throwing sand up in the air to help highlight them, meaning the air is constantly topped up with a thick helping of dust.
- Your position – several shots may require you to shoot from near to the floor. Now, remember those hundreds of people walking by that I mentioned? They tend to kick up quite a bit of sand!
Preparing for the environment you’re entering is crucial, and the same issues can also affect your eyes – I’ve seen people with contact lenses really struggle after an hour in the canyons. It’s also worth noting that you should not be planning to change your lens once you start shooting.
I’ve seen a grown man cry after changing his lens inside the canyon, and wiping his sensor when he got out. Needless to say, that was the last trip his camera ever made and he’s not alone – many people leave the canyons with their equipment covered in red sand and panic across their face.
In an ideal world, we need to be able to operate the camera but protect it from all that dirt in the air. Remember also that even the action of zooming a lens is pulling and pushing the outside air into the chamber of the camera itself, so we have to put the camera into its own little “bubble”. There are companies out there that will sell you a plastic sleeve for your DSLR, but I’ve found they have two problems. First, they’re not actually air-tight. They’re designed to protect from rain showers, not dusty air. Second, they don’t actually fit that well on many cameras.
What does fit well, is a made-to-measure jumbo-sized Hefty sack and duck tape!

Be sure to seal the end around the lens hood, but allow enough spare plastic to ensure the autofocus and zoom (if applicable) still work. Pop the eyepiece off and lock the plastic between the camera body and rubber casing. Remember also to screw in your tripod plate from the outside – so no dust gets up inside the camera by leaving a huge hole for the tripod column to fit through.
You may think you look silly going into the canyon with your camera looking like that. Trust me, you’ll look more silly crying when you leave to find your camera is now a lovely colour of brown.
Remember to load that sealed camera with a fully charged set of batteries and a memory card capable of grabbing a few hundred shots (just in case). I’ve never taken more than 40 per trip, but I’ve seen other photographers rattle off many more.
inside the canyon
On arrival to the canyon, depending on which you’re visiting, the guide will explain how the flow of your tour will happen. Remember, you will not be alone inside the canyon itself (with Upper Antelope being significantly busier than the Lower canyon) and cannot therefore get precious over your space. If you’re on a photo tour with 10 others, you are only 10% of the group that is trying to get the same stunning photographs that you are – nobody deserves to be there more than anyone else, and you are, essentially, shooting a busy tourist attraction.
The tours of Lower Antelope Canyon tend to be more relaxed as a result of the lower density of people, but in either case, the guides will do their best at the following:
- Pointing out the key features and well-known compositions
- Strategically placing foreground elements such as branches and bushes into shots (don’t worry, you can ask them not to!)
- Constantly throwing dust and sand into the air, when the light beams are visible, to make them more obvious
- Holding back (for a short while – max 40-50 seconds) other tour groups to allow for a clear shot of each scene
- Getting you in, and out, of the canyon safely, within the allotted time for your group
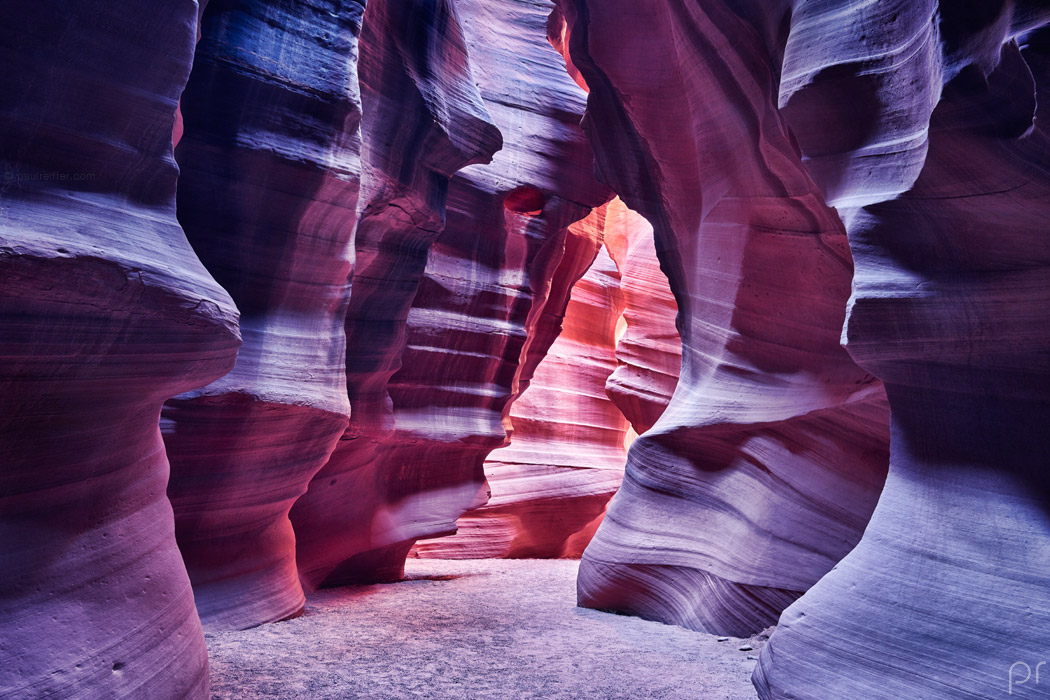
The guides themselves all tend to know each other, and do a fantastic job of co-operating between groups to help photographers. That said, do always remember that you are in the minority inside the canyon – most others are happy to snap with their iPhones – so crowd control, while relatively effective, is not 100% guaranteed.
Another thing to remember – your guide is not there to help you with camera settings, provide spare memory cards, or hold your equipment! If you want that, bring an assistant – but that is not the responsibility of the guiding staff. Of course, if they can help with a hint every now and then, they will, but your time inside the canyon (along with everyone else’s) is limited, and this is not the place to be learning how to take a photograph.
With that in mind, also prepare yourself for working in the dark. If you’re in Lower Antelope, or shooting at midday in the summer inside Upper Antelope, this is slightly less of an issue in my experience. However, during the non-light-beam times in the Upper Canyon, it can get very dark inside. Know your camera, the buttons, the screens, the settings, extremely well before you enter.

Expect to get dirty, and for the interesting angles, get ready to be low down and lying on the floor – preferably off to one side, or you risk being trampled on.
In general, you’ll be ushered along from location to location throughout the tour, and depending on the guide they may decide to reverse direction and head straight to the end, then slowly shooting on the way back, if it’s really busy inside. Other groups will pass/overtake/loiter, and that’s all part of the “game of Antelope Canyon” that it’s sadly become over the years. Keep calm, the person in your shot probably didn’t realise they were at the time, and get a good rapport going with your guide – they’ll watch your back if you get along well.
Time inside the canyons goes quickly – don’t miss opportunities to shoot, but on the other hand, don’t forget to take some time out to appreciate how amazing this place is with your own eyes!

A few key things to remember:
- Never, ever, be tempted to change a lens inside the canyon – regardless of if you’ve protected your camera in the process.
- Never wipe your lens clean – the dust can, and will, scratch the coating on your lens or filter. Instead, use a blower (not your mouth) to force air across the surface and remove most of the loose particles.
- Quick-release latches on tripod legs can get filled with dust and sand, making them more difficult to open and close, but don’t worry – they blow clean very quickly later on.
- Try to enjoy your time in the canyon – don’t forget to look around with your own eyes as well as through the viewfinder!
shooting tips
Look up!
Seriously, this is the biggest mistake I see people make – all their shots are at eye-level, and looking straight through the canyon trails. Guides will help by pointing out features, but a lot of the water carving and texture is above you. Sometimes, the more interesting shot can also be taken by getting down low and looking back up.
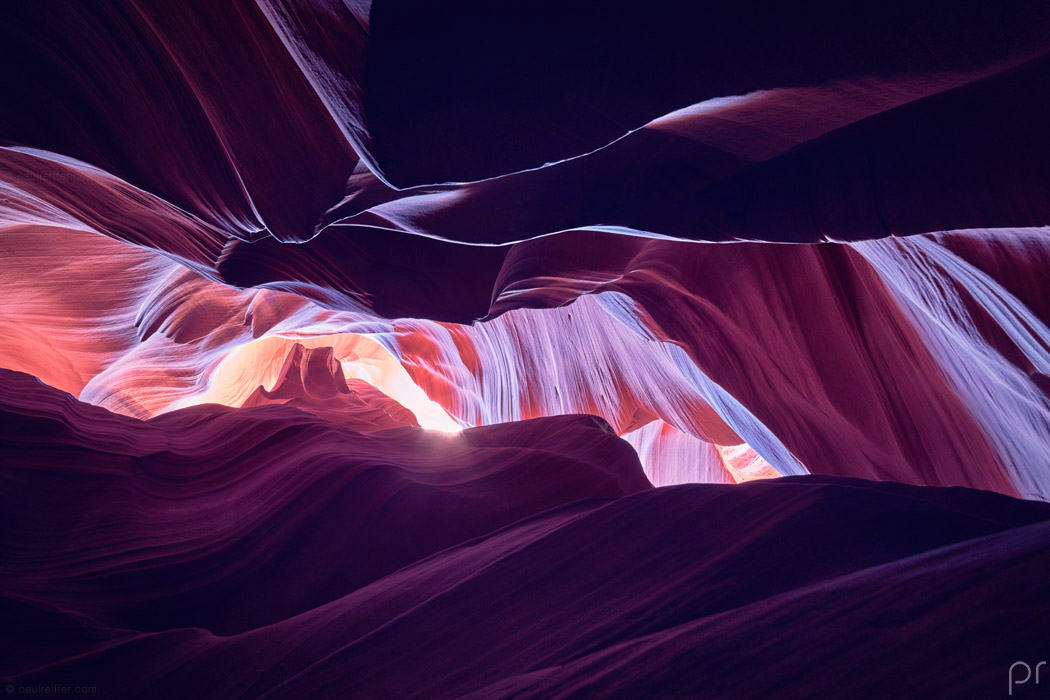
There are some famous sections with names, which will be shown along the way, but in general there isn’t a view in Antelope Canyon that’s ever boring.
Take time to look at the rock textures, the curves, the way the light hits the canyon walls. Think about how you’ll crop the image later – don’t always go for the straight and level shot, tilting and twisting the camera angle can produce a very different photograph to that which everyone else is taking. Use the corners of light that peek through the cracks in the roof of the canyon to “flare” by setting yourself a smaller aperture and longer shutter speed or even try some HDR techniques to expose both dark canyon and bright sky correctly in their own right.
The next mistake I see people make, following (in my view) poor advice from other photographers, is not using a tripod. “Whack the ISO up”, I hear quite often. “There’s not time to work with a tripod in Antelope”, is another one. “Tripods take up too much space!” was the one I overheard on my last visit. To me, each statement being completely and utterly wrong:
- “Whacking the ISO up” – while allowing for a shorter shutter speed, also provides more noise (yes, even on the amazing new Sony sensors that are out in their masses). Ideally, we’re looking for no more than ISO 100-200. You want to see the texture in the rock, not the noise from your sensor, right?
- “No time for a tripod” – that’s exactly why you’ve paid extra for a photo tour, to allow you more time in the canyons. The guides are there to help with that, and know that many people also want to capture long exposures.
- “Tripods take up too much space” – while in essence a true statement, again, this is why you’ve paid extra to be on a photo tour with a lot less people in your group.
In any and all situations inside the canyon, I’ve never experienced a photographer wishing they hadn’t brought their tripod. On the other hand, I have witnessed photographers who had wasted their entire trip by not bringing one along. There is no harm in bringing one, it’s expected, and I guarantee it will give you a much better shot than without. Plus, it opens up the options for multiple-exposures in an HDR process later.
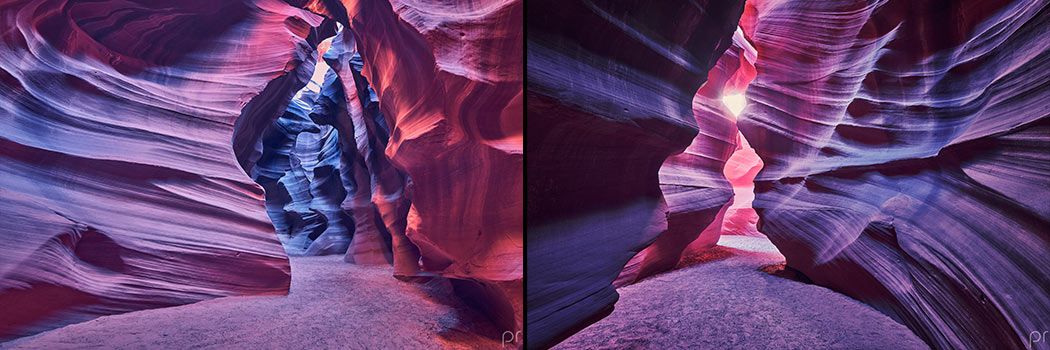
As a general principle, you’re going for a long depth of field and a “clean” shot if possible to really capture the textures and detail that fill the canyon walls. With that in mind, it’s better to shoot at a small aperture and have to increase your exposure time, than trying to shoot with the lens wide open and noticing everything near to you was out of focus. Auto-focus can be tricky inside Antelope Canyon – the light beams play games with most AF systems, as do the walls with lack of contrast once the dramatic light disappears in the afternoon. Be ready to switch to manual, if you need, and be familiar with distances and the range that your lens is capable of before it defaults to infinity.
You may find, throughout the canyon walk, two rather frustrating lighting issues: Laser pointers and AF-assist beams. Both can ruin a shot, whether it’s the bright green lines of a guide pointing out the shape of an eagle to the rest of their group or the red and white hashed pattern of a camera searching for focus points, but typically your photo tour guide will point out if something’s causing an issue, allowing you to try again. Screen preview is helpful here, as it only takes a brief moment of these two things to scratch a frame.
And one final thing, remember to look behind you as well. Your guide will often point out if there’s something good to see in any direction, but the canyon is a complete 360 degree photographic playground – don’t just look forward when looking for compositions and details to capture.
after the shoot
So, you’ve made it out of the canyon and are either walking back to the car, or sat on the back of the pick-up being driven back to the parking lot. Do NOT brush your camera to clear the dust and sand! That applies regardless of whether you’ve used a plastic protective wrapping, as you’re going to kick up all that dirt into the air around your own (and other peoples’) equipment.
The guides sometimes have blowers with them, but really you should be prepared with your own. Wait until you are well away from any sand or dust and use air to remove the majority of the dirt from the protective bag or wrapper you used to protect the camera. Once clear, slowly remove the tape to reveal what is hopefully a pristine, dust-free, camera body and lens.
If you didn’t protect the camera, or if dust somehow managed to get inside, this is where you need to be especially careful. As a general rule, air first, then light brushing/wafting with a soft cloth, then finally, up-close brushing with a cleaning tool. Don’t even think about opening the camera chamber up by removing the lens until you’re sure you have almost all of the external dust removed – then, in a clean environment, it’s a good time to check that nothing got inside.
To put some context around this issue, I’ve not once had a problem with my equipment as a result of using it inside Antelope Canyon. Being careful, protecting my camera, and not being in too much of a rush to see the shots after leaving the canyon have all meant my camera escapes unharmed – and it’s easy to do.
processing your shots
Images of Antelope Canyon can be wildly different, depending on the photographer’s interpretation of the light inside. During my very first visit to Upper Antelope, the light-beams were so vivid, that I stuck with the daylight-set white balance of bright yellow, red and orange rocks all around.
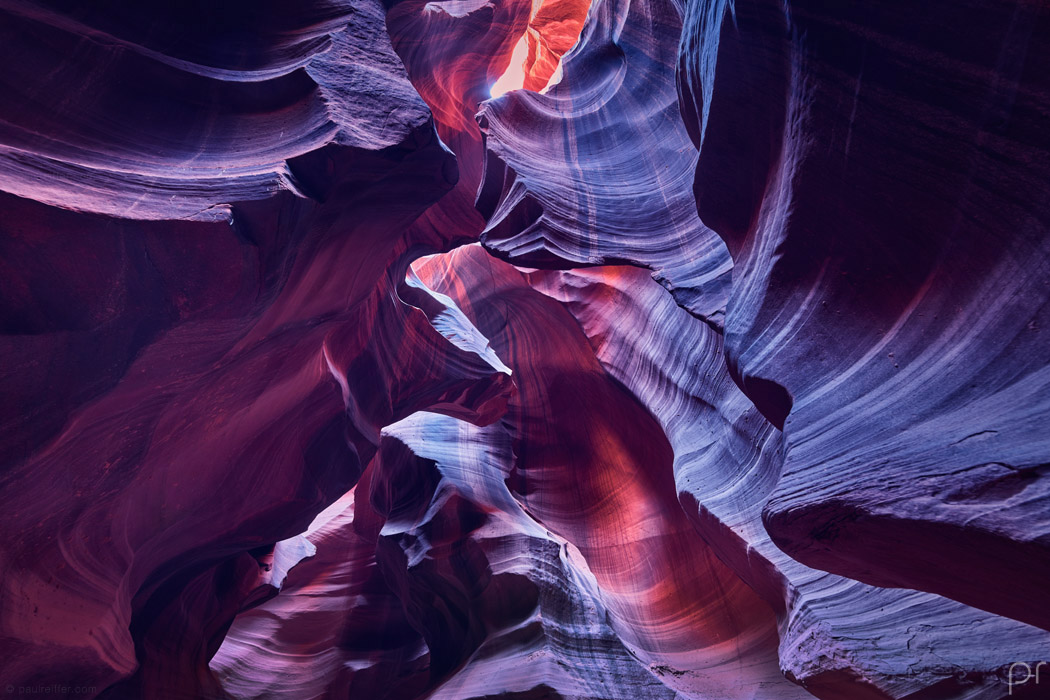
As you’ll see from this guide, however, in subsequent visits I intentionally chose to alter that setting to be cooler in colour-temperature and more magenta in tint. While the canyons are both stunning natural locations, they have also been photographed by people from every corner of the world, in every season, from what must now be every possible angle, and as a result the images can tend to appear very similar.
In the cooler winter months, with lower sun, the canyons do in fact seem to change colour from what you see in the peak of summer. Gone are the golden glows, replaced with cooler tones as the softer, slower, light bounces around inside the slot canyon walls. With that in mind, don’t be afraid to adjust your white balance, vignetting, or colour balance to give you something a little more unique and abstract. In the case of the images in this post, I actually revisited some of my earlier light-beam shots and matched the colour temperature and tint to the rest of the series, in my view creating a complete collection that is at least different from many others out there.
night photography at the canyon
Yes, it’s possible to shoot the canyon at night – and it’s very cool being in there after dark. The crowds have long since gone, it’s eerily silent, apart from the sound of the natural surroundings and on a clear night, the stars above are spectacular. However, just like in the daytime, you need to have a proper guide take you and support your trip inside.
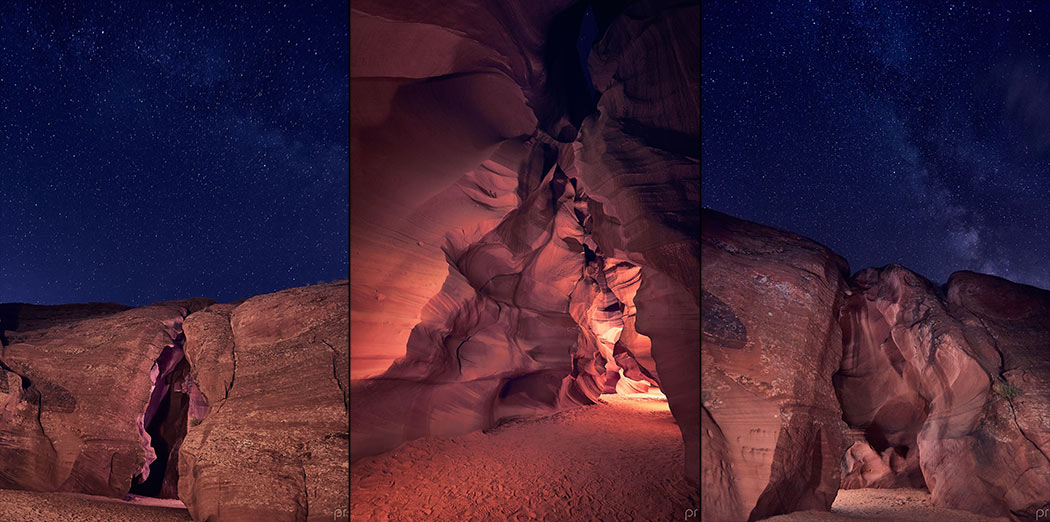
A lot of the major tour companies don’t offer night shoots, and instead you may have to talk directly to your guide in the day to get to the right people. One of the guys I explored with works for one of the main operators in the day, but also runs workshops at night for those who know to speak with him about it.
The rock formations look very different without a source of natural light. Instead of relying on whatever sunshine is breaking through the top of the rocks, this is where your flashlight or phone torch comes in handy to paint the rocks in the way that you want. It can be pretty creepy inside when all the lights go out but if ever you wanted the canyon truly to yourself, this is how to do it!

Through the cracks in the roof, you’re able to see the stars clearly, and a nice long exposure on a wide lens goes a long way to add depth to the foreground while keeping the interest in the sky above. The colour temperature of your images will be dramatically different, relying on the light source you’re using, but this can be matched to your other shots later on when shooting RAW, if necessary. If capturing stars in your shots, you need to keep your exposures on a wide lens to a maximum of 20-25 seconds, to avoid any trails becoming obvious – but other than that, this is more of an exercise in light painting than it is in any clever camera trickery at this point.
recommended camera settings
While every camera is different, here’s my suggested setup for shooting the canyons in the three situations I highlighted above, on a 35mm DSLR system. As with all suggestions, you’ll need to adapt them to what you know your equipment is capable of, as well as the style of shot you’re trying to achieve – but as a starting point, I think it’s a good base:
Light beams, midday
- ISO 100-200
- 2-4 second exposure
- f/11 – f/16, depending on focal length
Canyon walls (soft light, no beams)
- ISO 50-100
- 15-30 second exposure
- f/8 – f/16, depending on focal length
Night shooting
- ISO 1250-1600
- 20-25 second exposure
- f/2.8 or wider
on your way out
So that’s my guide for photographing Antelope Canyon. I’m sure some will disagree with some aspects of it, but it’s impossible to get something universally correct for every person’s taste and intention. However, taken as a baseline (the way it’s intended) hopefully those who have never visited before will have just a touch more confidence about what to expect and how to get the shots they want from their visit.
Antelope Canyon really is a special place, but to a certain extent, a victim of it’s own success. Many years back, this really was a quiet, peaceful, serene slot canyon that was explored and appreciated by few. Photography, in part, is responsible for its overcrowding and rush once inside – a sad consequence of the location becoming more and more popular as people share images of how magical it looks to friends all around the world.
With that in mind, please also remember you are on ancient tribal land. The canyon is more special to many of the local people than any photographer can ever claim – and part of our duty as visitors is not only to capture it on camera, but to also appreciate it with our own eyes and experience a place on earth that is a true wonder of nature.
UPDATE – 20th December 2019 – Photo Tours Banned
Sadly, Navajo Nation have decided to cease allowing any and all photographic tours to Upper Antelope Canyon as of 20th December 2019.
It’s been stated that it’s due to the number of complaints from the (thousands of) tour customers who enter the canyon each day, as a result of being held back for several minutes while photographers with tripods on specialist tours get their shots. As a secondary consideration, it’s also to “help protect and preserve the canyon”.
Personally, I don’t buy it – given that it’s Navajo Nation who determine the number of people allowed in to begin with.
While a photo group may be a small inconvenience for others, this doesn’t stop the thousands and thousands of tourists clambering around the tiny walkways, on top of each other, for their 20-30 minute experience. Indeed, it actually allows them to permit even more standard tours of 20+ people to enter every ten minutes each day, in the slots that would have been used by the groups of 8-9 with camera setups.
So, due to “overcrowding” (which they control, and brings in cash to their account), the photo tours have ended.
The result? It allows them to bring even more non-tripoded groups into the canyon during the same period of time.
That, to me, sounds like even more overcrowding – and far from “protecting and preserving the canyon” – no…?
Oh well – such a shame, overtourism at its finest.
Note: Lower Antelope Canyon is still available to photographers – for now.
