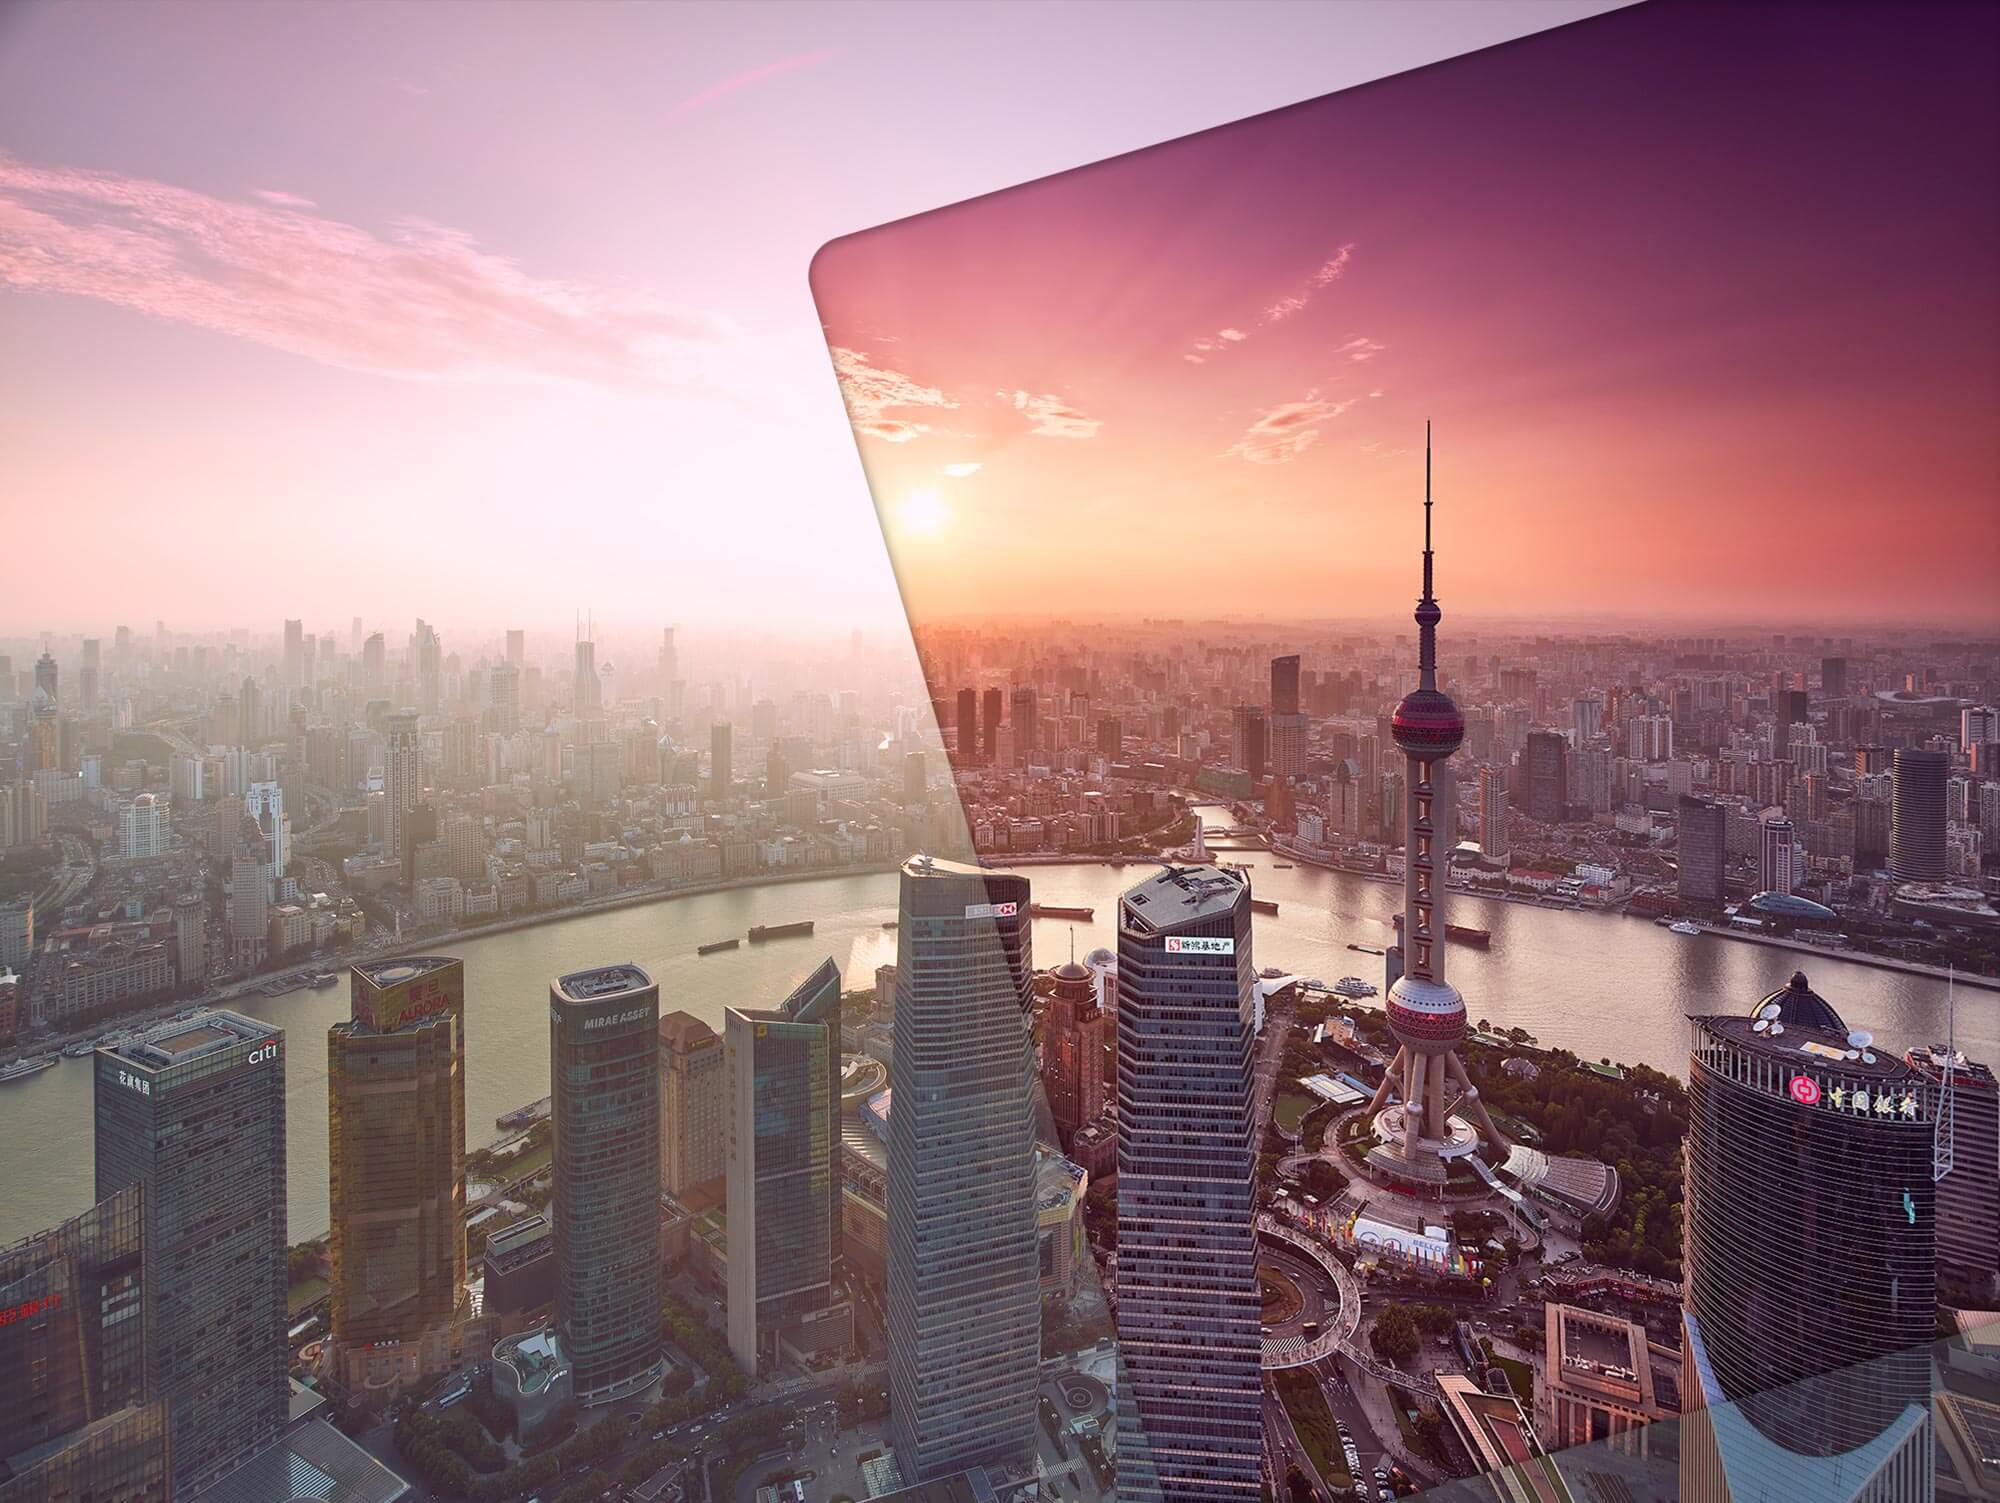
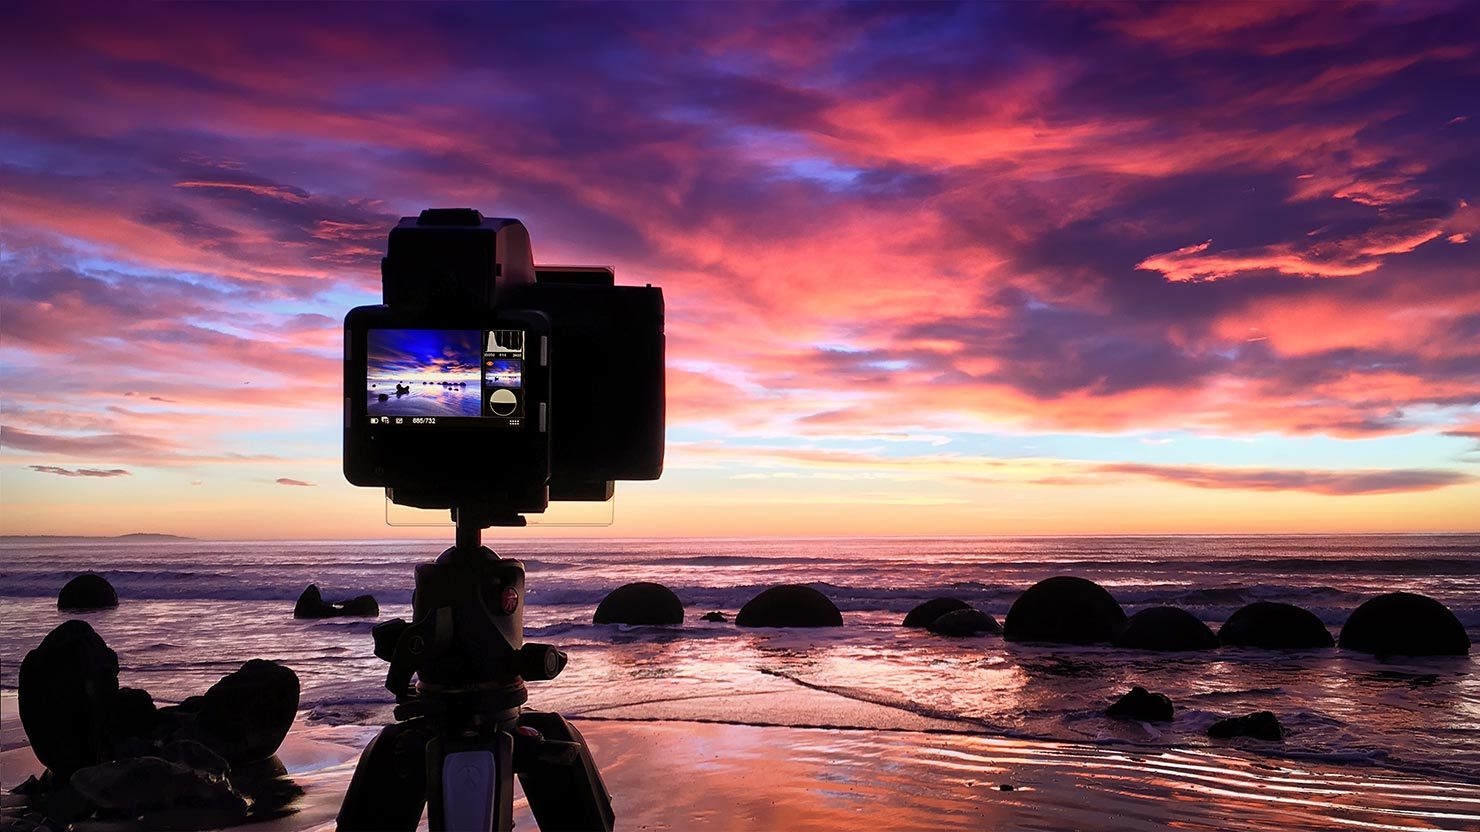
They can be the difference between a nice picture and a “wow” photograph, but I’m always amazed by how many people still seem to believe the phrase “photographic filter” means nothing more than an Instagram effect on their iPhone.
The use of filters forms a significant part of my landscape photography workshops around the world, along with talks and presentations I deliver for manufacturers and camera brands, as they’re often the most misunderstood addition or tool in any photographer’s kit bag.
 In a digital age it’s easy to fall into the trap of believing anything can be done on a computer. “I’ll fix it in post” is something I hear all too often – and while yes, many things can be fixed in digital post-processing, the old saying still stands:
Rubbish in = rubbish out (or a similar meaning from a suitably less polite version, of course).
While raw processors are now massively powerful, they are still only able to enhance the detail and data that was recorded by the camera at the time of capture – if that detail is missing in the shadows, or blown out in the highlights, no amount of digital processing is going to recover what was lost from the scene.
We spend all this money on advanced camera sensors, amazing glass in our lenses, and then naturally expect the system we’re using to be able to record more detail than even the human eye is capable of seeing. Although I’m in no doubt that at some point in the future our cameras will be capable of resolving more dynamic range (the ability to see detail in extreme shadows and highlights at the same time) than our own eyes and brains, that point has not yet arrived. As a result, we add filters in front of the camera to help our camera systems “see” better.
Simply put, we can use filters to manage the amount of light entering the lens from different parts of the same scene. This is all about control – some refer to photography as “painting with light”, others talk of “controlling light” – either way, once we can control the light entering our camera, we can properly manage our overall exposure, getting the best possible capture from the scene before our eyes.
Filters come in a huge array of shapes, sizes, materials and brands, but in this guide I’m going to focus on the key filter used by photographers when trying to even out a scene with strong differences in light across a single frame: The “graduated neutral density filter”, or “GND” for short.
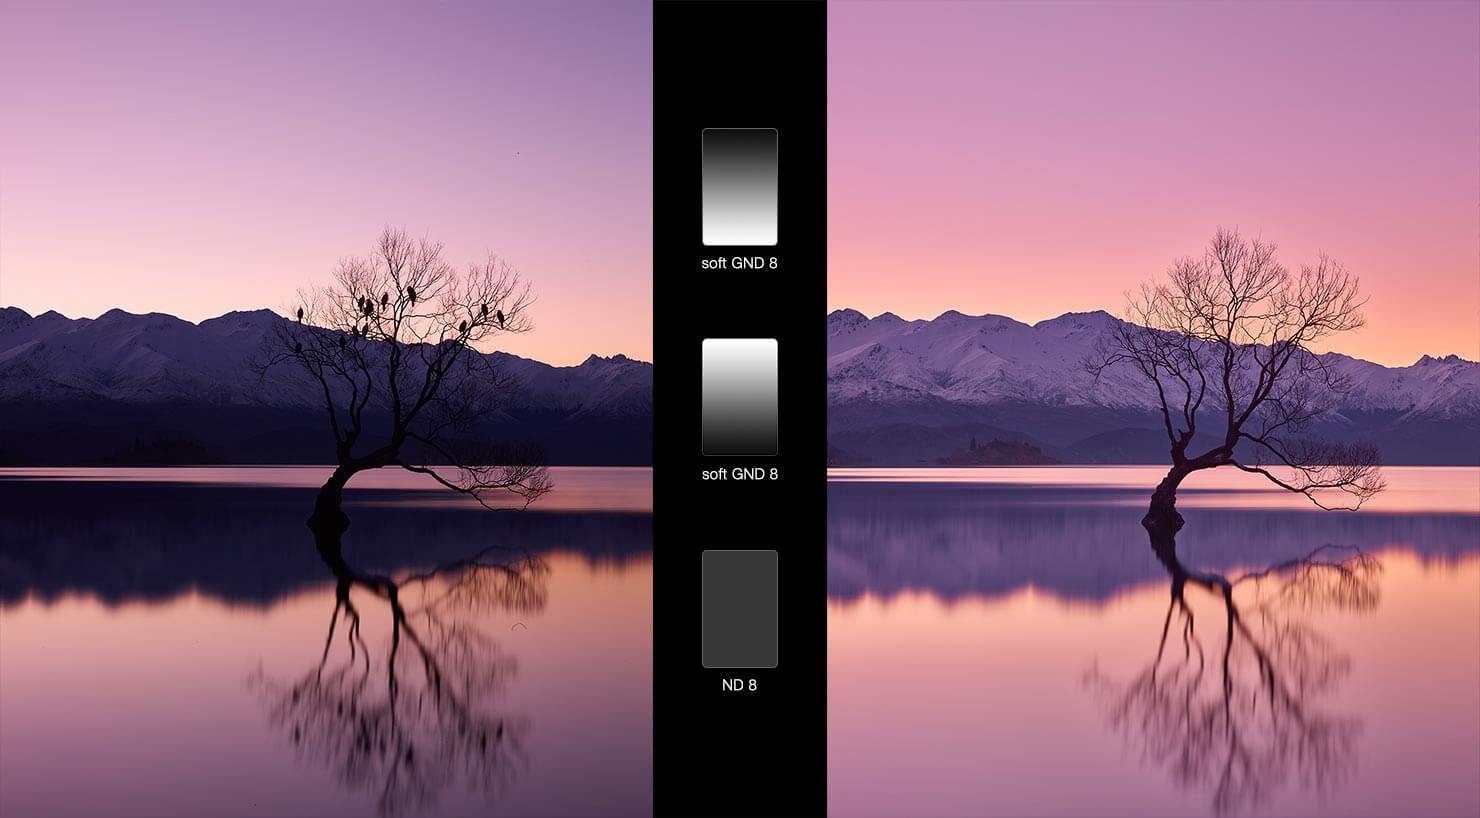
While solid ND filters can help us control shutter speed or aperture and polarising filters help us reduce glare and reflections, these graduated filters are an essential part of any photographer’s sunrise or sunset kit bag – allowing the camera to expose for details in the extreme shadows and highlights at the same time.
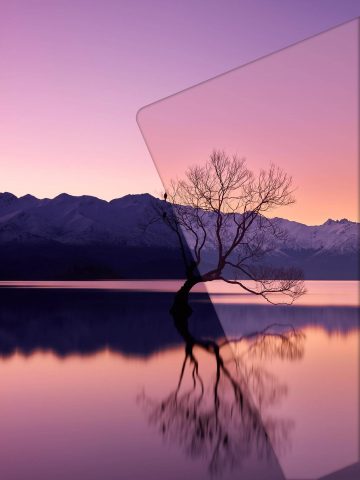
Take the image above (the famous “Wanaka Tree” in New Zealand) for example. In the first attempt, the entire central area of the scene was in shadow. My eyes could see the detail, but the camera couldn’t expose correctly for the brightness in the sky and water reflections at the same time as the darkness in that middle band – it needed help to capture all that detail. By adding two GND filters (one top-to-bottom, one bottom-to-top), I can then balance out the exposure where both the sky and the mountains are correctly exposed at the same time, leaving only the true silhouette of the back-lit willow to stand out.
Sadly, GND filters don’t have any effect on birds in trees – for that, you need a crazy man running towards them, flapping his arms in the air while shouting like a lunatic…

Then let’s look at this next shot of Shanghai.
Although I’d never normally recommend shooting into the sun with a CPL (Polarising filter), in this case, adding that and a Soft-GND to the front of the lens meant not only could I balance out the bright highlights from the sun with the shadows of the buildings below; but I could also enhance the clarity of the shot by reducing the light bouncing back into my lens from all different directions as it hit the pollution in the air.
The problem is, there’s not one single GND that suits every situation, so I’m going to take some time to explain the different types of Graduated Neutral Density filter and also introduce a very specific format which is often overlooked – the Reverse GND.
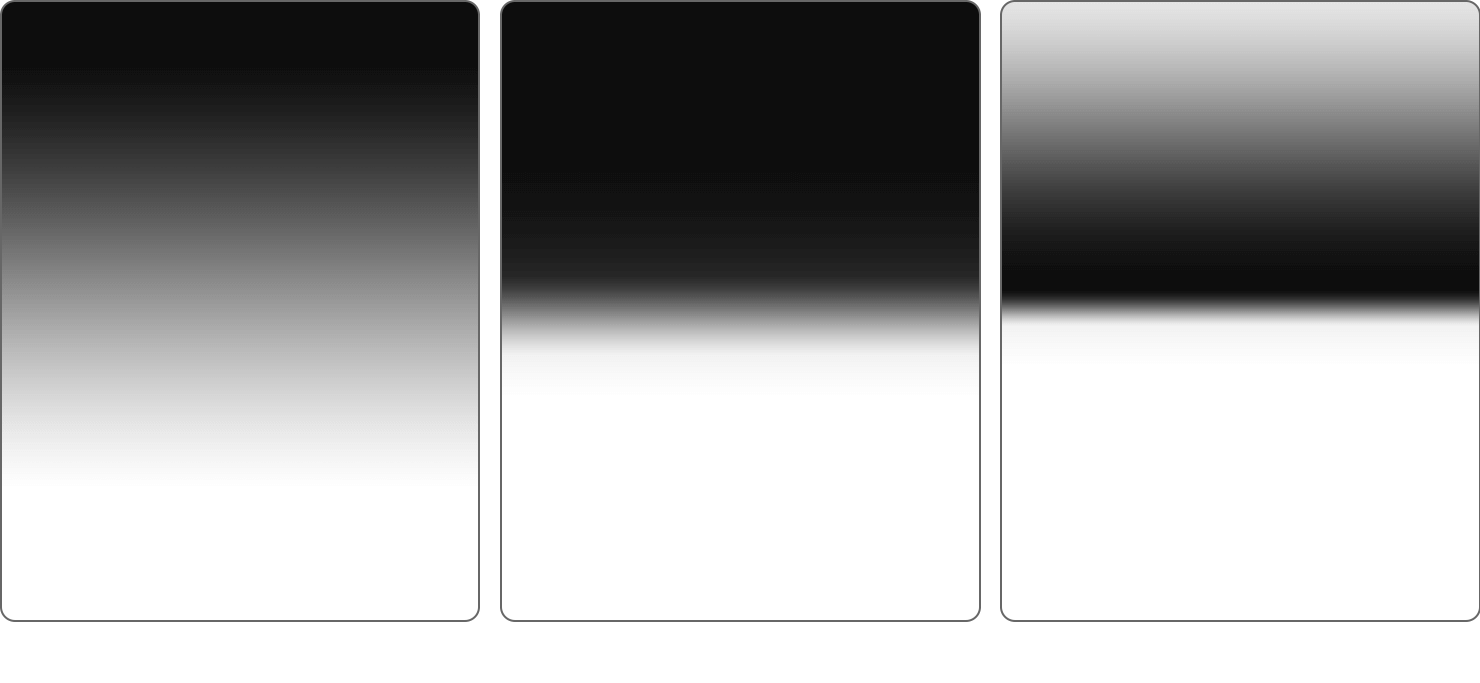 Theoretically, Graduated Neutral Density filters are quite straightforward:
- “Graduated“, as there is a gradient effect between the lightest and darkest part of the filter, fading smoothly in between.
- “Neutral Density“, as they try to have as little impact on the colouring of the image as possible (note: try, not succeed – all filters have an element of “colour-cast” which will appear on your final image unless corrected).
- “Filter“, as it’s designed to filter out light. Where the dark areas are, less light can get through to the lens – the clear areas allowing the most light transmission.
So on that basis, it’s easy to see why they might be useful to us as we try to capture as much detail as possible in any scene. Let’s take the image below as an example – an image which is completely raw, from the camera, and not intended as a “final shot”.
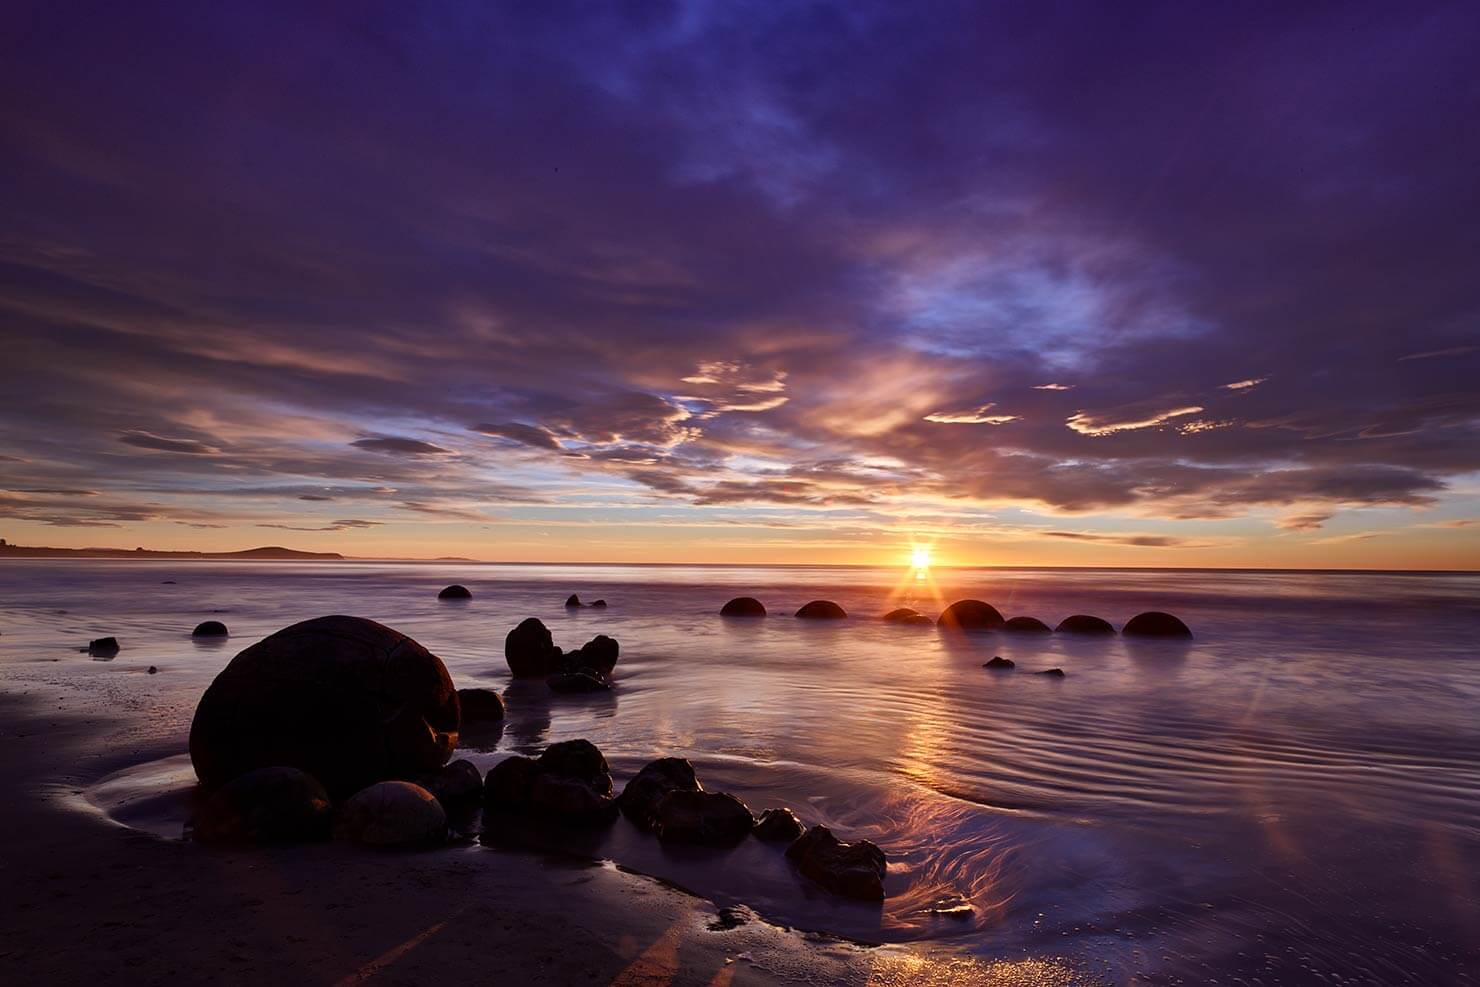
In this shot, the camera has metered and exposed for the sun (so we keep all the details in the highlights) but look at what it’s missing as a result – all those shadows with barely any information recorded. Basically, the differences in light levels between the highlights and shadows are just way too much for the camera to resolve in one frame. So what are our options?
Well, we could expose the entire scene to be the correct level for the shadows instead…

Great, I can see the detail now (as well as that awful lens flare!) – but look what that overexposure has done to the highlights: I’ve lost all the information in the bright areas as a result of exposing for the shadows.
“What about HDR?” Some might ask.
Well, blending scenes such as this where there is movement in both the clouds and water, as well as a direct sun-flare, is an extremely difficult task and not one I’ve ever seen executed very well. Some may opt, as in the image above right, to attempt digital “highlight and shadow recovery” from the raw file in Lightroom or Capture One – but the results are a “rescue” at best, and hardly the scene I remember viewing with my own eyes at the time. To make matters worse, by “recovering” the highlights and shadows from extreme areas of under and overexposure in post-processing, I’m introducing another unwanted factor into my final image: Noise.
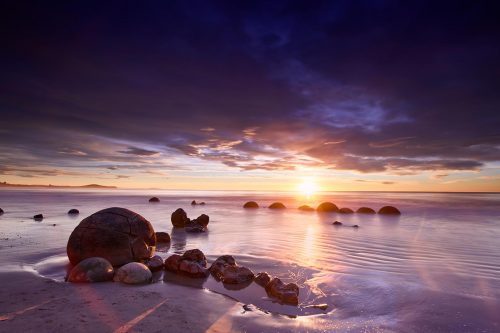 Instead, we can use a soft (or hard) graduated filter to “even out” the scene – using the dark areas of the filter to block some of the harsh highlights and leaving the areas of the scene which sit in shadow clear of any filter effect by placing the lightest part of the plate across them.
In this case, I now have a more balanced image with detail in the clouds and sunshine on the horizon, but no loss of information in the shadows of the rocks in the foreground. No digital “tweaking” required (and if I wanted to, I could do a lot more with this image than I could the original shot without a filter).
So if it’s that simple, what’s with all these differences and decisions out there when it comes to choosing a GND filter?
First, let’s cover the “strength” of the filter. You’ll see a number after the “GND” designation on your filter – this relates to how much light the filter is going to cut at its darkest point.
| Light Reduction | F-Stop Reduction | Optical Density | ND Filter Rating |
|---|---|---|---|
| 2x | 1 stop | 0.3 ND | ND 2 |
| 4x | 2 stops | 0.6 ND | ND 4 |
| 8x | 3 stops | 0.9 ND | ND 8 |
| 16x | 4 stops | 1.2 ND | ND 16 |
| 32x | 5 stops | 1.5 ND | ND 32 |
| 64x | 6 stops | 1.8 ND | ND 64 |
| 128x | 7 stops | 2.1 ND | ND 128 |
| 256x | 8 stops | 2.4 ND | ND 256 |
| 512x | 9 stops | 2.7 ND | ND 512 |
| 1024x | 10 stops | 3.0 ND | ND1000* |
- Some manufacturers use “stops” to reference the filter’s light-cutting ability (where each one stop = half the amount of light being allowed through)
- Others reference the “optical transmission factor” – 0.3 being equal to “1 stop” (or half of the light), 1.2 being equal to “4 stops” (or 1/16th of the light).
- While many now refer to a simple “ND factor” – where the number is the multiplier of light being cut. For example, ND64 means 64x less light than is physically there is allowed through the darkest part of the filter.
In reality, whether you refer to the filter as a “3-stop”, “0.9” or “ND8”, you’re talking about the same thing – a piece of glass or resin which cuts out 8 times the amount of light coming into the lens.

Moving on to the the “type” of graduated filter – and specifically, the three main options out there which can be used in combinations to suit almost any situation:
 Soft Graduated ND – Meaning the transition between the darkest part of the filter and the completely clear area on the surface is pretty much constant and smooth over the full length of the glass/resin. This makes it easy to absorb any minor positioning errors, and means the darkest part of the filter (or the part with the largest effect) is at the very edge of the plate.
- Hard Graduated ND – Refers to a filter which still has a dark and a light area, but the transition between the two (or “boundary”) is a much more defined, harder, line. As in the diagram above, you’ll see a very clear definition between the top and bottom of the filter – great for shooting against clean lines, horizons, etc where we need a big difference, quickly, between the highlights and shadows of a scene.
- Reverse Graduated ND – Here’s the fun one – a filter which is clear at the bottom (or top, depending on orientation), but half way up, transitions very quickly to the darkest part of the filter and then slowly gets lighter again as it continues away from the middle.
Looking into many photographers’ kit bags, you’ll often find a variety of GND filters – soft, hard, 3-stop, 5-stop, etc. But very rarely do I come across a photographer using a Reverse GND – and I have to wonder why.
Let’s return to that sample image, but this time instead of looking at the image as a colourful scene, let’s map out the brightest and darkest areas using a simple greyscale sample (in the middle):

You see, the problem is that when shooting sunrise or sunset, especially when you’re looking at a clear horizon, the darkest part of the image is not at the top of the frame – as standard graduated filters are designed. In this scene, a standard GND filter will obviously help reduce the exposure of the area of the sunrise, but it will also have the effect of darkening the clouds at the top of the frame and some of the beach at the same time.
Using a Hard GND will help reduce the issue on the beach (as we can line it up to transition perfectly on the horizon) but it will still leave the top of the frame underexposed and gloomy. Instead, we need a filter which is clear (light) at the bottom, dark (heavy) in the middle and then slowly transitioning back to clear (light) at the top again, to match the brightness profile of the scene.
Luckily, this is where the Reverse Graduated Neutral Density Filter (R-GND) comes in:

So let’s take a look at that exact same scene, with a shot taken moments after the Soft-GND image, but this time with a Reverse-GND instead. We keep the shadows bright, as the bottom of the image has no filter effect applied – the detail in the sun and clouds on the horizon (the brightest part of the image) is well exposed, and the sky is clear and accurate to the view I had when stood there.
I’d say that’s a win for the Reverse GND filter in this case!
Of course, as with any filter in your kit bag, there is a time and place to use a Reverse GND and a time to leave it in its pouch. The below image is a perfect example of this – if there is anything popping out above the line you’re placing the filter along, it’s going to look wrong. Plain and simple, just don’t do it.

Incorrectly aligning the filter’s transition area even slightly off of the horizon will give you an unnatural bright line as in the image on the right. Using a reverse (or hard) GND filter when objects, buildings or mountains break up the line of the horizon? Well, that’s why you have a Soft GND filter in your kit-bag too.
Remember, I did mention there were lots of options for Graduated Neutral Density Filters – and there really is one for every situation!
Hopefully this little “how to guide” goes some way to removing the apparent mystery surrounding GND filters, and why getting it right in-camera really can be the make or break moment for an image. For those who want to learn more, why not check out our workshops around the world? – Otherwise, those of you wanting to know what filters I carry in my own gear bag can head on over to my equipment list for the full run-through.
