We’ve hit that magical time of year for photographers again, when Capture One release their latest update to our favourite raw editing and post-processing software – this time with Capture One Pro 21.
Included in this release are a slew of updates, both front-of-house and behind-the-scenes – resulting in an even more versatile and robust way to bring our images back to exactly how we remember that moment in time.
To help with the transition, I’ve added another of my “Pro Tips” videos to our YouTube channel as a guided review – describing and demonstrating each of the new features – ready for you to start playing with:
Dehaze
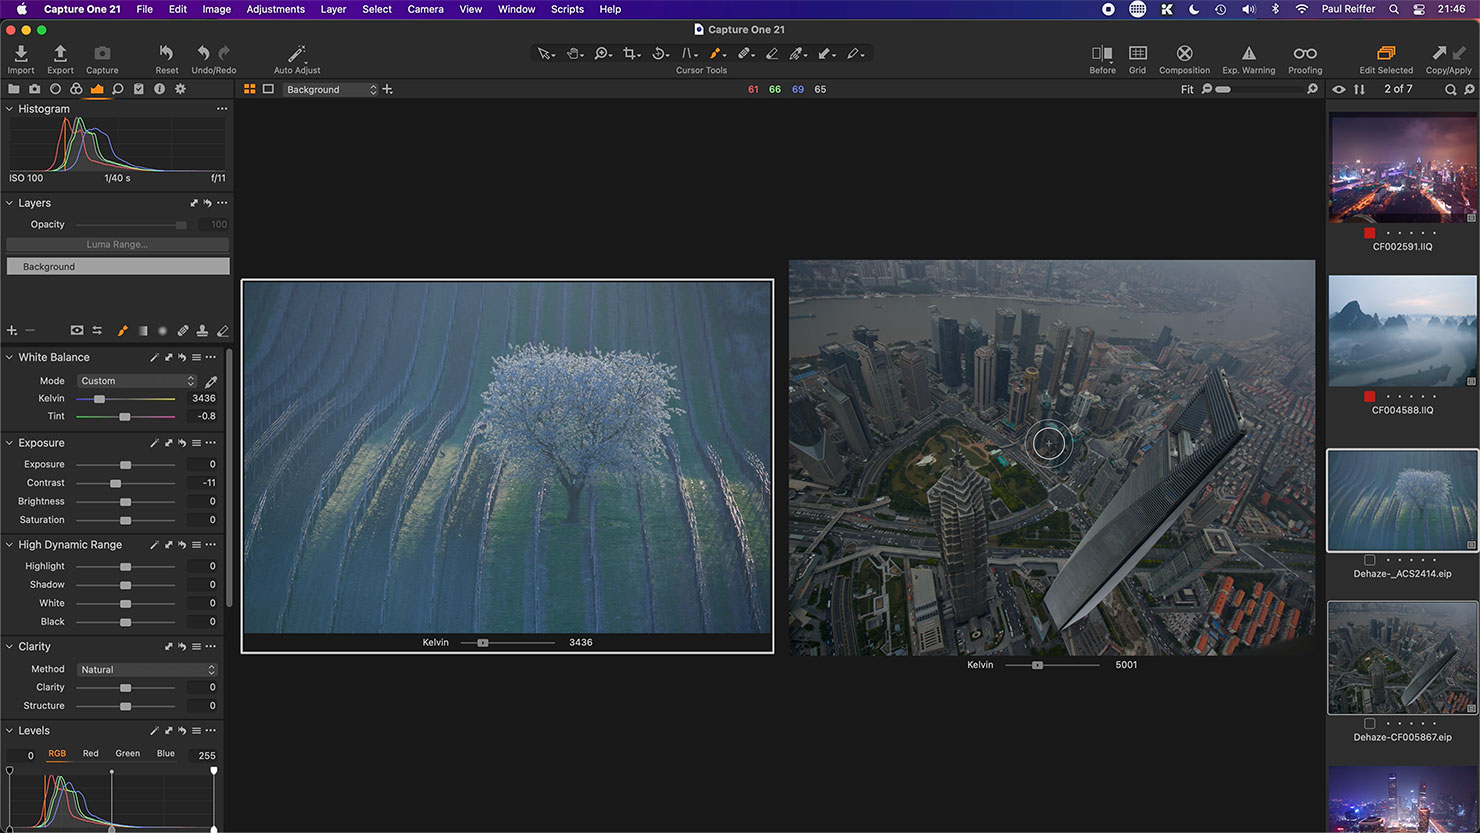
It’s fair to say I’m not a big fan of “one-click” solutions when it comes to getting the best out of your images. What those tools deliver in speed, they tend to compromise on quality. With the new dehaze function in Capture One 21, however, the developers have been quite clear: This is not to replace other tools, it’s there to supplement.
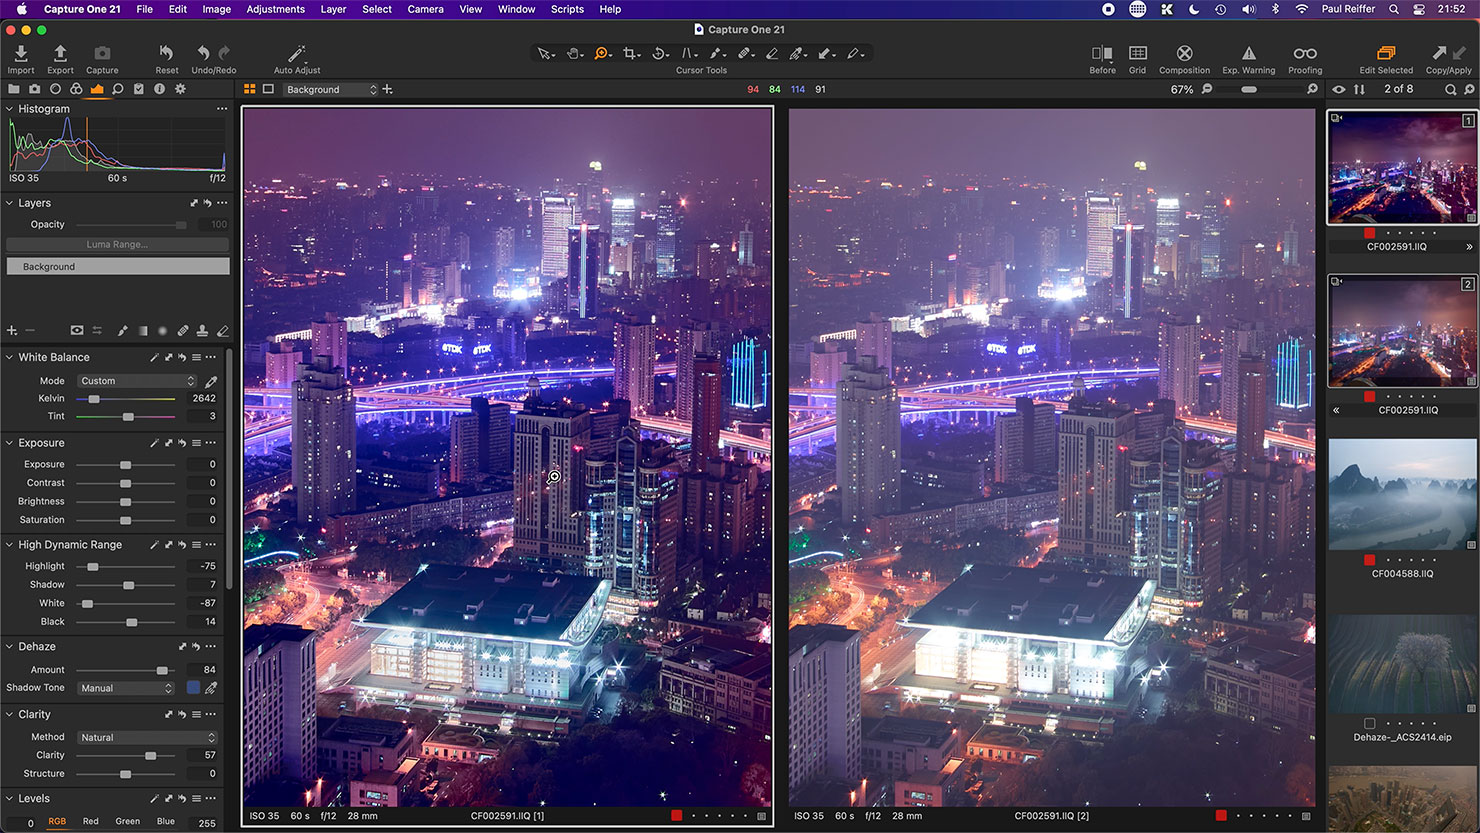
Yes, it’ll try to deliver a quick-fix in “auto” mode, but the real power of this tool comes into play when you start manually selecting the shadow tones and adding clarity and HDR adjustments to fine-tune the end result.
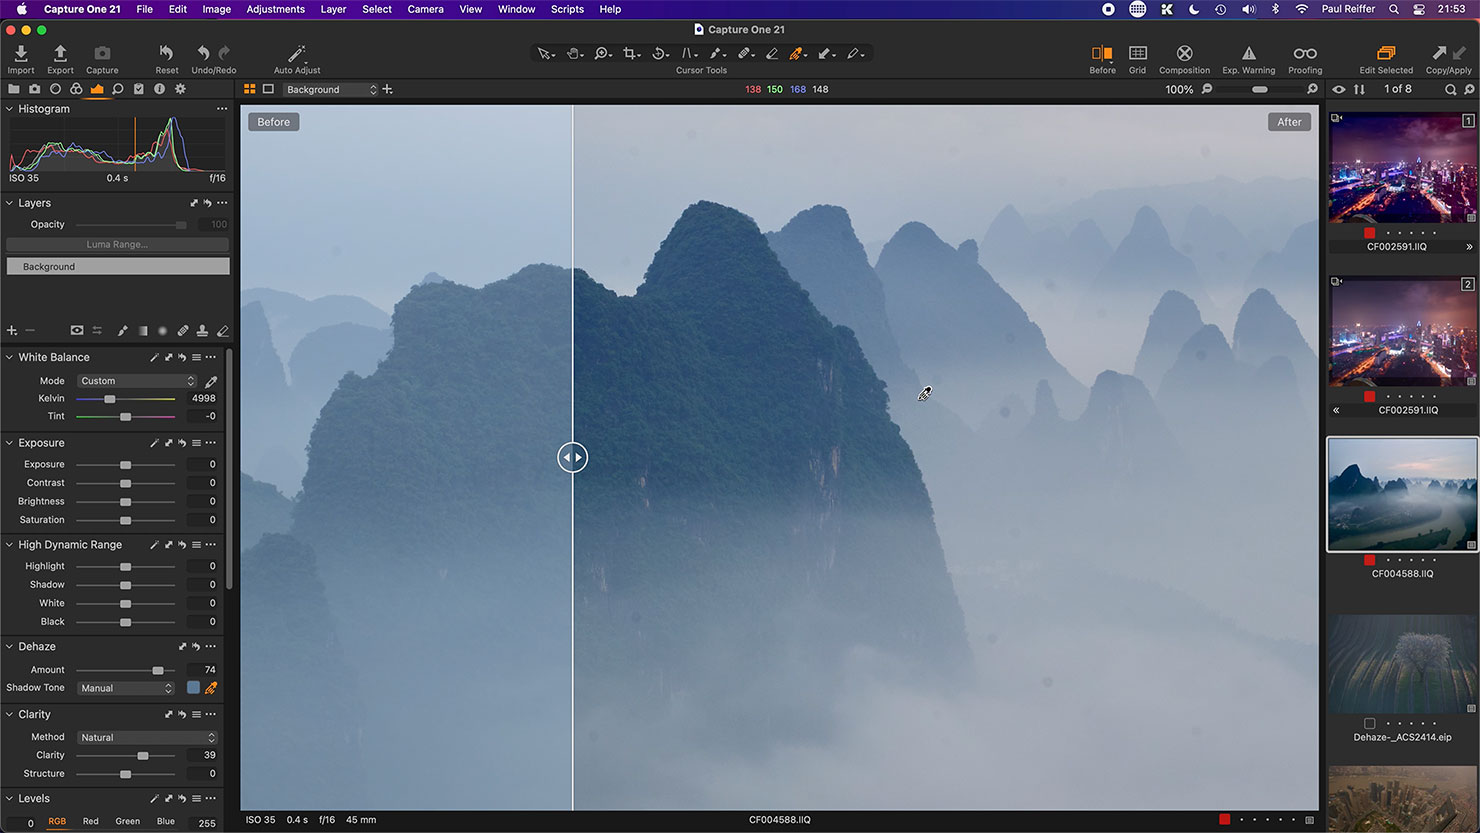
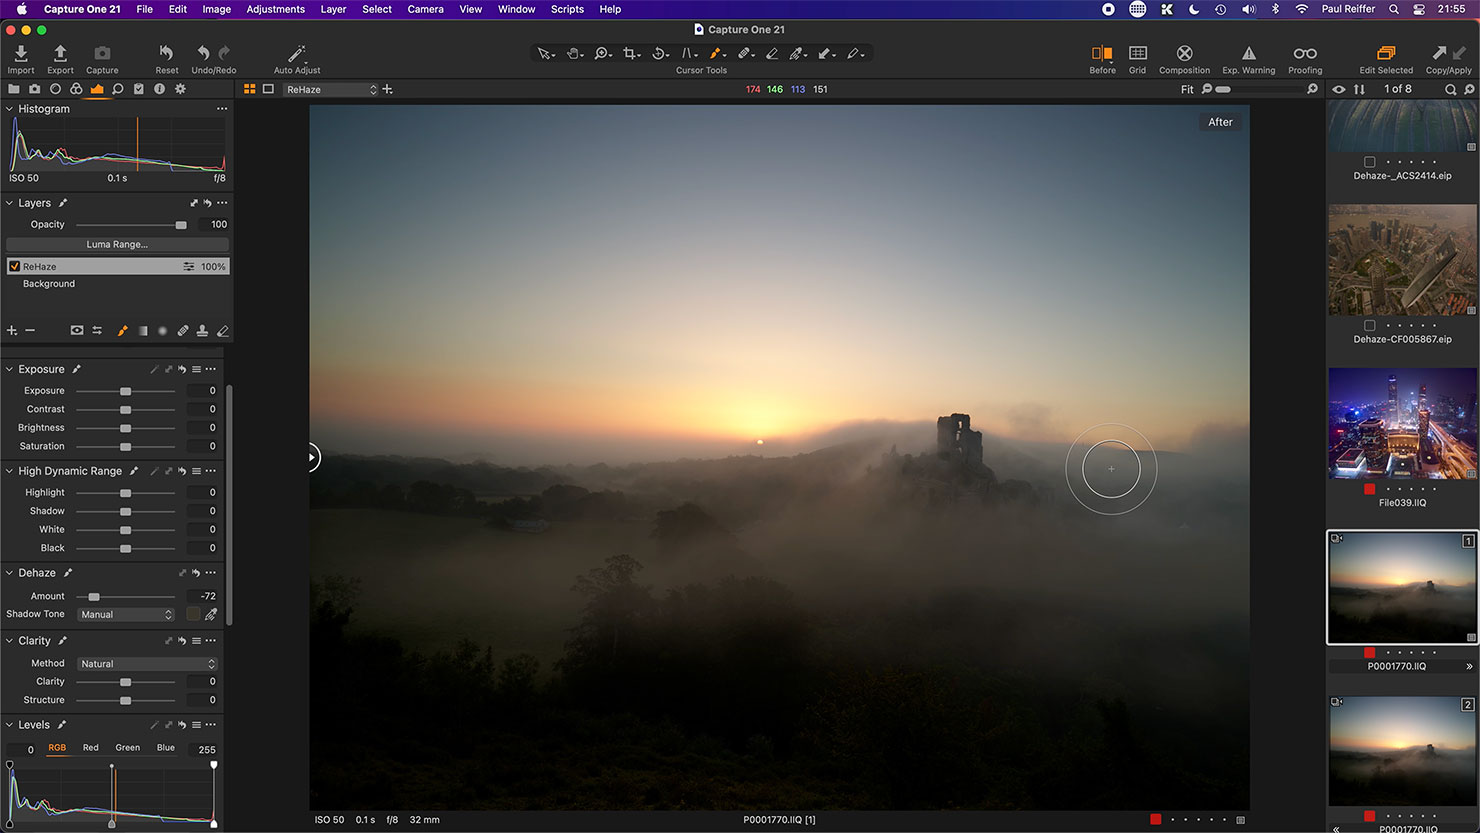
Of course, one thing it can also do, ironically – is add haze to an image.
While the idea of simply “adding more fog” is rather sad – and let’s not fall in to the trap of creating scenes that never happened – the ability to enhance or clarify the effect of mist and haze in the air, at times could come in rather handy.
Speed Edit
Also new into Capture One Pro 21 is the “Speed Edit” feature – a shortcut-centric way to make adjustments to one or more images without needing to move your eyes from the content in the process.
One argument for including this new feature is the increase in popularity of external “controllers” – dials, sliders, buttons and switches – that people have used to augment their post-processing systems in the name of workflow efficiency.
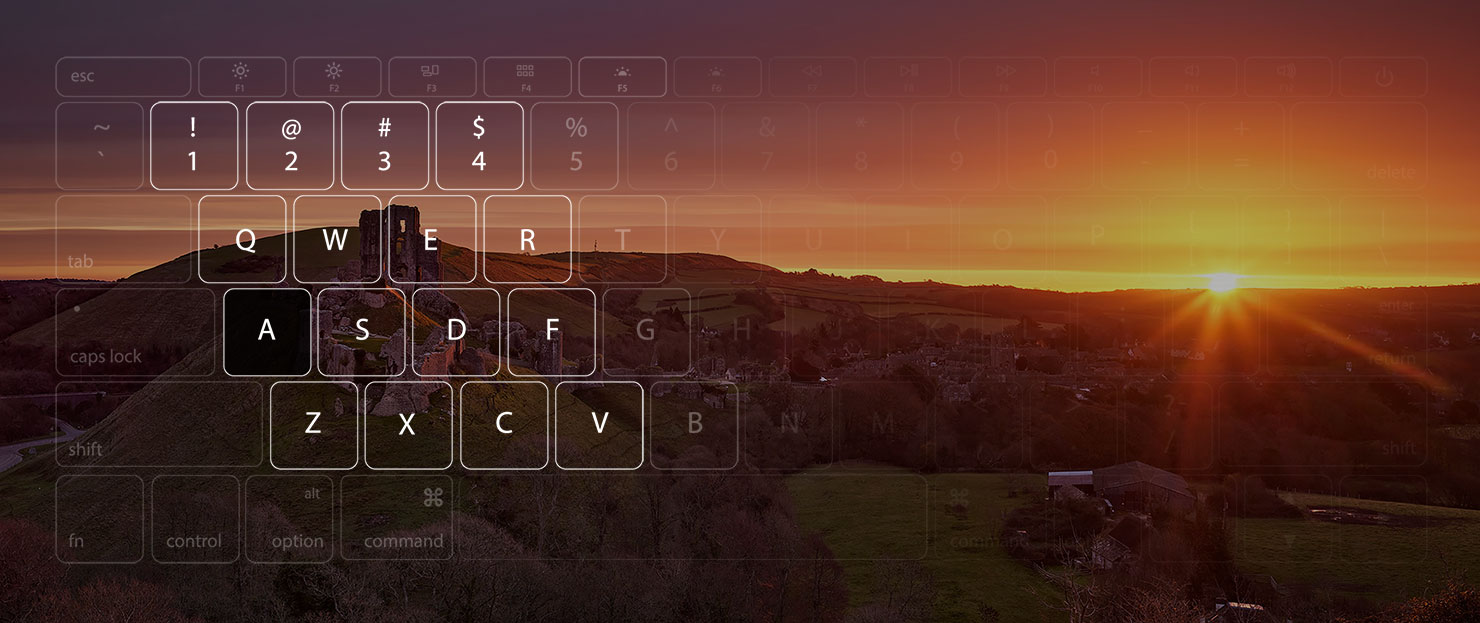
By introducing an array of customisable shortcut keys, combined with mouse/pen/cursor movements, the team at Capture One have essentially turned everyone’s existing desktop into a hands-on editing suite, and I must say it’s rather efficient.
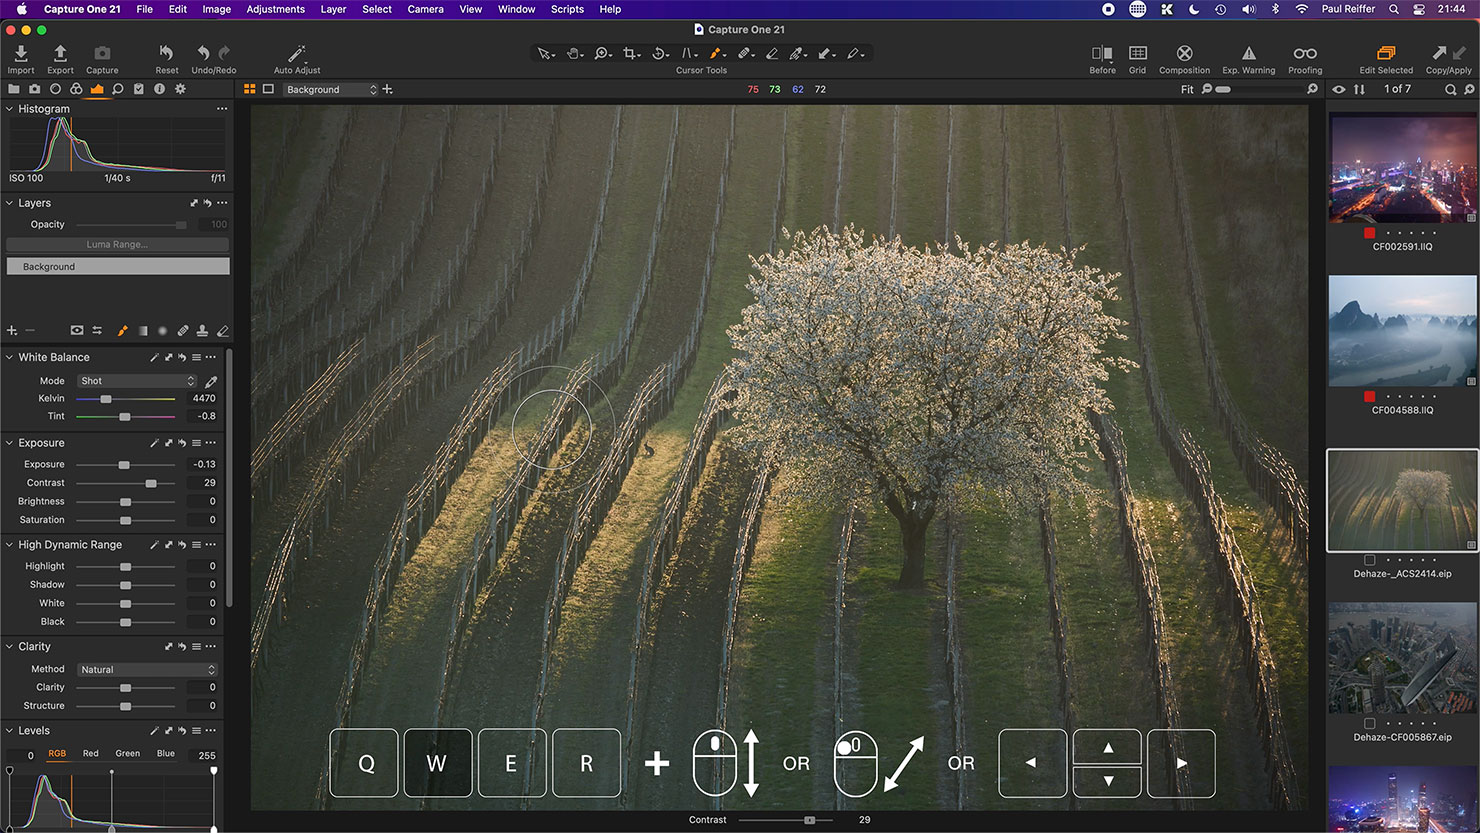
Simply by holding down one of a series of keys and moving your mouse, you’ll find your choice of adjustment slider moves in turn. In our video, we show the full set of adjustments enabled by default, as well as the nuances of using the tool to edit multiple images at once.
Easy Brush Adjustments
Fed up of constantly right-clicking to make adjustments to the brushes you use to draw masks?
Well, Capture One 21 fixes that frustration with the introduction of shortcut-based brush changes, which correspond with other pixel editing applications for a seamless transition between the two.
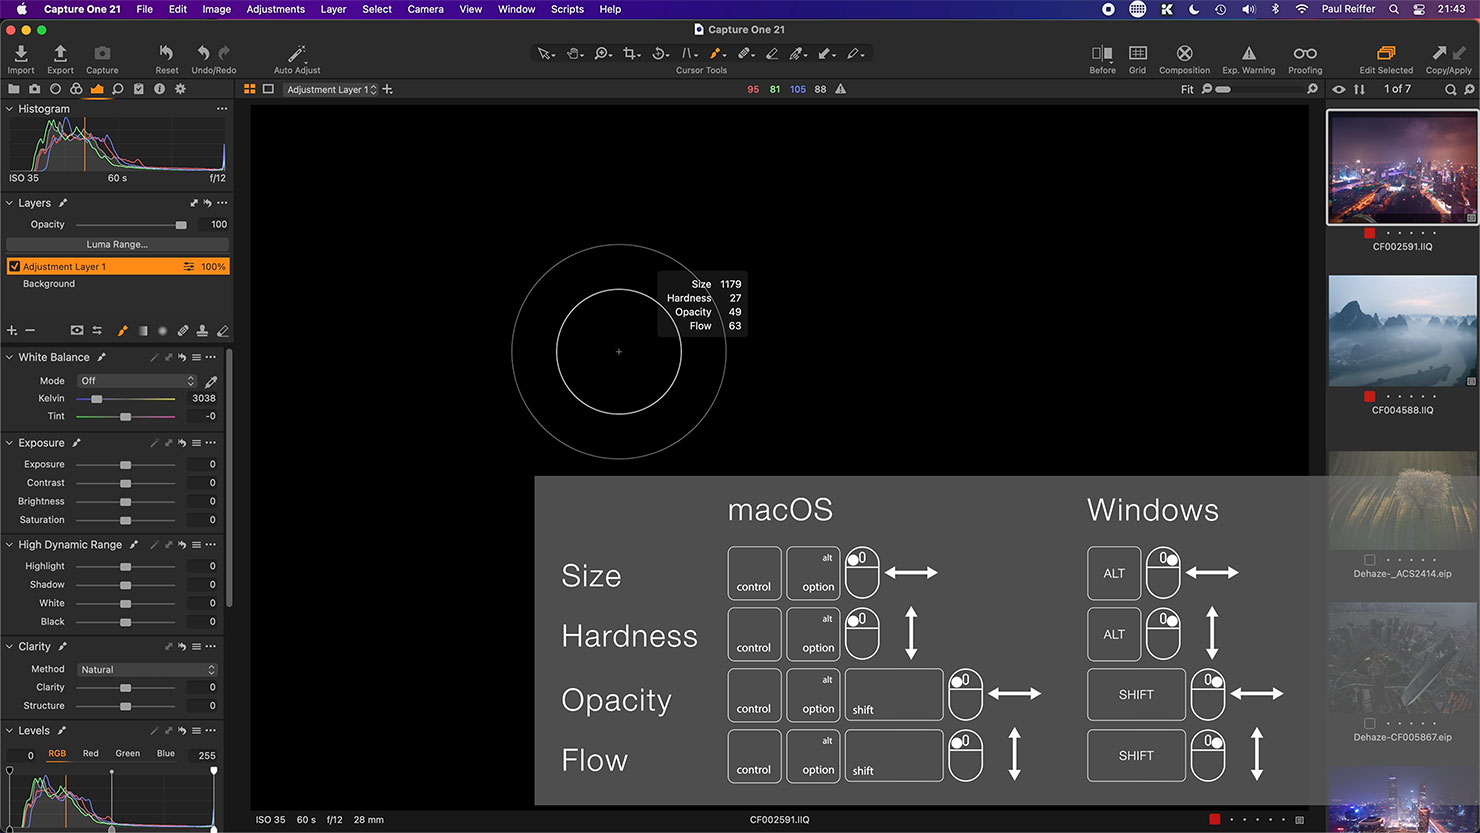
In our guide, we walk through both Mac OS and Windows keyboard combinations that can be used to make your brush shape, size and behaviour transitions as smooth as possible while drawing – without the need to take your eye off the image.
ProStandard ICC Profiles
It’s not really last, and it’s certainly not “least”, as from my perspective the revised ICC profiles really were the “unsung heroes” in this release.
It’s been a long time coming, but Capture One 21 introduces brand new profiles for the most used camera systems on their platform (with many more to come in future) which provide more realistic colour rendition, tone transition and depth when it comes to rendering what we captured out in the field.
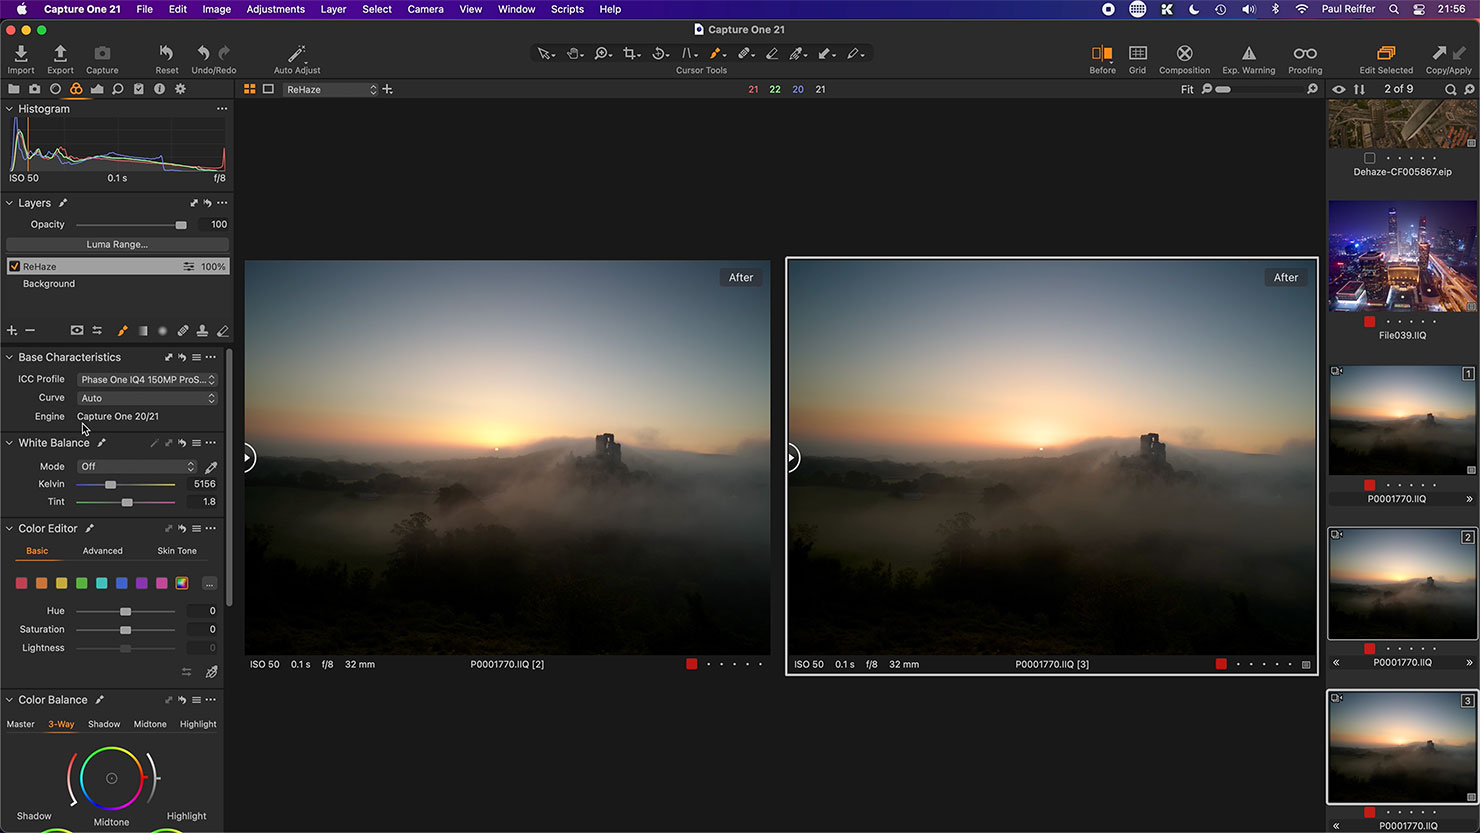
To me, this is actually one of the biggest changes – as it saves me time “correcting” a raw file back to what I saw. While the differences may appear small, when printed, they represent a more realistic, genuine and richer representation of the scene I captured at the time.
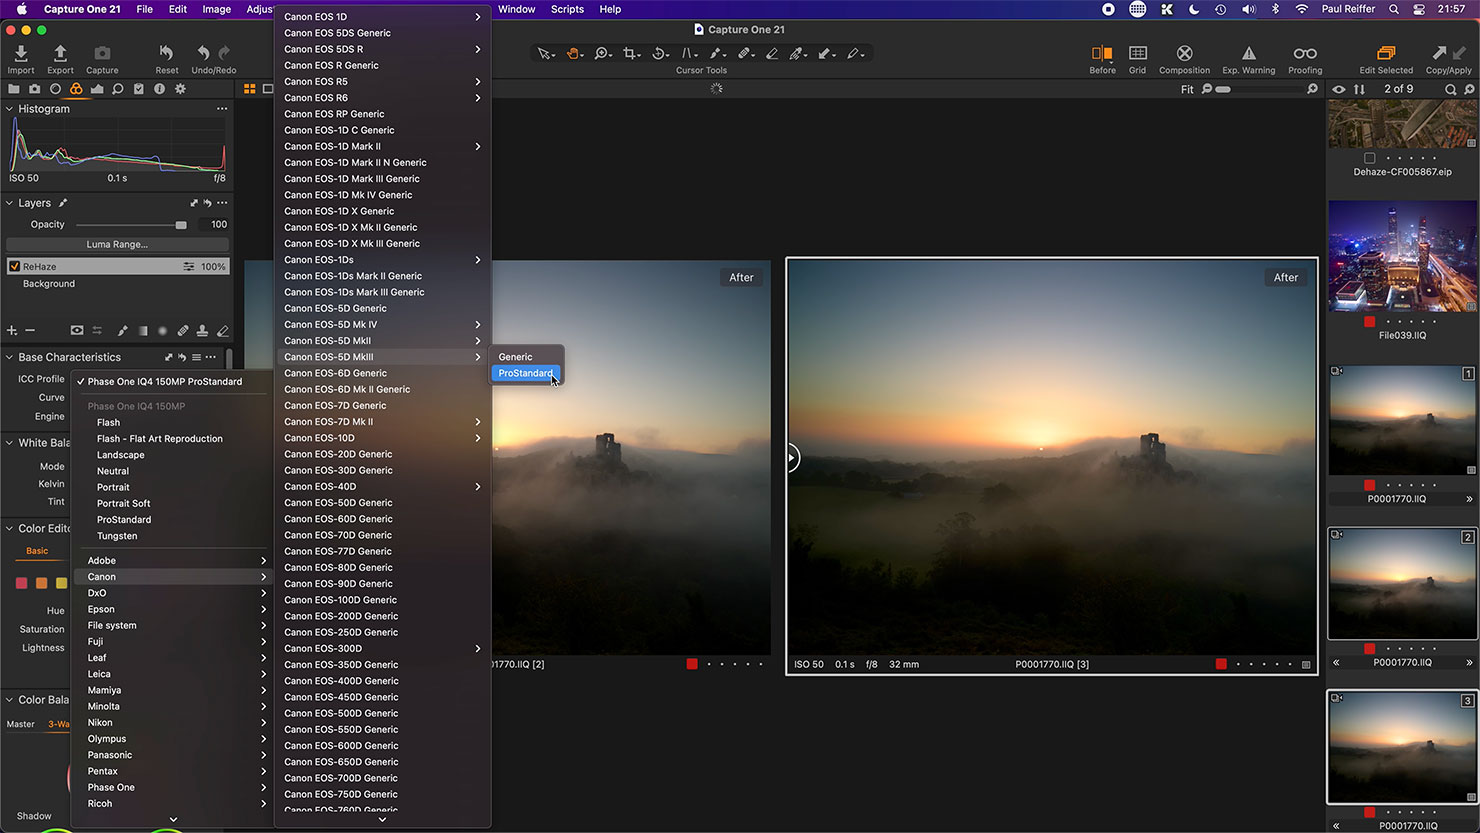
Of course, you can still apply another camera’s ICC profile to your image – and I know people who have a lot of fun doing so. If, however, you find your own system is missing from the list of ProStandard supported profiles, now is the time to get in touch with Capture One Support and raise it as a support request. It’s only through volume of requests that they can gauge how important a system really is to people!
Under The Hood
It would be unfair to not take a moment to address the workflow and speed improvements that have been made in Capture One for this release.
Coupled with the adoption of macOS Big Sur and the latest Windows updates, they’ve managed to make some impressive gains when it comes to catalog and session performance, as well as the import process.
The Import Dialog Box has had a facelift – matching some of its terms to those of more “industry standard” phrases, along with a much improved pick/unpick function at the point of bringing images in to the system.
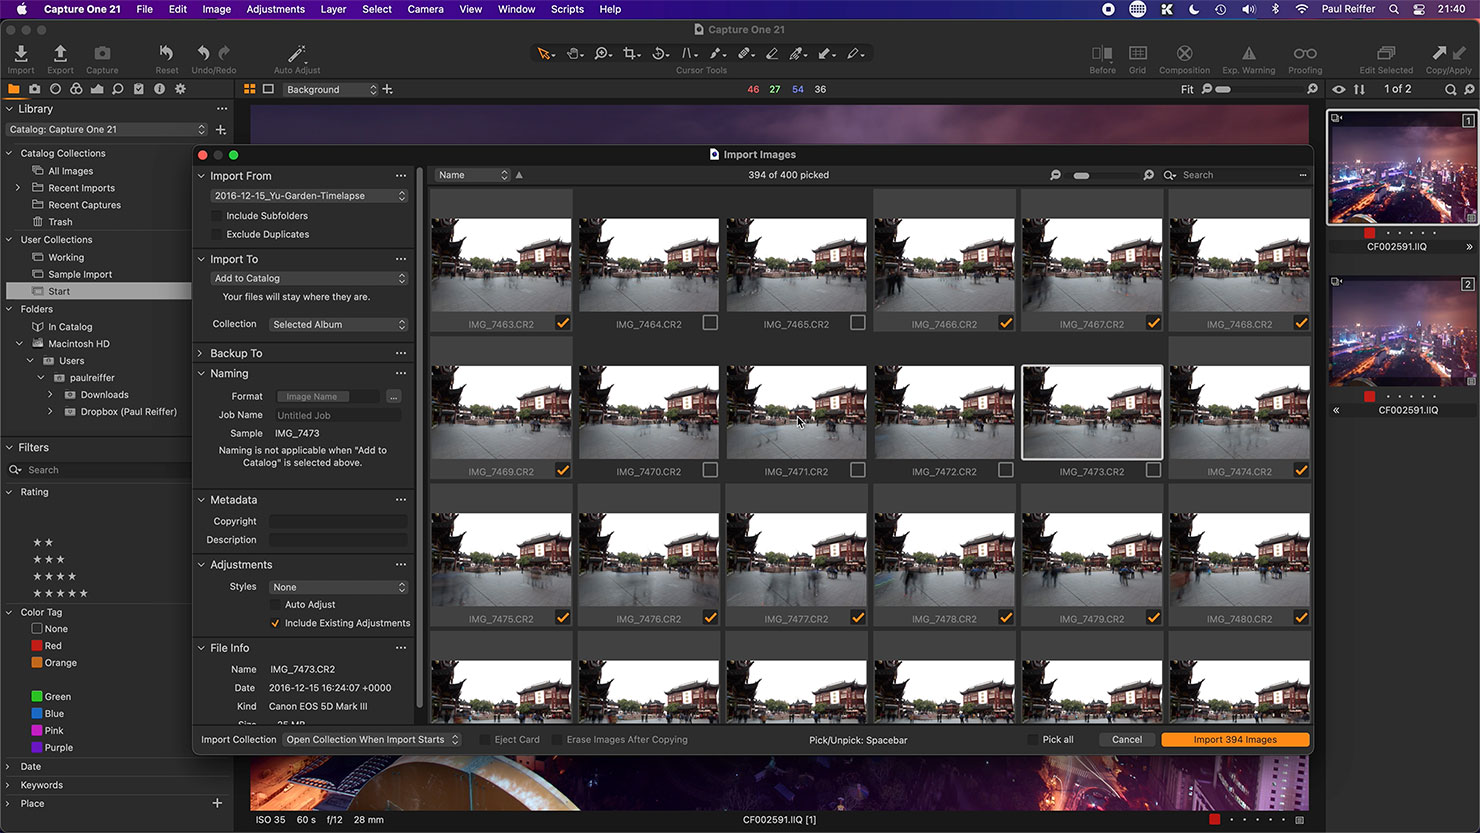
The process of physically importing photographs has been greatly improved, with 20-30% speed increases in both catalog build and preview generation being far from uncommon.
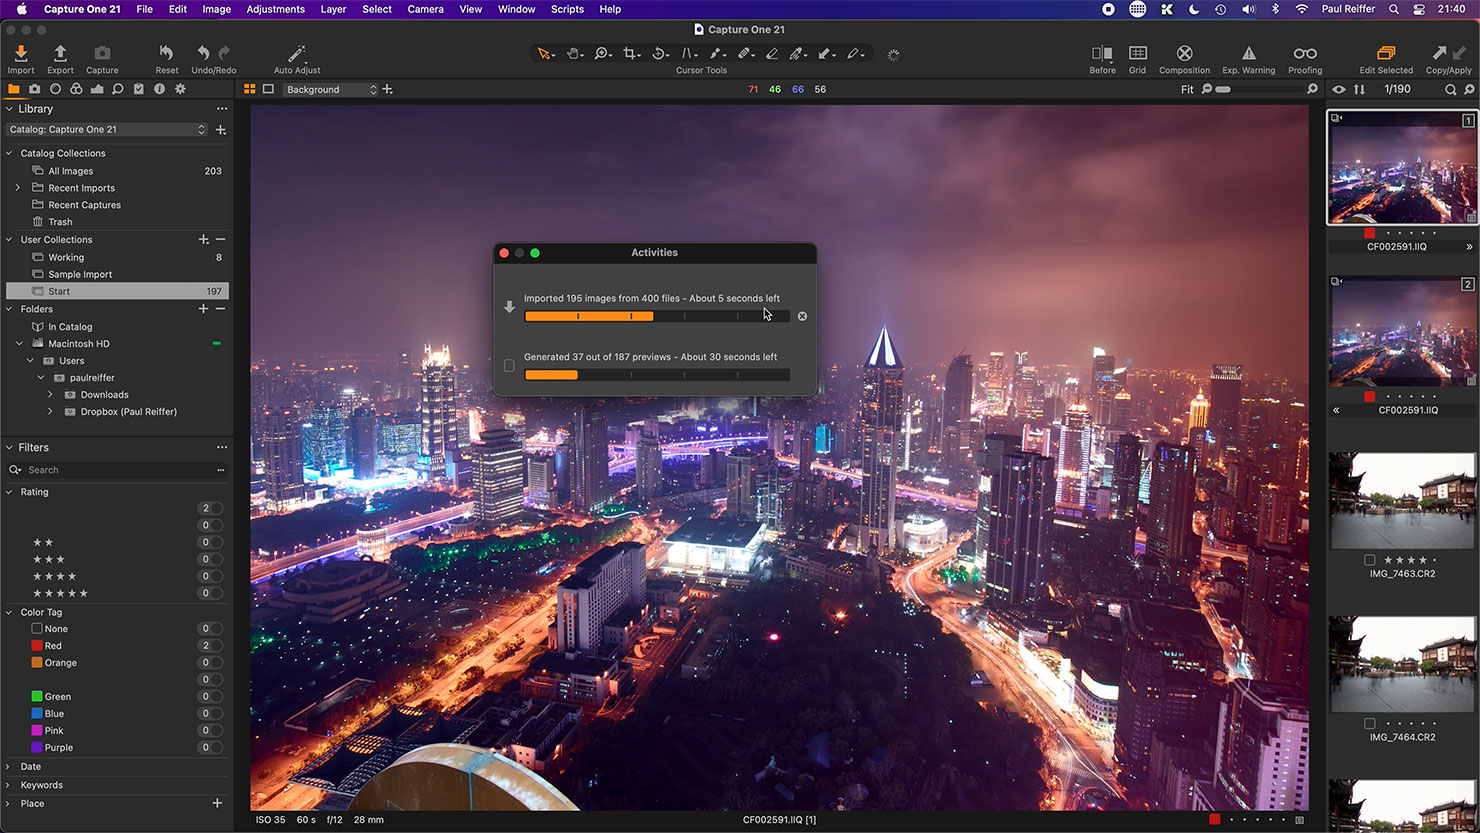
Locating missing files and folders has been improved to the tune of 4x faster, and in general you’ll find navigating around catalogs, sessions, browsers and viewers a whole lot “snappier” with the new build.
Summary
This is the first time the team at Capture One offered “sneak peeks” into the tools they were developing in the month-long run towards release date.
Rightly or wrongly, feedback was mixed – some were disappointed that more “toys” weren’t planned to be in the mix, while others appreciated the openness that they were showing in terms of development priorities.
The “buy now, discover later” sales and marketing tactic they’ve adopted over the past couple of years is certainly not one I appreciate or celebrate, but all of that feels somewhat like a distraction to what they’ve actually done – again – with this release:
They’ve made the best image editing and post processing tool available on the market better, more reliable, faster and more authentic in terms of its output. Beyond that, they’ve added a couple of extra tools into the mix while they were at it.
To my mind, that’s a pretty good place to be…
For more info – check out Capture One Online.