For years I’ve travelled the world to capture the feeling of iconic scenes, from the electrifying energy of a city at night to the refreshing crispness of cool mountain air. Capture One has always been there to help me transport my viewers right back to how I felt at that very moment when I clicked the button.
It’s one of the most frequent questions I’m asked – “how do you get your images to look like how it felt?” – and while I’m keen to help my workshop customers with more bespoke editing, it seemed like we could help others get to that “70% there” mark a lot easier too.
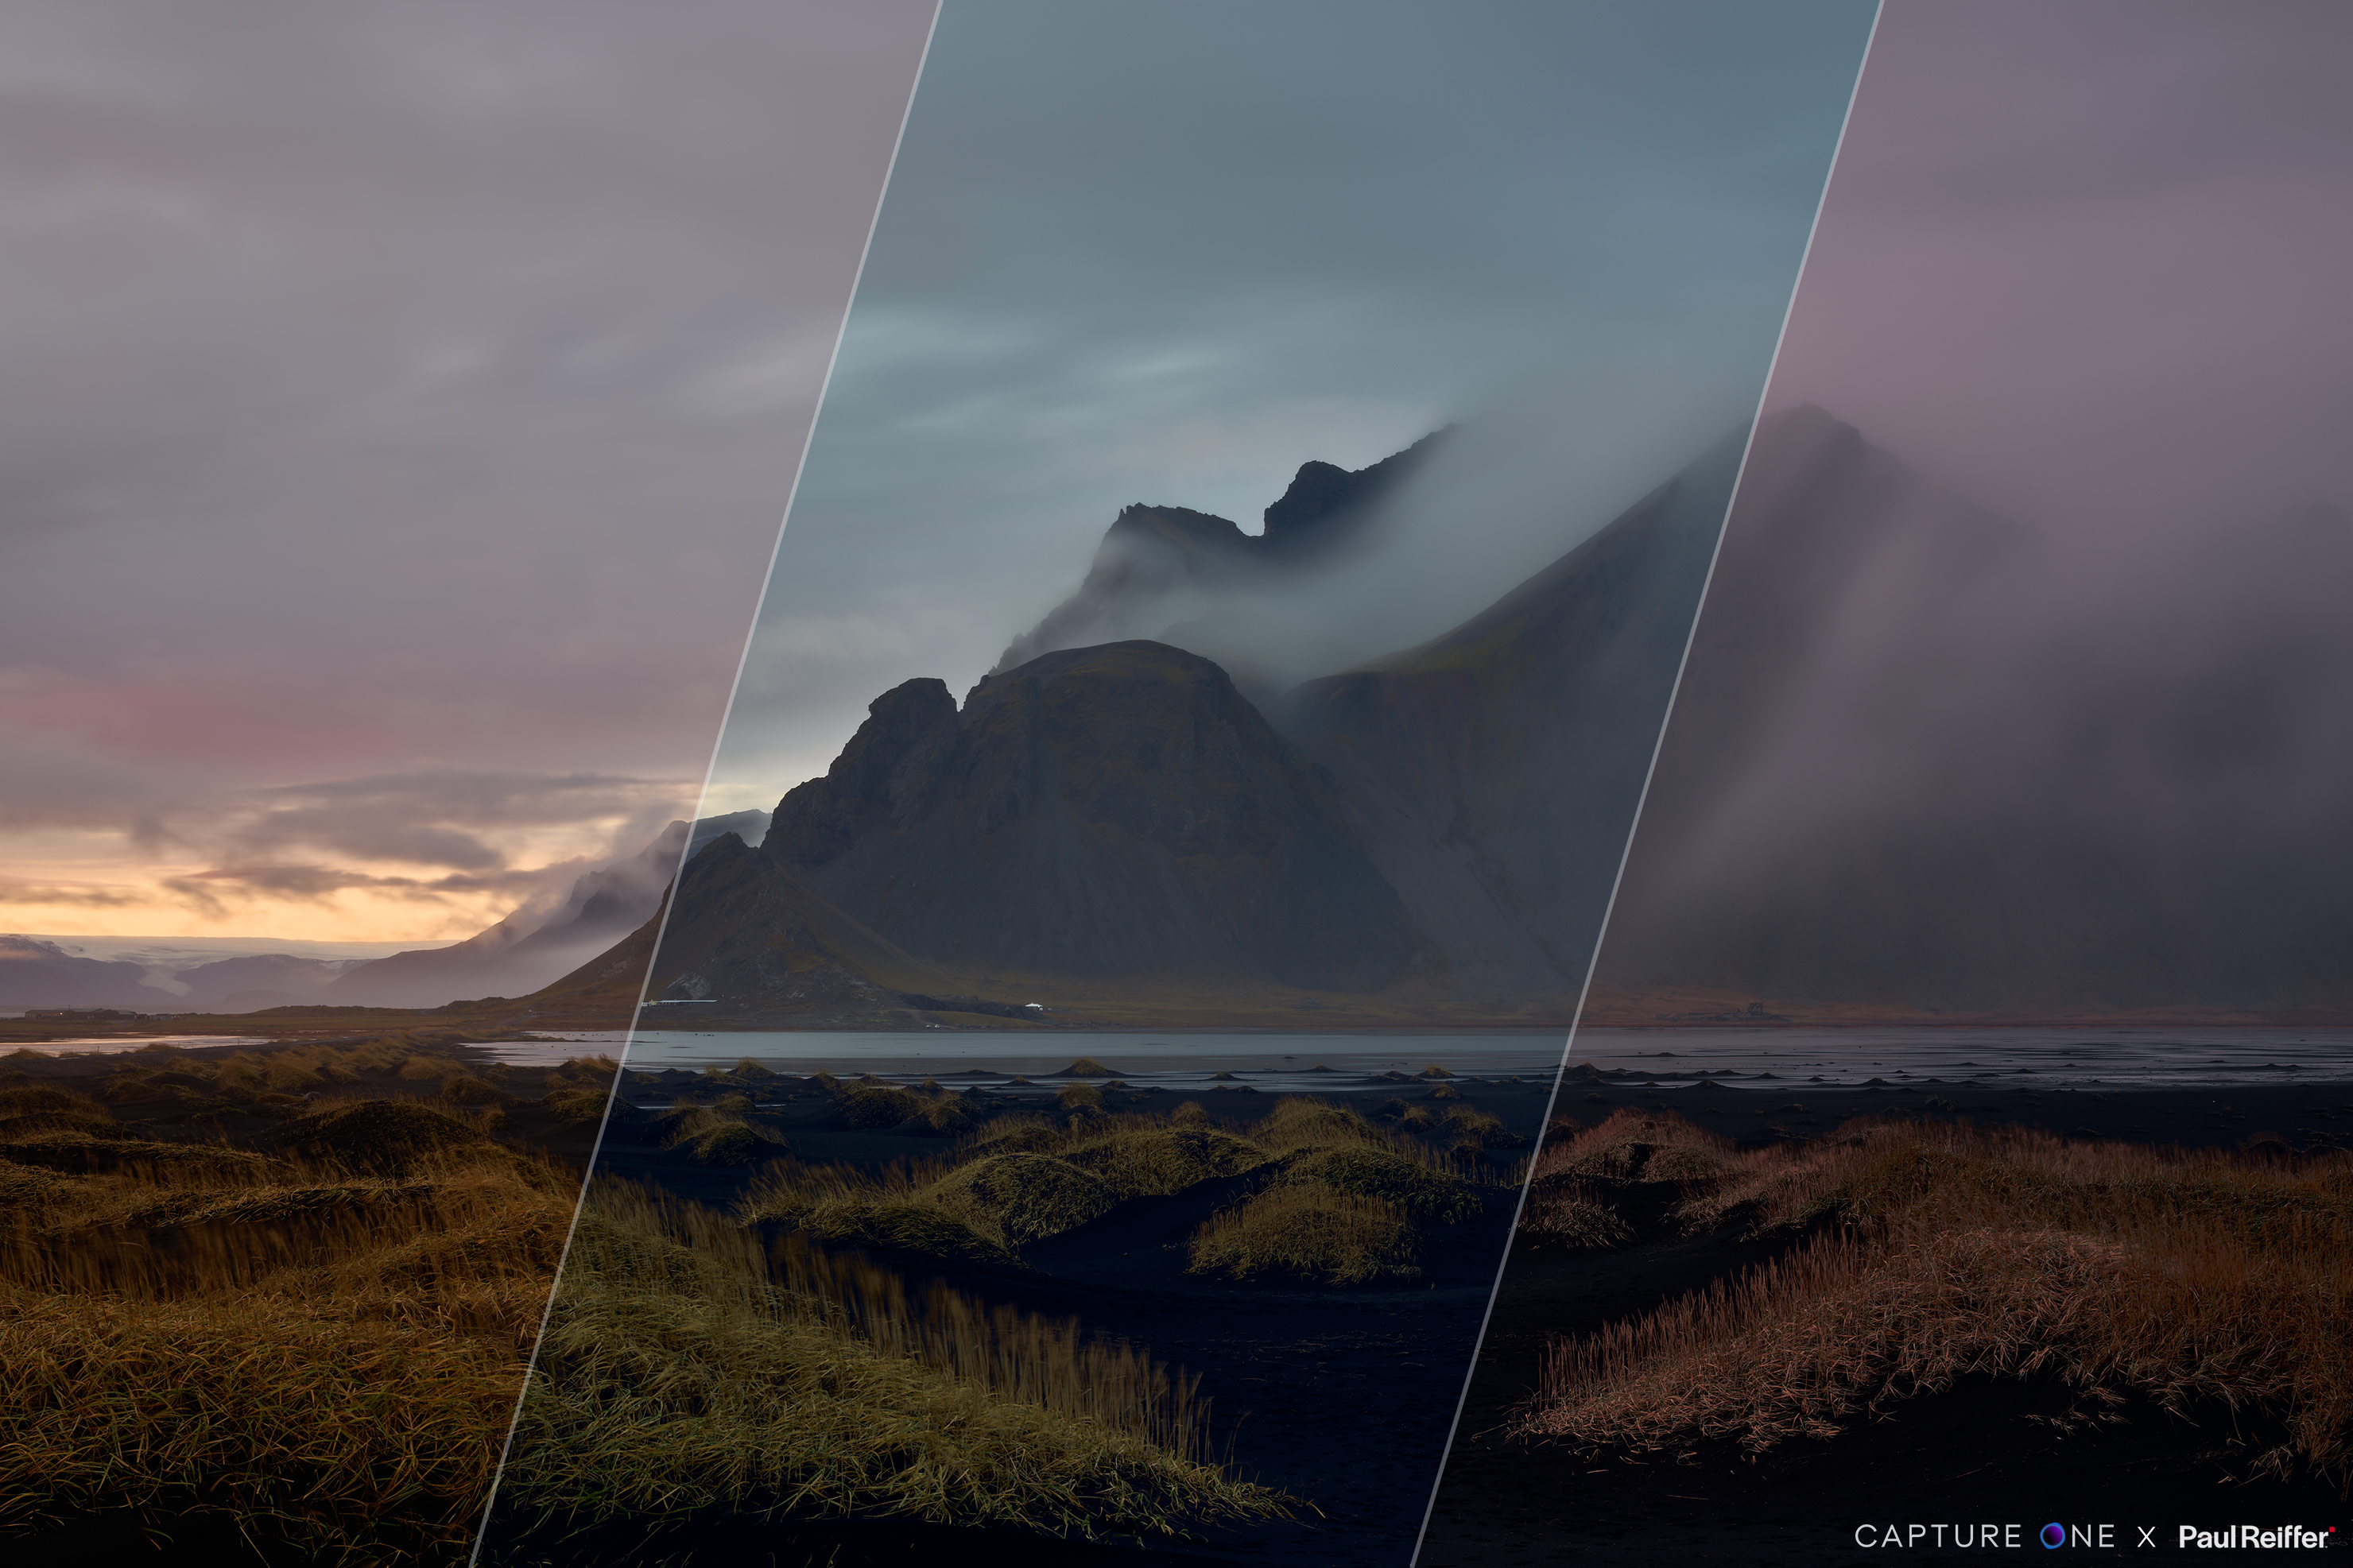
So, following a few discussions with the team in Copenhagen and quite a bit of work “under the hood”, I’m pleased to announce the launch of our brand new style pack for Capture One : Elevation.

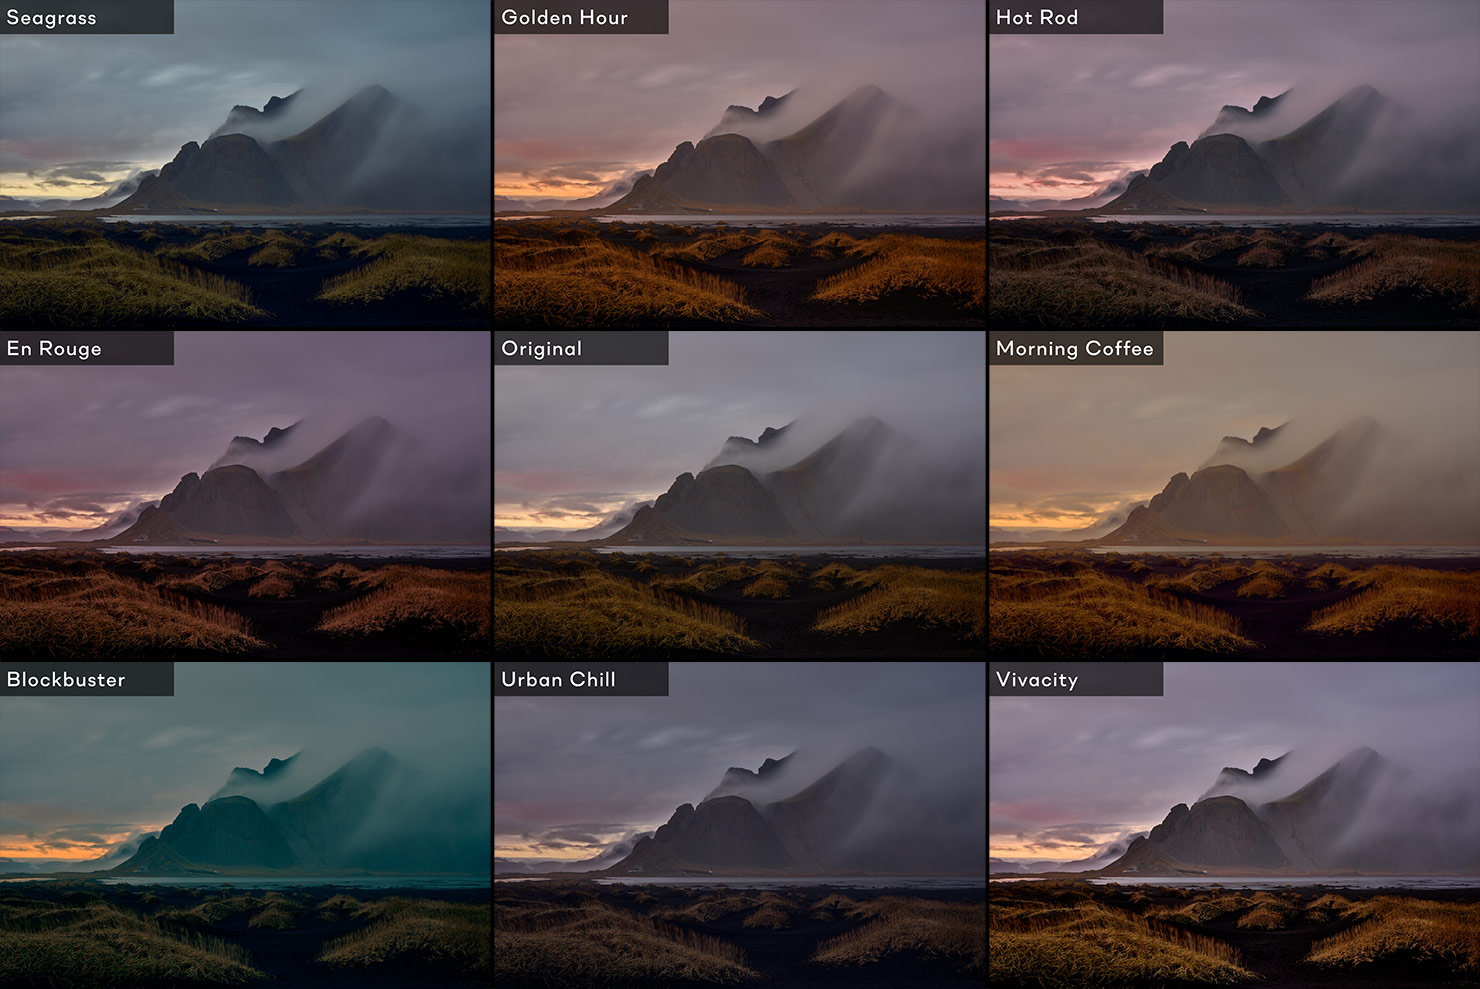
With my Elevation Styles pack, I’m giving you access to 8 of my own graded looks to help you match the moods and feelings you wanted to capture in your own photos when you shot them.
From enhancing the grand vistas on a landscape road trip to bringing the lights of an urban metropolis at night to life, each look can be applied as a fully editable layer and easily adapted to create your own consistent and unique photographic style.
What’s inside
Included in the pack are the 8 styles below with 4 variations of each:
- Default
- Out-of-the-box with the most contrast for the intended Style.
- Highlights –
- Recover details in brighter areas of your photo.
- Shadows +
- Recover details hidden in the shadows of your photo.
- Max Range
- Maximize the range of both bright and dark areas.
Cities
Evoke the feel of contemporary urban movies — this orange & teal-based grading, combined with a low contrast output, delivers a strong and distinctive look for nighttime cityscapes.
- Ideal for:
- Cityscapes and urban scenes with light trails at night.
- Tip:
- Start with a cool white balance (2600- 2900K) for accurate grading.
Bring a video game feel to urban scenes — this style enhances red and white highlights while leaving other tones cool, dark, and muted for an energetic city vibe.
- Ideal for:
- Cityscapes at night with urban light trails and buildings.
- Tip:
- Apply to a New Layer and adjust opacity to control the strength of the effect.
Reduce the intensity of too “warm” night lights — this style cools the tones of city lights to a more relaxed glow while retaining the details and structures that are important to the feel of the photograph.
- Ideal for:
- Nighttime cityscape scenes with warm lights and traffic trails.
- Tip:
- For an enhanced dynamic range, consider using “Urban Chill – 4 – (Max Range)” at 60%.
Get that classic neon city glow — this style pushes light trails and nighttime elements to deliver an electric feel throughout any urban scene with vivid, pronounced highlights and extra contrast for shadows.
- Ideal for:
- Cityscape shots with strongly defined light trails, or a need to cut through haze.
- Tip:
- Start with a cool white balance (2600- 2900K) and use Opacity to control the effect.
Landscapes
Bring strong burgundy tones to the forefront of an image – this style shifts your color balance to enrich skies, foregrounds, and man-made structures by enhancing the red & orange hues in any scene.
- Ideal for:
- Landscapes with colorful skies, rock formations & buildings at golden hour.
- Tip:
- If the output appears too cold, adjust white balance to accommodate.
Increase the warmth throughout any sunrise or sunset photograph — this style softens and smooths the yellows and reds in an image to create a consistent tone where golden light falls on skies, clouds, and water.
- Ideal for:
- Landscapes and seascapes at golden hour, urban scenes with warm light.
- Tip:
- Consider using “Golden Hour – 2 – (Highlights -)” to protect any sky detail.
Enrich the soft and warm tones of a golden hour image — this style subtly enhances the morning tones of the photograph and adds a gentle haze to sooth the harsh lines and edges of rock formations or buildings in any scene.
- Ideal for:
- Landscapes during golden hour, warming cityscapes with existing cooler light.
- Tip:
- If structures are too soft, adjust the reduction of the clarity slider.
Highlight cool blues and bracing greens — this style brings an adventurous feel to any photograph that holds atmosphere, deep layers, and vegetation while maintaining a strong and consistent color grade across all images.
- Ideal for:
- Landscapes with clouds, storms, foliage, and mist.
- Tip:
- Use “Seagrass – 2 – (Highlights -)” to control detail and textures in bright clouds.
How to get the best from Elevation Styles
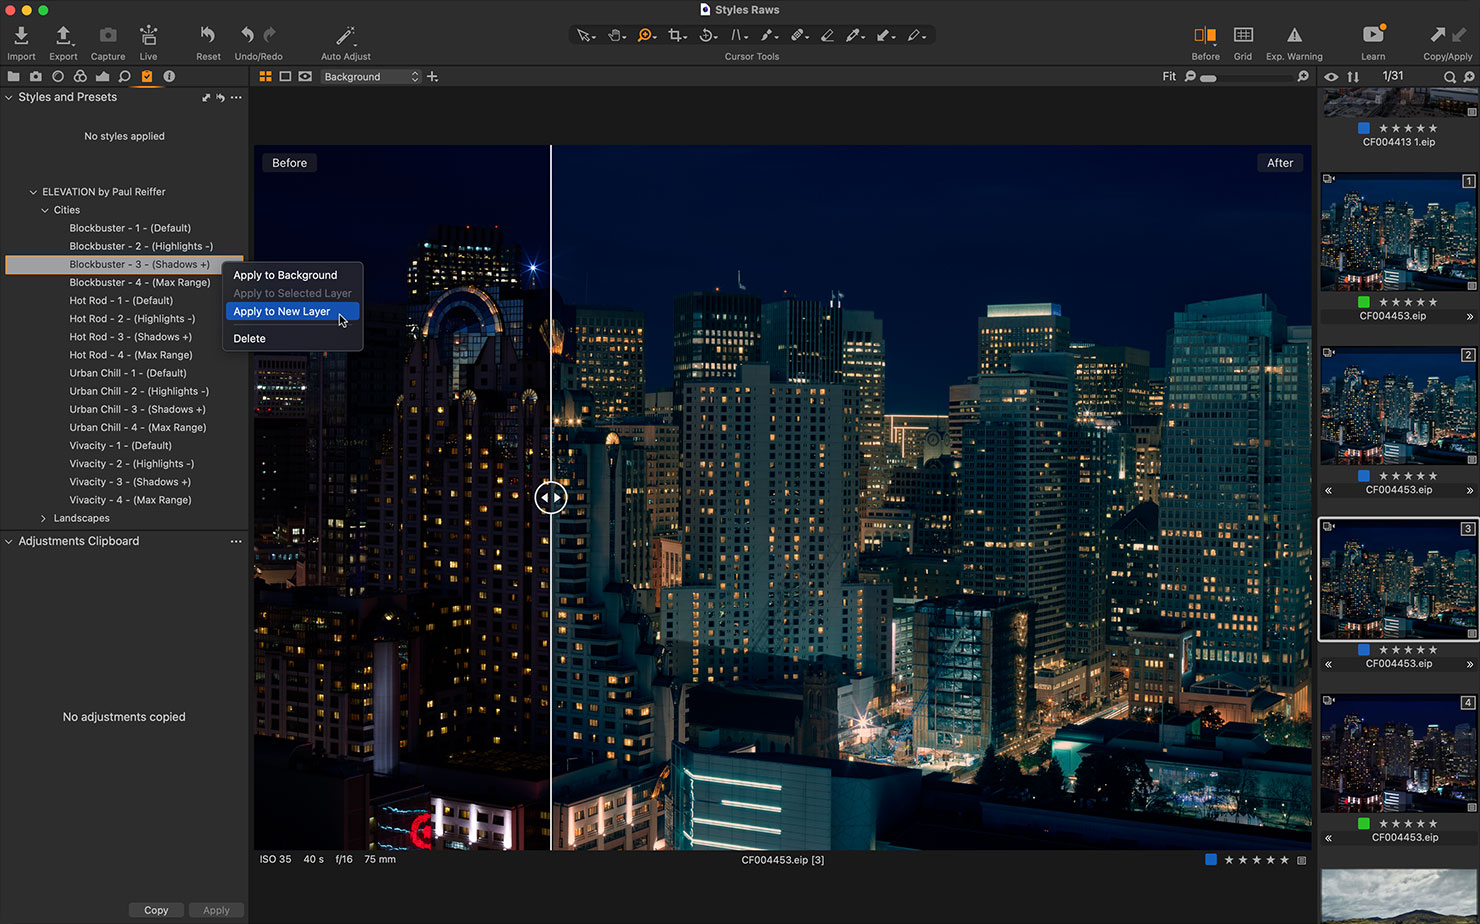
All 8 styles and their variants are designed to work “out of the box” – and as such, can be previewed and applied to a background layer from the styles tab.
However, we’d recommend making base adjustments (lens corrections, white balance, etc) on the Background layer of your image and then applying your chosen style to a New Layer. This may result in a slightly different result to that which is delivered by just clicking and applying it to the background and overall image.
- Correct your white balance before applying Styles.
- In the adjustments tool tab, right-click on the Style and apply it to a layer.
- Reduce the opacity of the layer to adjust the Style’s intensity to your liking.
- Perform final adjustments to make it your own, and you’re done!

Remember, also, that while we’ve provided suggestions as to which styles will work best on golden hour landscapes or night-time cityscapes, they can equally be applied to both genres for any given effect.

How to purchase
Click through to the dedicated page on captureone.com to purchase the Elevation styles pack:
And most importantly, enjoy experimenting with what the tools in Capture One can do.
These styles are intended to be a starting point – to get to 70% quickly – the remaining edits are up to you.
Try deconstructing the adjustments, modifying these styles and creating your own, or even make a new style brush out of them if you wish. The world of editing is waiting for you to click the button and explore!

