Having shot many of the world’s cities over decades of travel, I’ve been lucky enough to capture some memorable moments and iconic skylines in my career.
I’ve also been unlucky enough to get awful weather for weeks, to lose inspiration in a place that I can’t quite connect with, or to just burn out when I’ve been in a city for too long.
There are no real rules to shooting a cityscape “well”, it’s about capturing the feeling of a place – the energy, the movement of people, the evolution of the city itself over time. That said, there are a few tips and tricks I’ve found have helped as “pointers” over the years, which I hope will help others to bring back fantastic photographs from your own memorable moments to come.
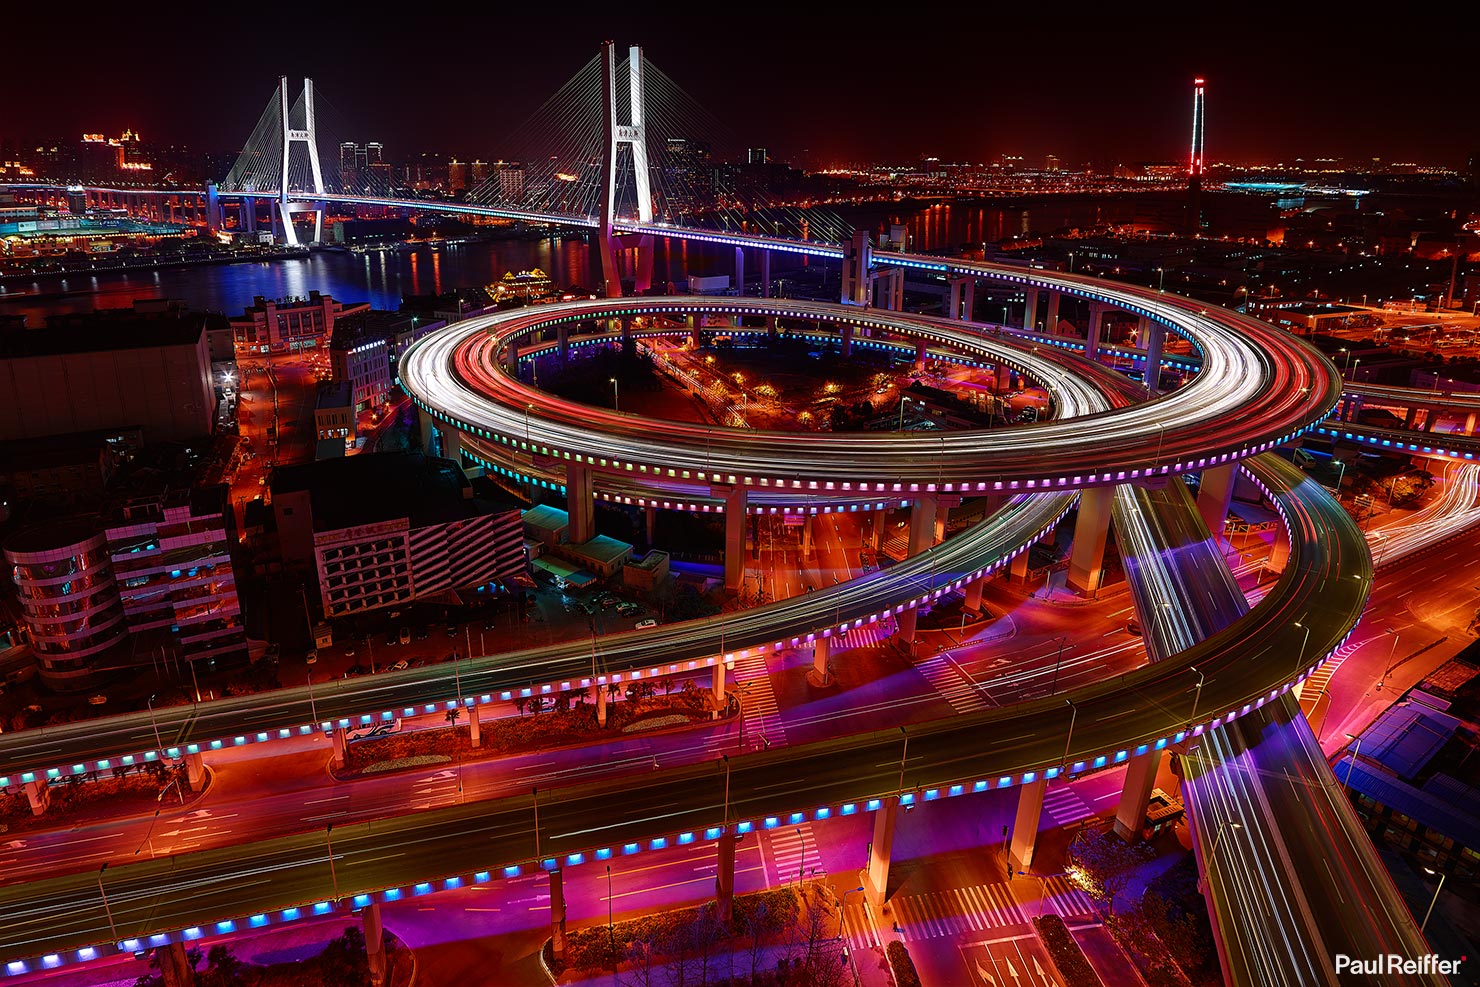
Low light = Low ISO (yes, really!).
The temptation (and automatic tools in our cameras) will always be to push the sensitivity (ISO) up high when shooting cities in the dark – but this will result in a noisy “snapshot” image instead of a clean photograph of a scene that captures motion and time with light trails too.
Consider shooting a longer exposure (on a tripod or sturdy base for 30 seconds+) at a low ISO instead of relying on the camera’s auto-settings on a handheld high-ISO shot.
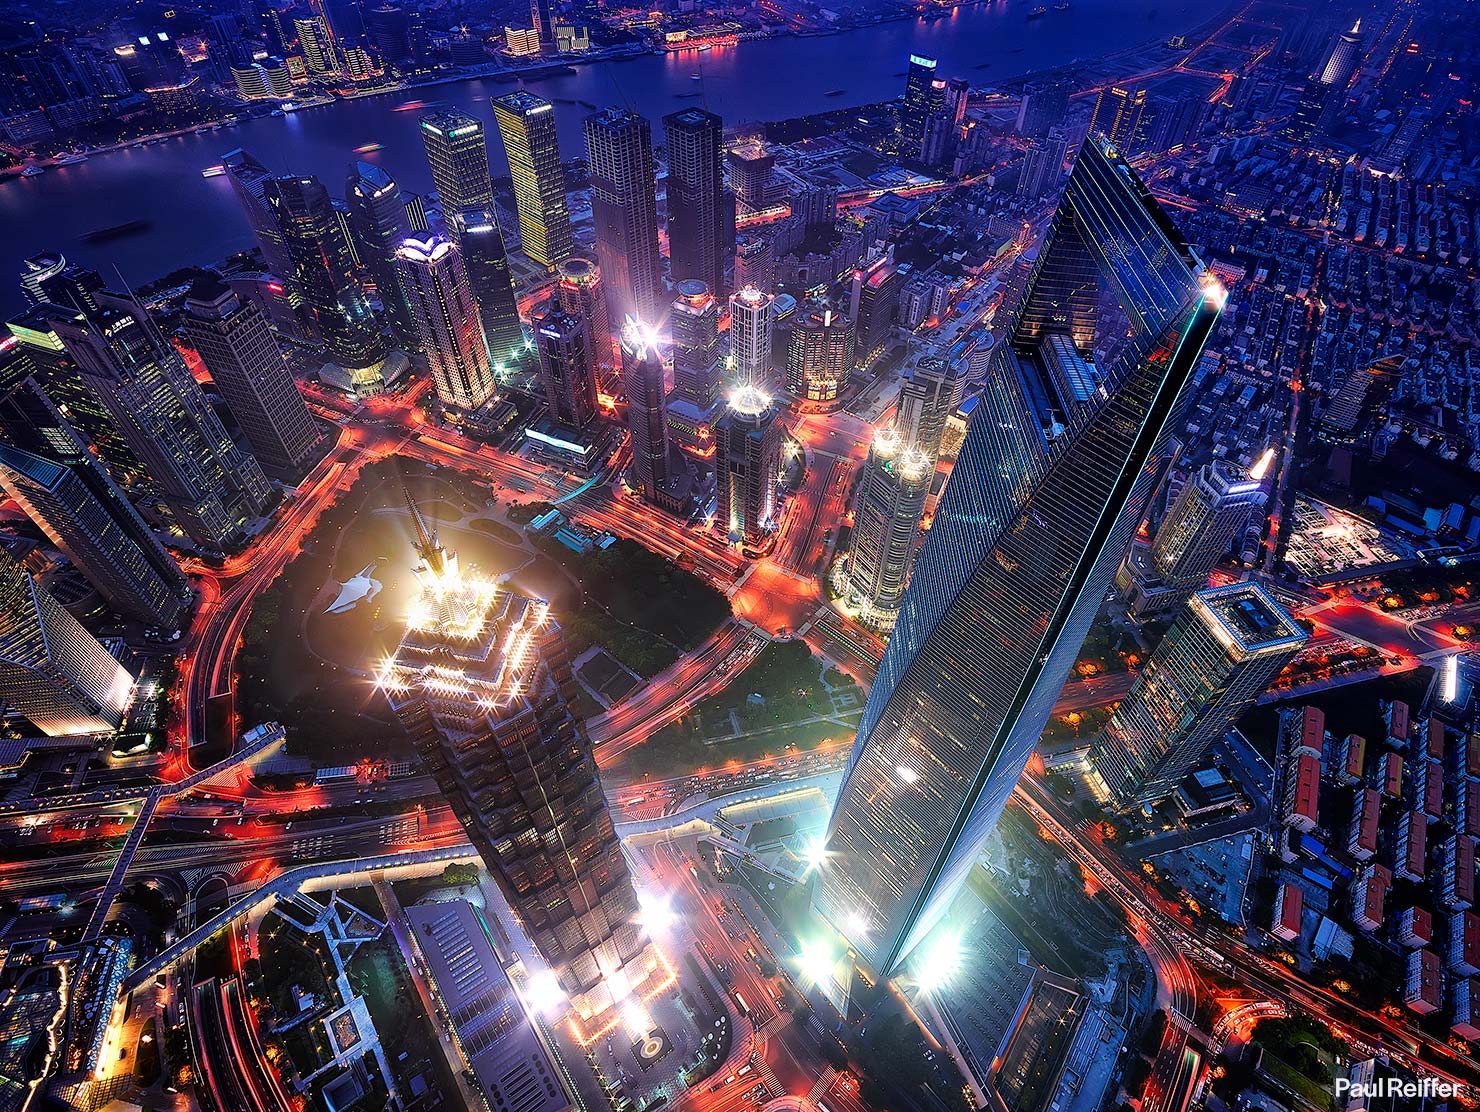
Get up high!
If you find yourself with the opportunity to shoot from up high – use it – and remember to keep that feeling of looking down when considering the angle you choose.
While perspective distortion can be an unwanted effect for strict architectural shots, it can really add a sense of dynamic height to images that intend to provide that view from above.
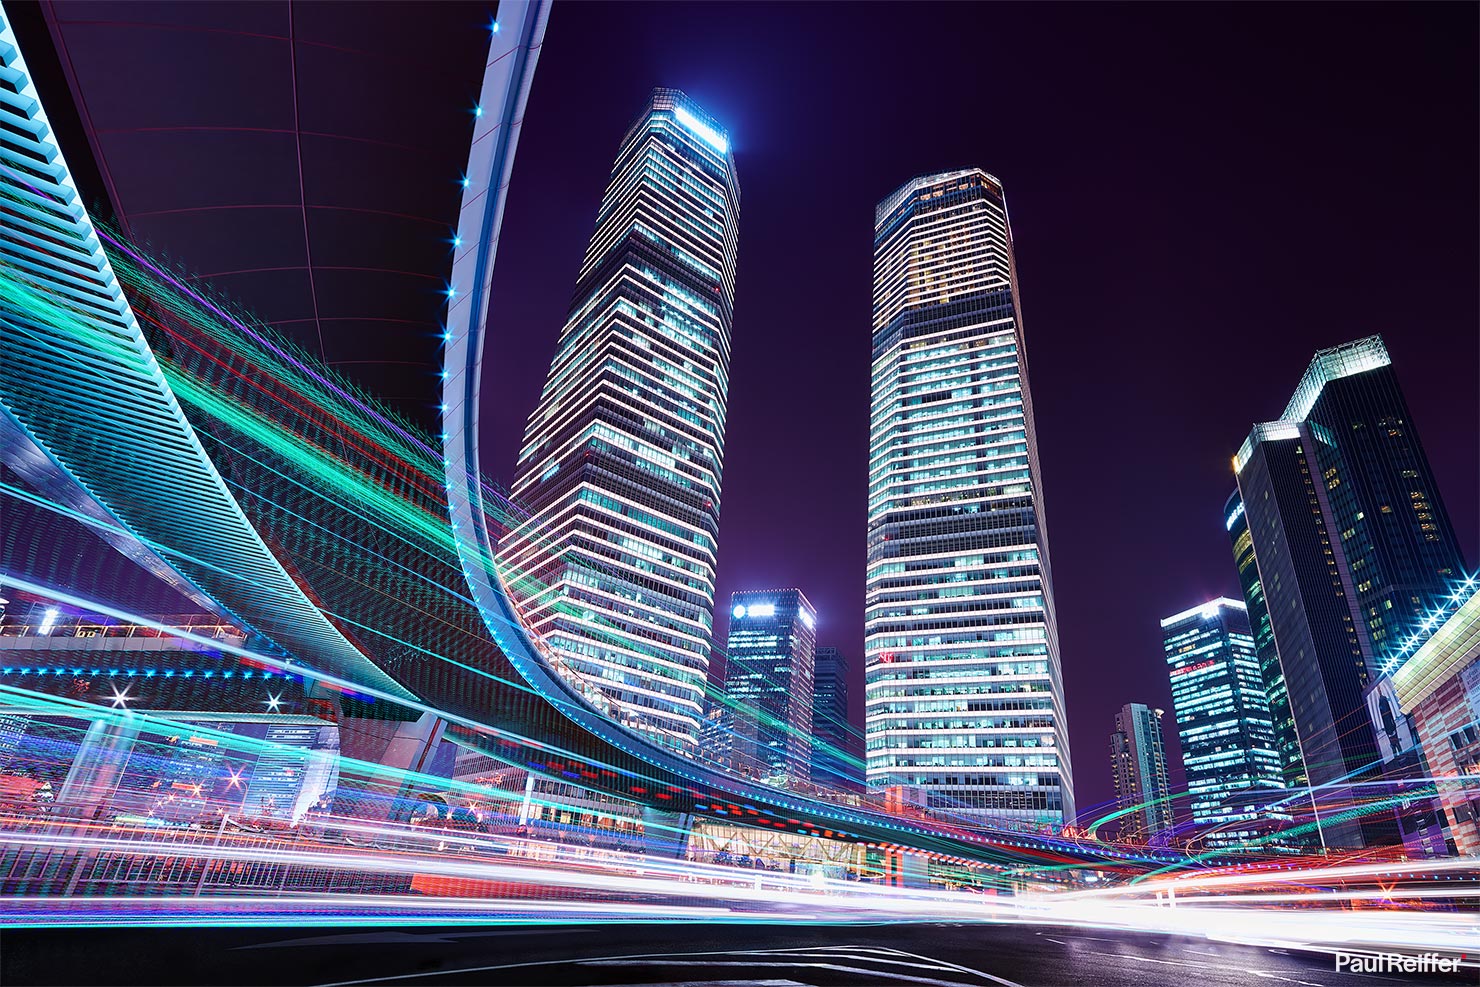
…or go down low.
Cities are typically designed to be viewed from eye level or above – but sometimes a low angle can add energy and a new perspective on an otherwise less exciting, well-known scene.
Be careful around traffic, for obvious reasons, but don’t be afraid to get down to ground level and shoot from there for something unique. If you see a crazy guy with a tripod on the floor and his head a few inches away from freeway cars, chances are it could well be me…!
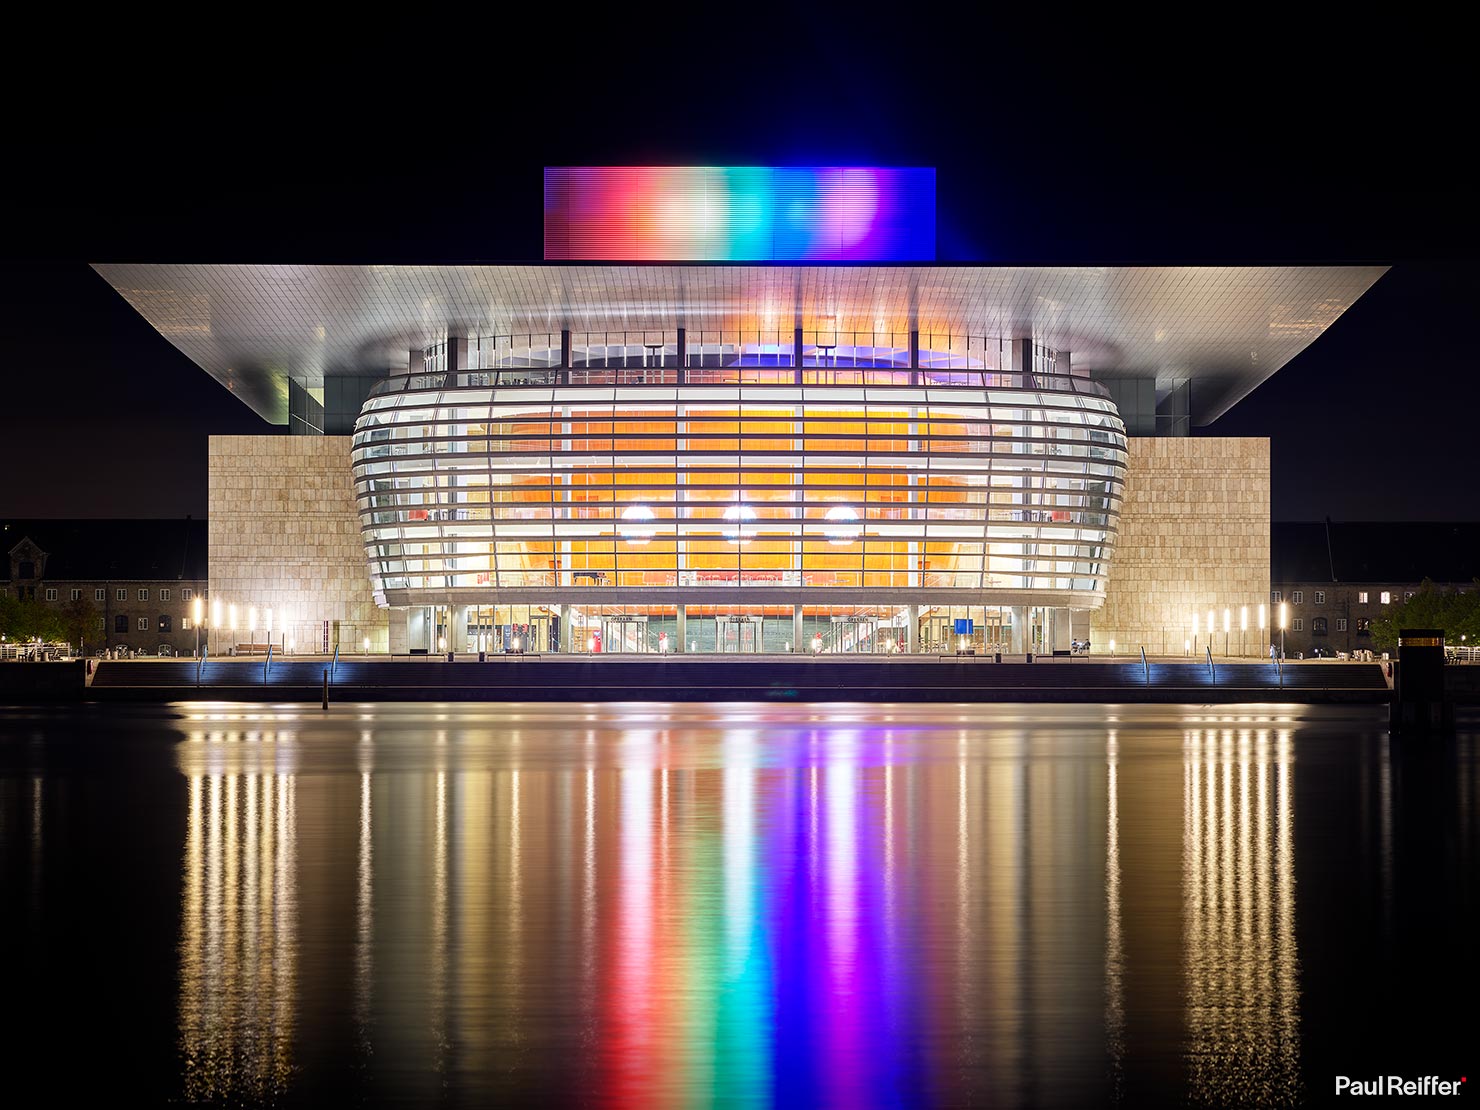
Use reflections to boost an icon.
Some of the world’s most iconic landmarks are built near water – for a reason : The reflections can add something extra special to the architecture itself.
Using a slower shutter speed and filters (for a long exposure of 30 seconds or more), you can smooth out any movement in the water and bring those reflections and colours to life. Just be careful to stop short of blowing out any highlights along the way.
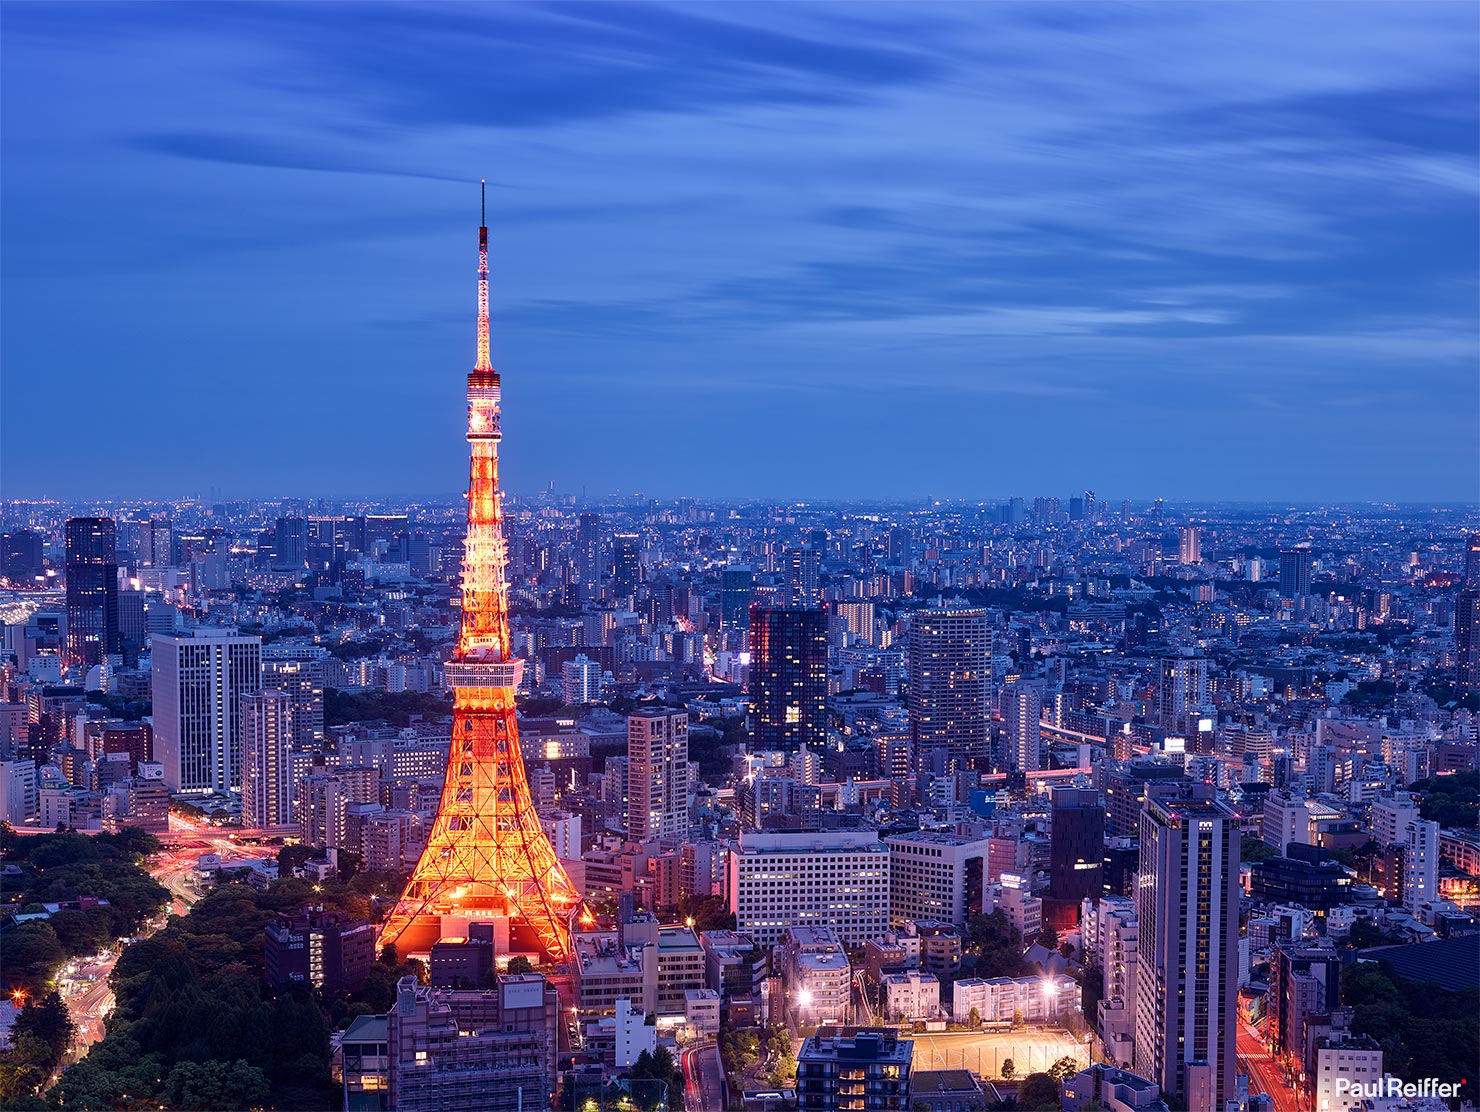
…But be careful when stuck behind glass.
Window reflections tend not to be quite as useful as those from still water – but sometimes, in some situations, we have no choice other than to shoot from behind glass. Even in some rooftop scenarios I’ve shot from, there’s still glass in the way, so it’s a case of knowing how to deal with it rather than avoidance.
In this case, consider using either a polarising filter and/or holding up some dark fabric around the lens and window itself to reduce any bounceback. Double-glazing can be a real problem, but the right amount of darkened area around your lens will reduce the impact of “ghost lights” and reflections in your shot.
And if you’re taking pictures through glass from your hotel room at night – start by turning off all the lights behind you first!
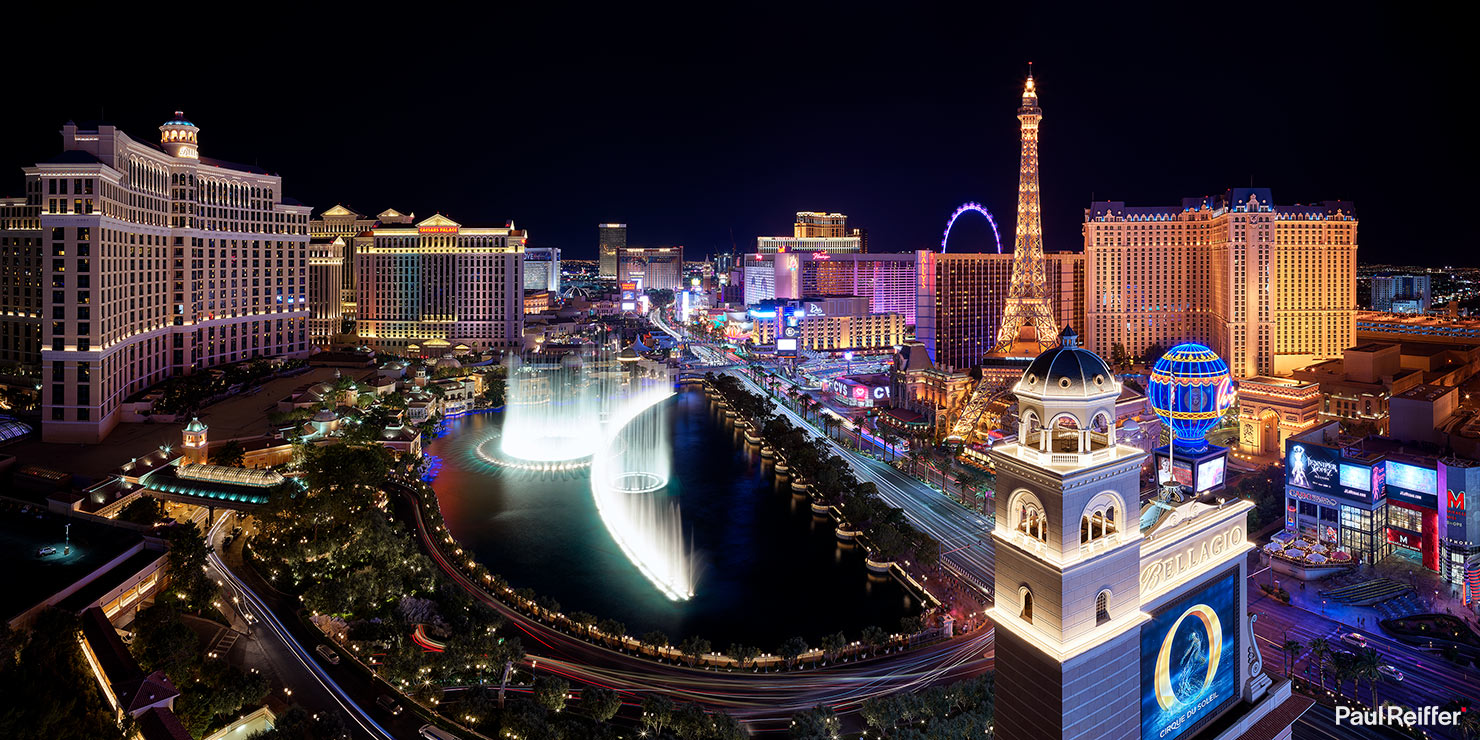
Take in the view.
Panoramic images give the viewer a vista that’s larger than life. When we produce images that are wider than the standard human field of view, it adds a sense of scale that’s hard to beat.
If you don’t have an ultra-wide lens (<16mm on a full-frame basis), consider shooting multiple images and stitching them together in software to achieve a similar effect. If including architectural elements, buildings and horizontal/vertical lines, be careful to keep your camera entirely level between each shot to avoid any bending/warping in the final result.
(Just be careful with those joins!)
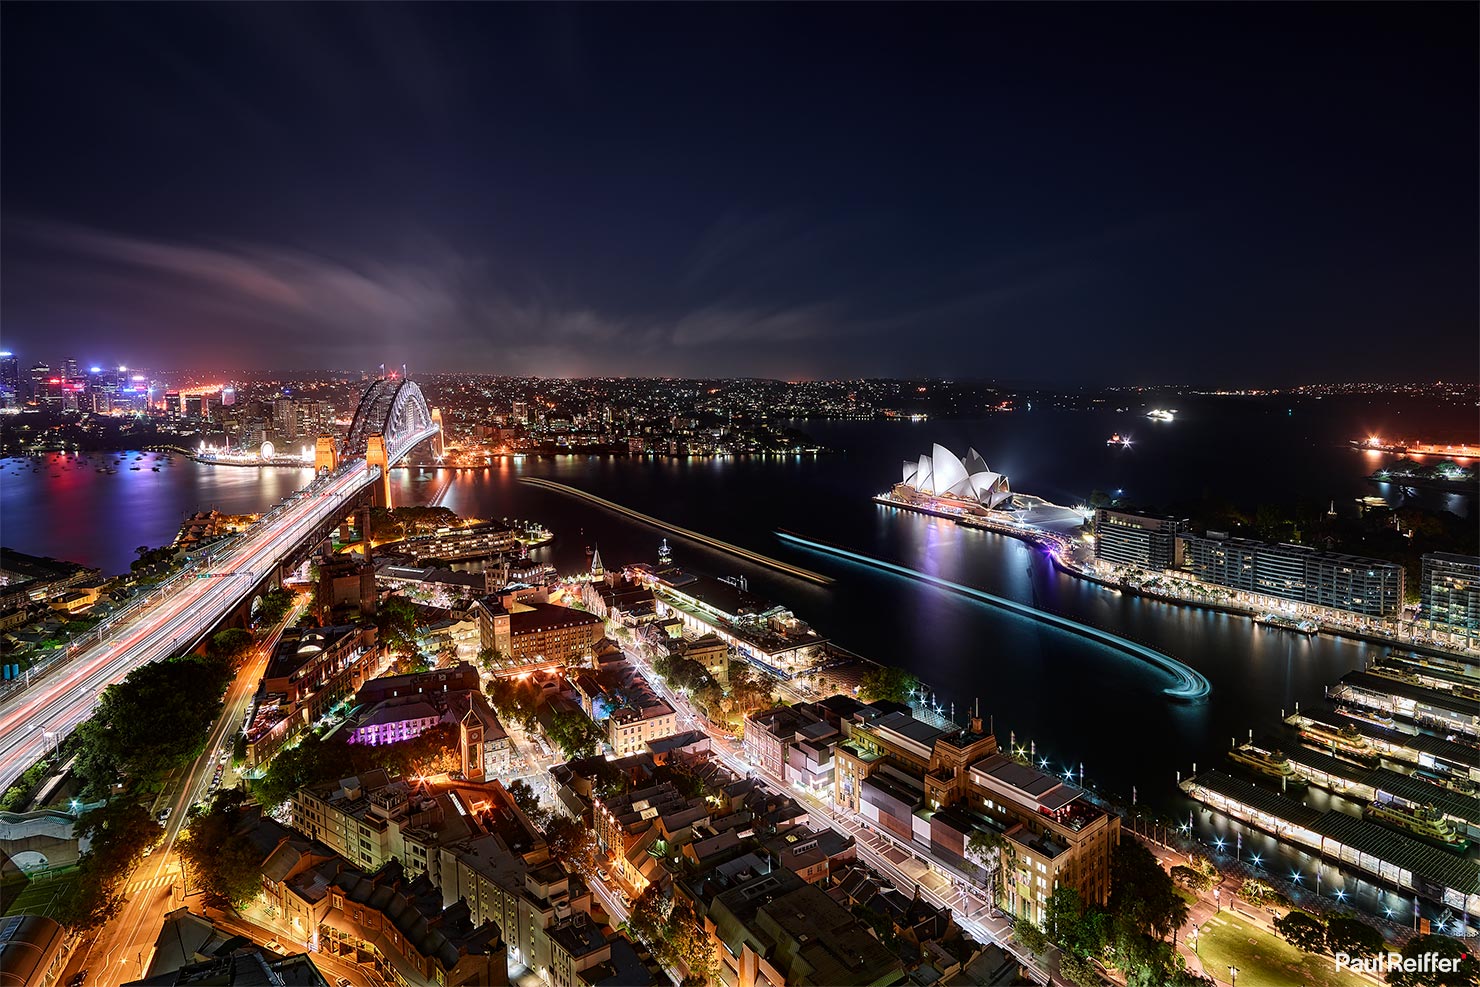
Capture the movement of life.
Cities aren’t static by any measure – they have moving people, moving transport, developments that change over time, light shows and more. Whether it’s from above, below, or at street level – an image that displays the heartbeat of a city’s energy will always create interest.
Don’t rely on a cool location alone to get that “wow” shot – work out the key ingredients to each city’s momentum and capture those moving parts in your image where you can. Sometimes it’s the activity caught in your image that delivers the key subject, not the view itself.
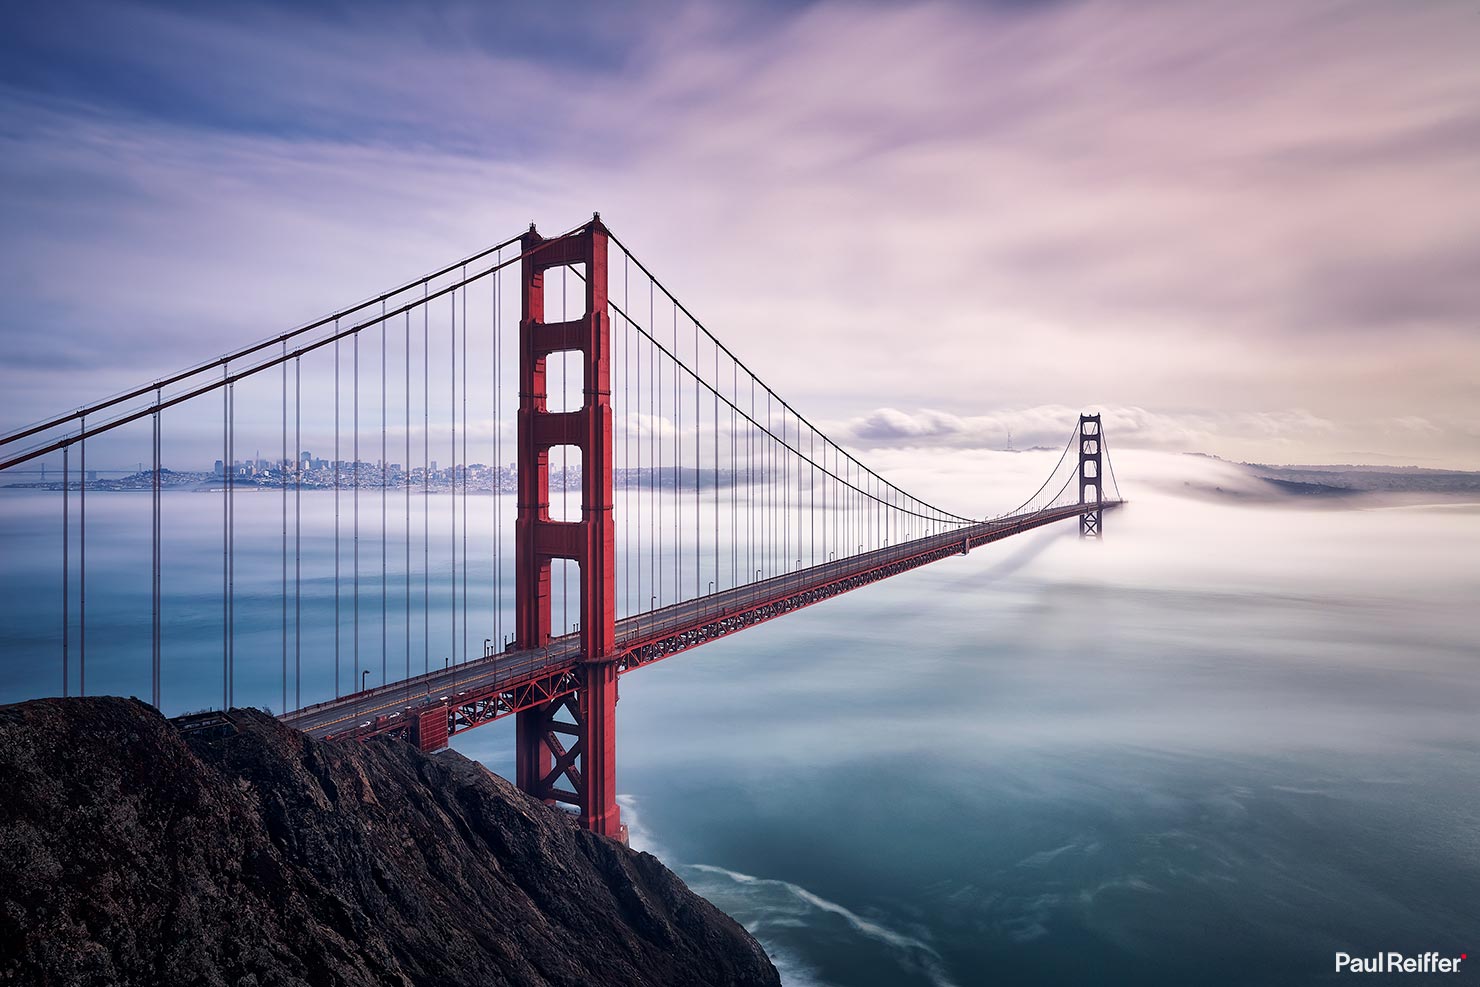
Don’t discount the “obvious”.
As photographers, we have a tendency to shun the “tourist traps” or “honeypot locations”, but it’s a fool’s goal to actively avoid those places which are often popular precisely because of the view.
Instead, consider what you can do to bring something different to the shot – use weather, frame against some foreground interest, try an unusual angle – but don’t write it off just because others have shot there before. Maybe look at it as a challenge in terms of delivering something different from that exact same location.
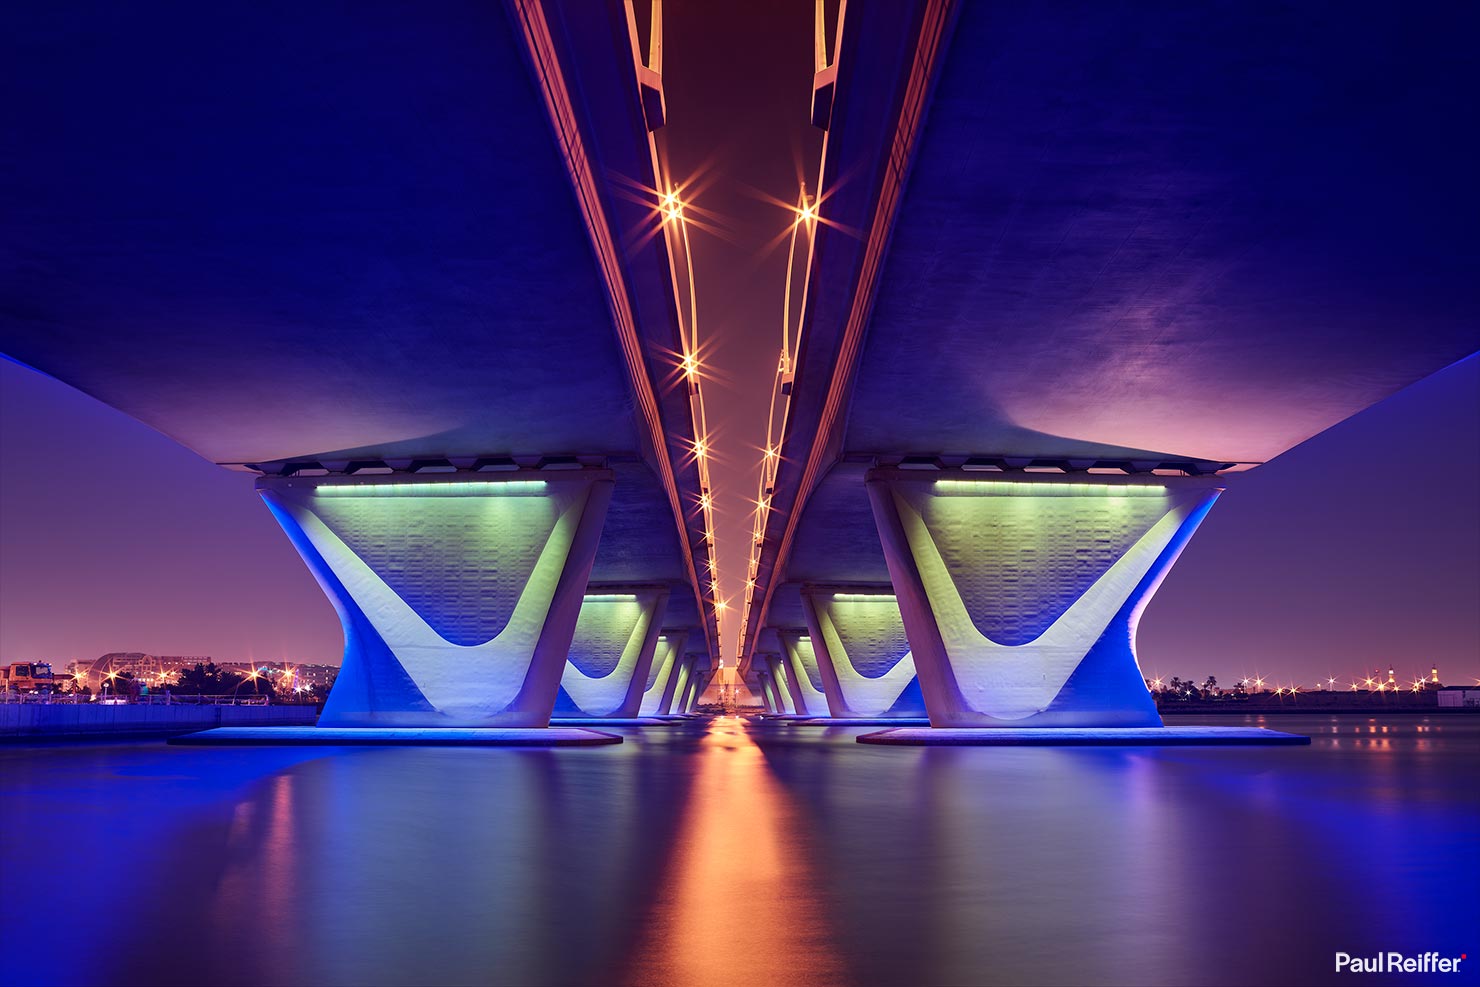
The “obscure” can work too.
Much of a city’s architecture isn’t found purely on the main streets and tracks that have been walked a million times – it’s underneath bridges, in subways, in older downtown areas and more.
Always stay safe whenever you head out, but shooting in the lesser known parts of town can result in some unique perspectives that leave people guessing where you were. Arguably, the shots that aren’t instantly identifiable as one particular city can be more interesting as a result.
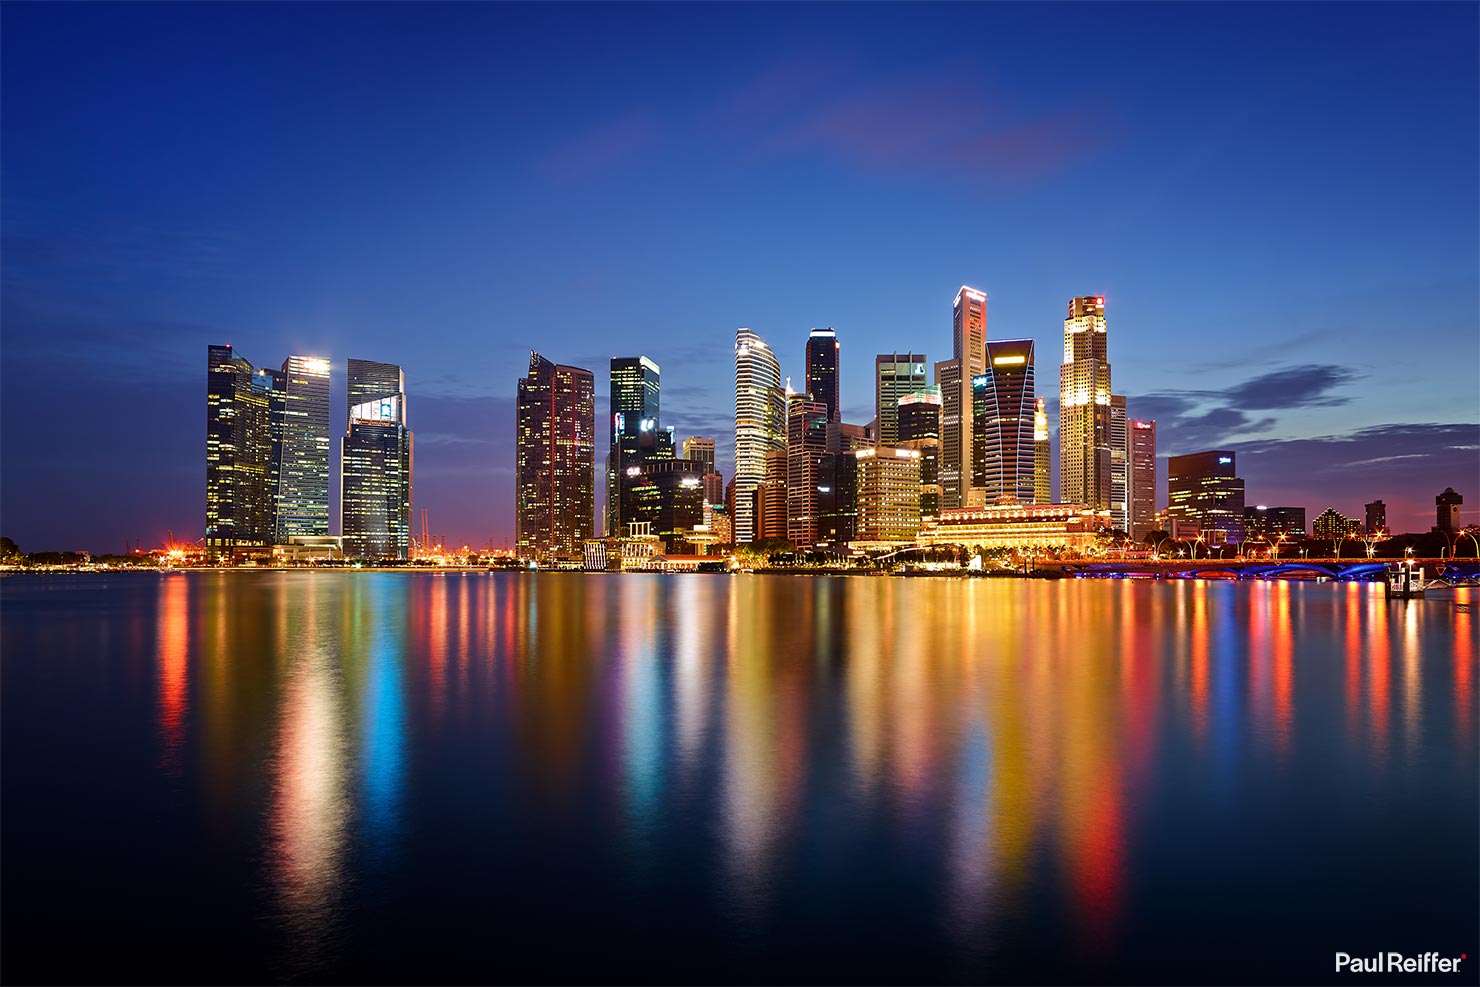
Symmetrical skylines.
In the same way that a single iconic building can be enhanced by any water that’s nearby, some cities have entire skylines built on the waterfront just asking to be captured when the conditions (and light) are right.
Head out at “blue hour” (just after sunset – but before the sky loses all of its colour) and see if you can capture two cityscapes in one: The concrete version, and the one that’s in the water. Using the remaining light in the sky, coupled with a long exposure of 30 seconds or more, you can create a striking shot of a world-famous skyline.
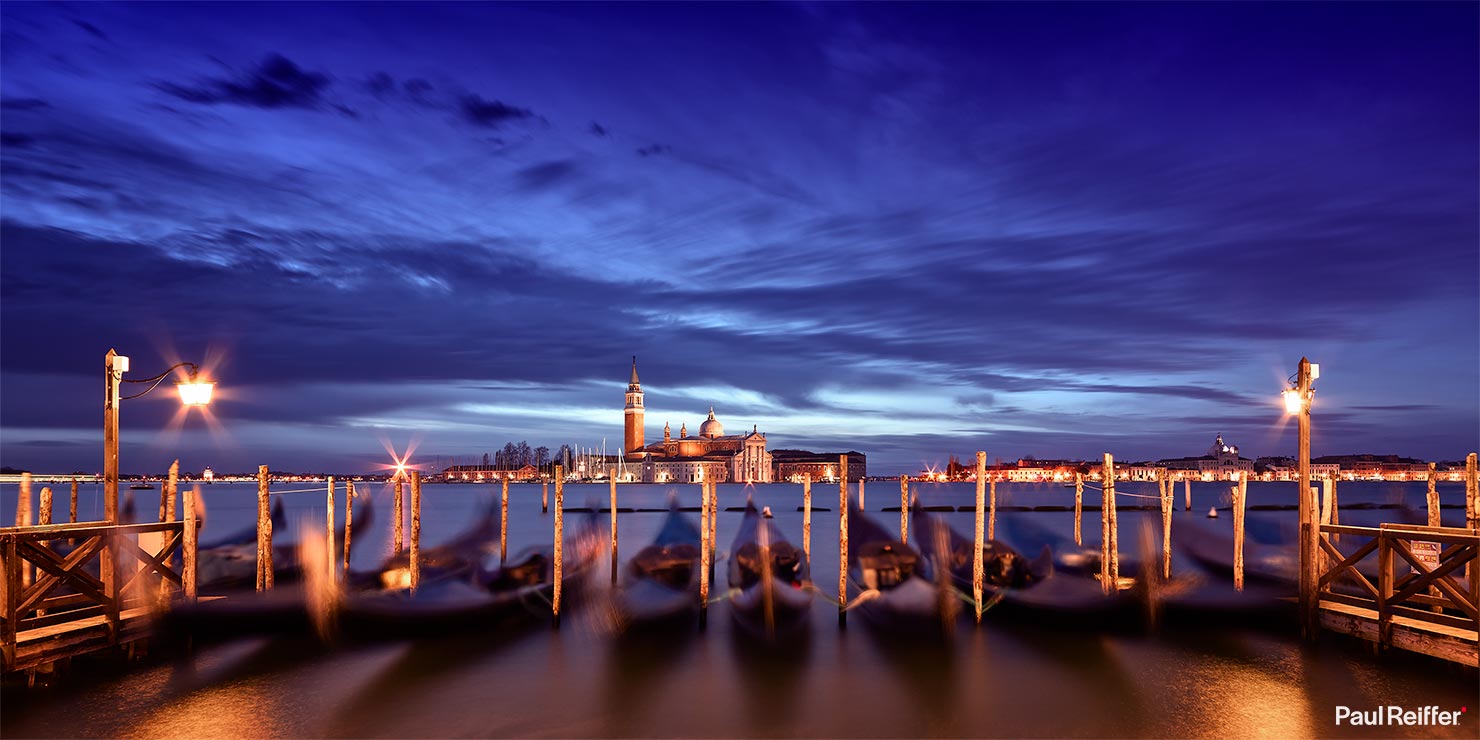
Stillness in motion.
Buildings tend not to move that much in a day – but the items that surround them often do.
Whether that’s people, road traffic, boats or even just the clouds, capturing these for a little longer than normal with the help of a filter (ND64 for example) can make the part of the shot that is static stand out even more. Compositionally, filling your foreground with moving elements that frame the subject in the distance can lead to a really powerful image when put on display.
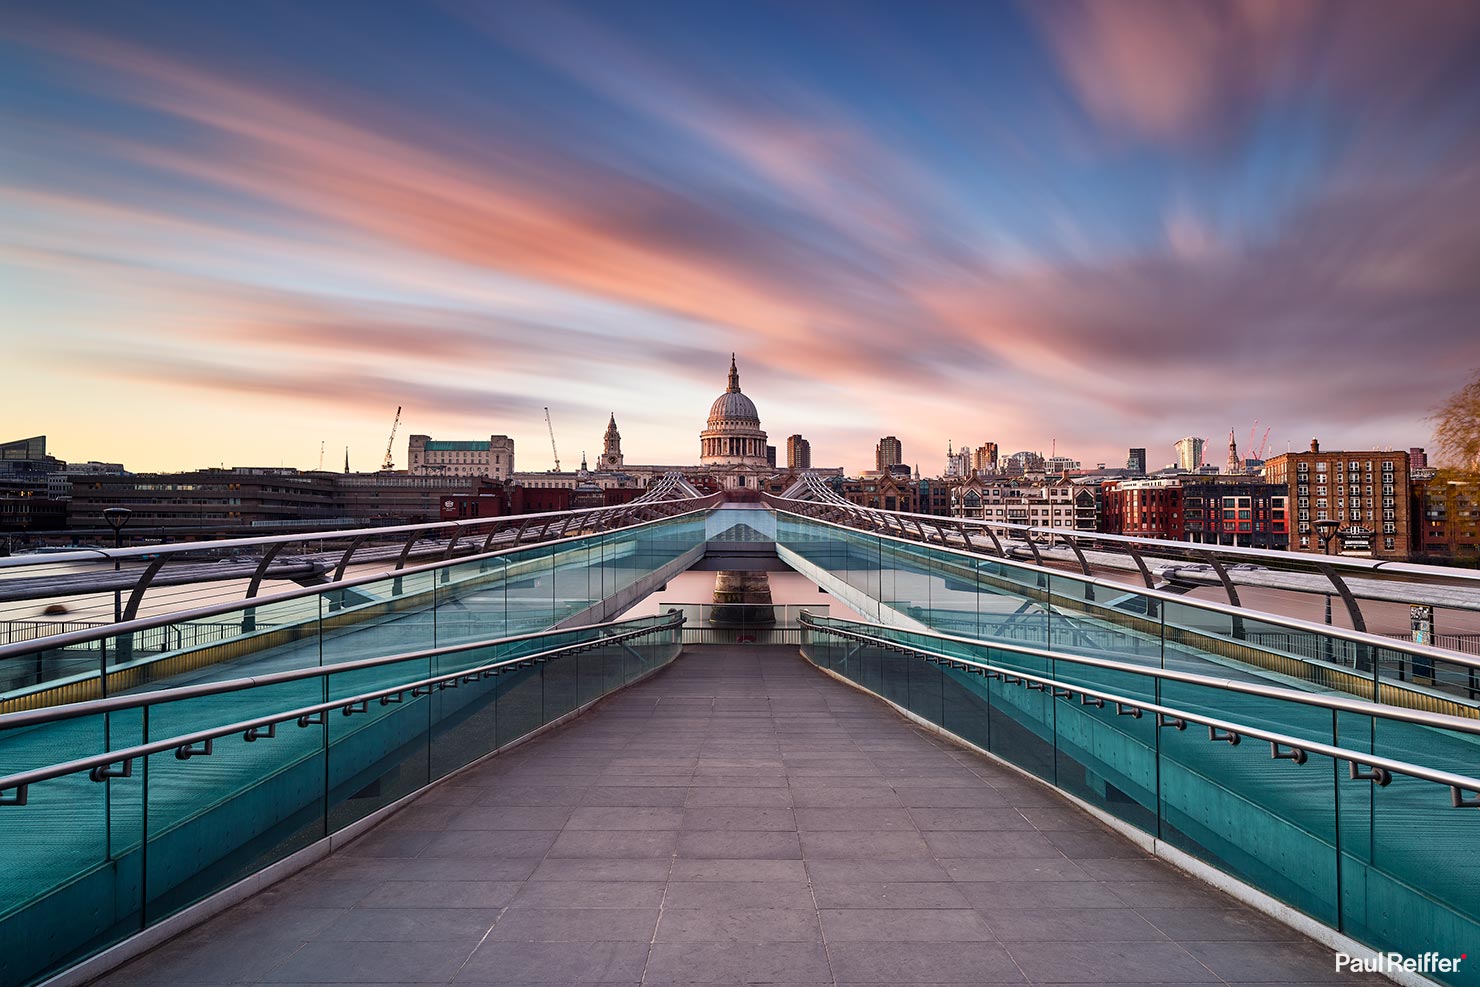
Leading lines.
Architects and photographers have a few things in common – not least of which is the use of bold, leading lines.
Use these diagonally at the edges and corners of your frame, or through twisting lines and patterns from the edges to bring the viewer’s attention straight to the subject of your shot. Not only is it geometrically calming, it also tends to be the way a structure was intended to be seen.
(If only they’d built that bridge exactly central to St. Paul’s Cathedral!)
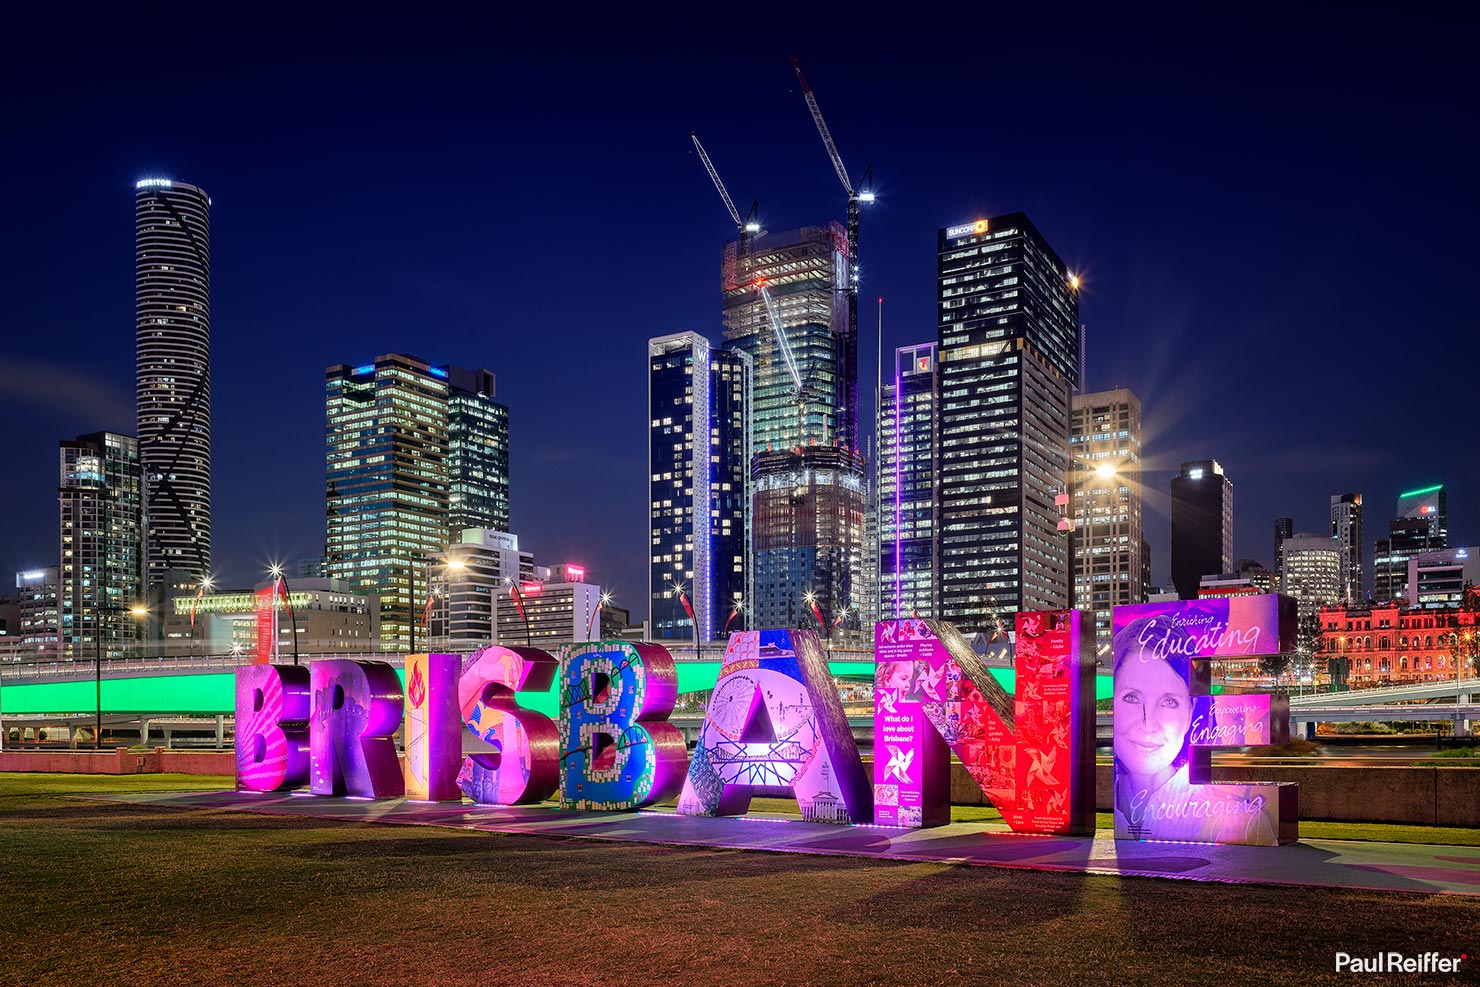
Making headlines.
Want an obvious “title track” for your location?
Seek out the shapes and sculptures that help identify a city and its narrative in one frame. It could be obscure, only making sense to those who know the area well, or it could be obvious such as a city’s name or road sign. Either way, it can give you a definite starting point for a collection of images from that place.
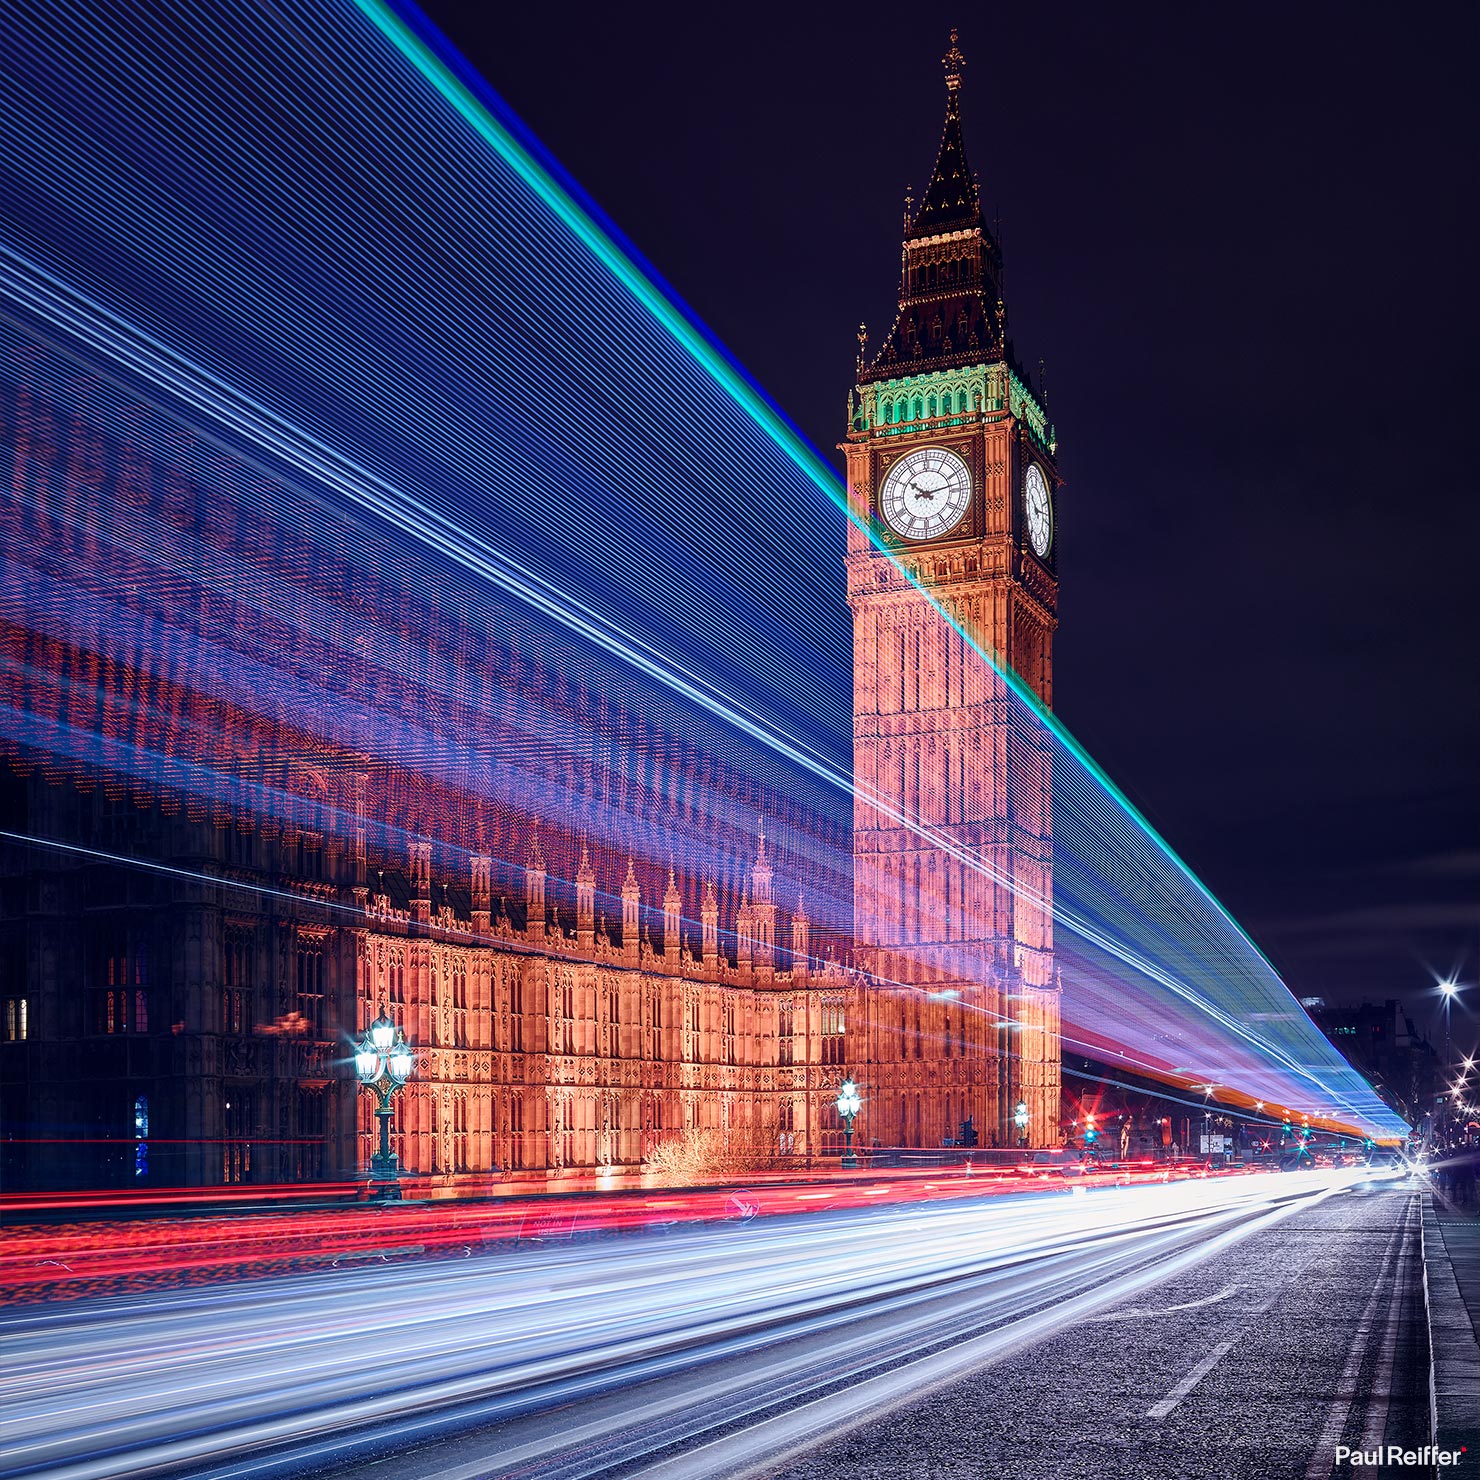
Rush hour.
Traffic trails really do add something energetic and exciting to a night-time cityscape.
Framing a landmark or key piece of architecture, these streams of light take some planning to get right in between stop lights, flashing police cars and pedestrians – but when you do manage to capture them well, the shot can really pay off.
(Just remember to stay out of the road!)
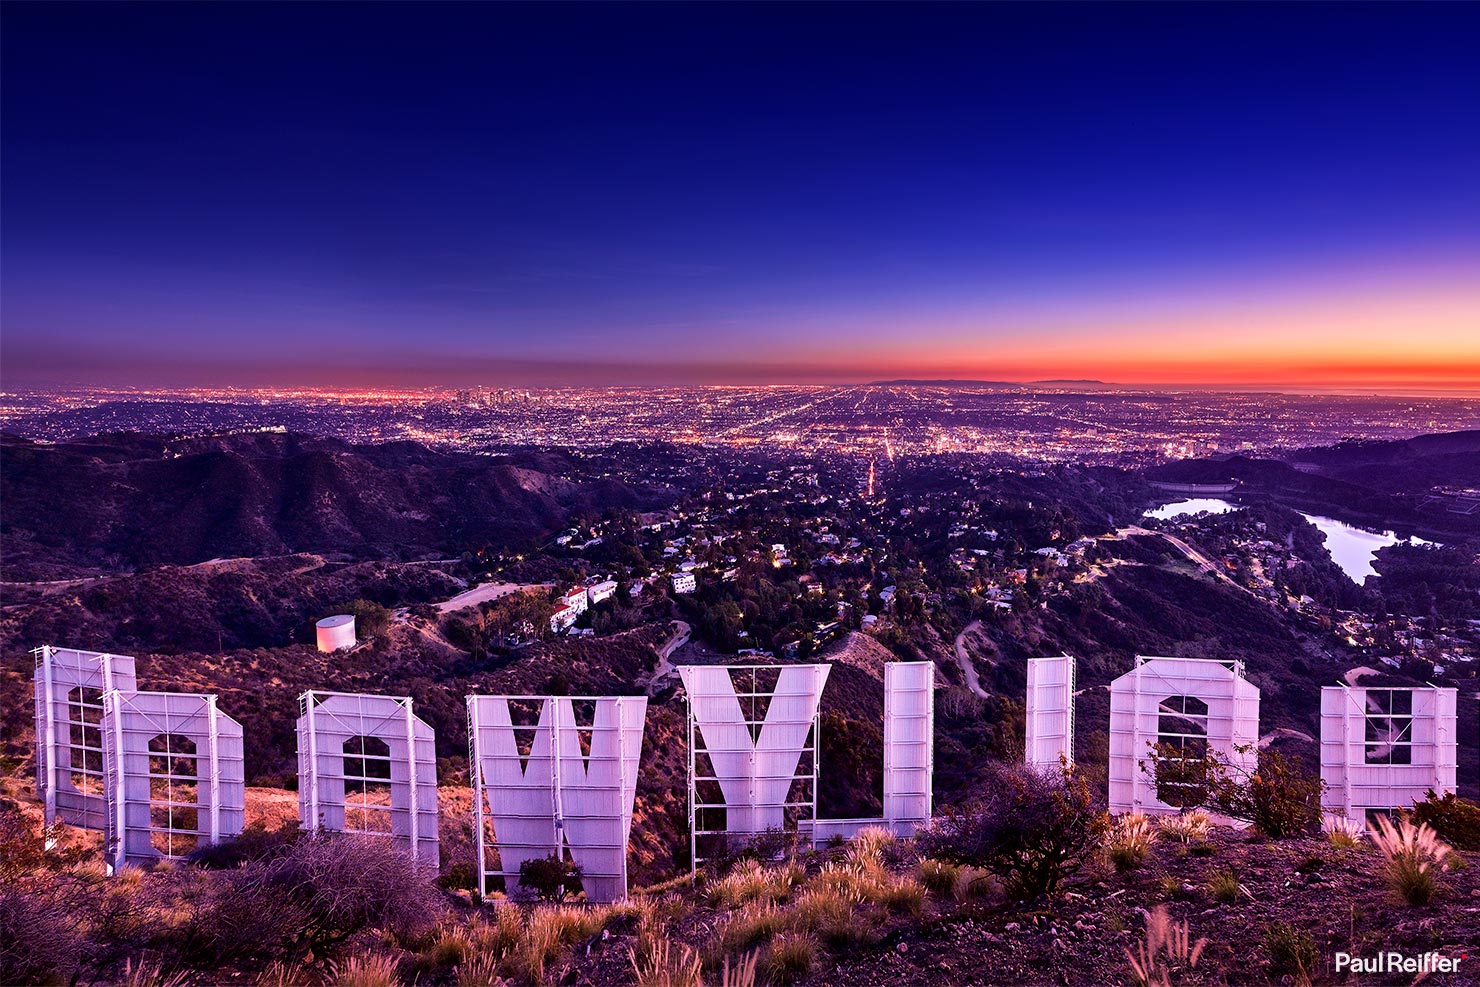
Behind the scenes.
A view from a landmark can often be as interesting as the view of it from afar. With so many images of the landmark itself out there, the reverse view can be an intriguing vantage point for most viewers of your image.
By hinting at the location from behind, including it in the shot, consider shooting the vista that the icon sees from its position to get an alternative view over any well-known city you’re in.
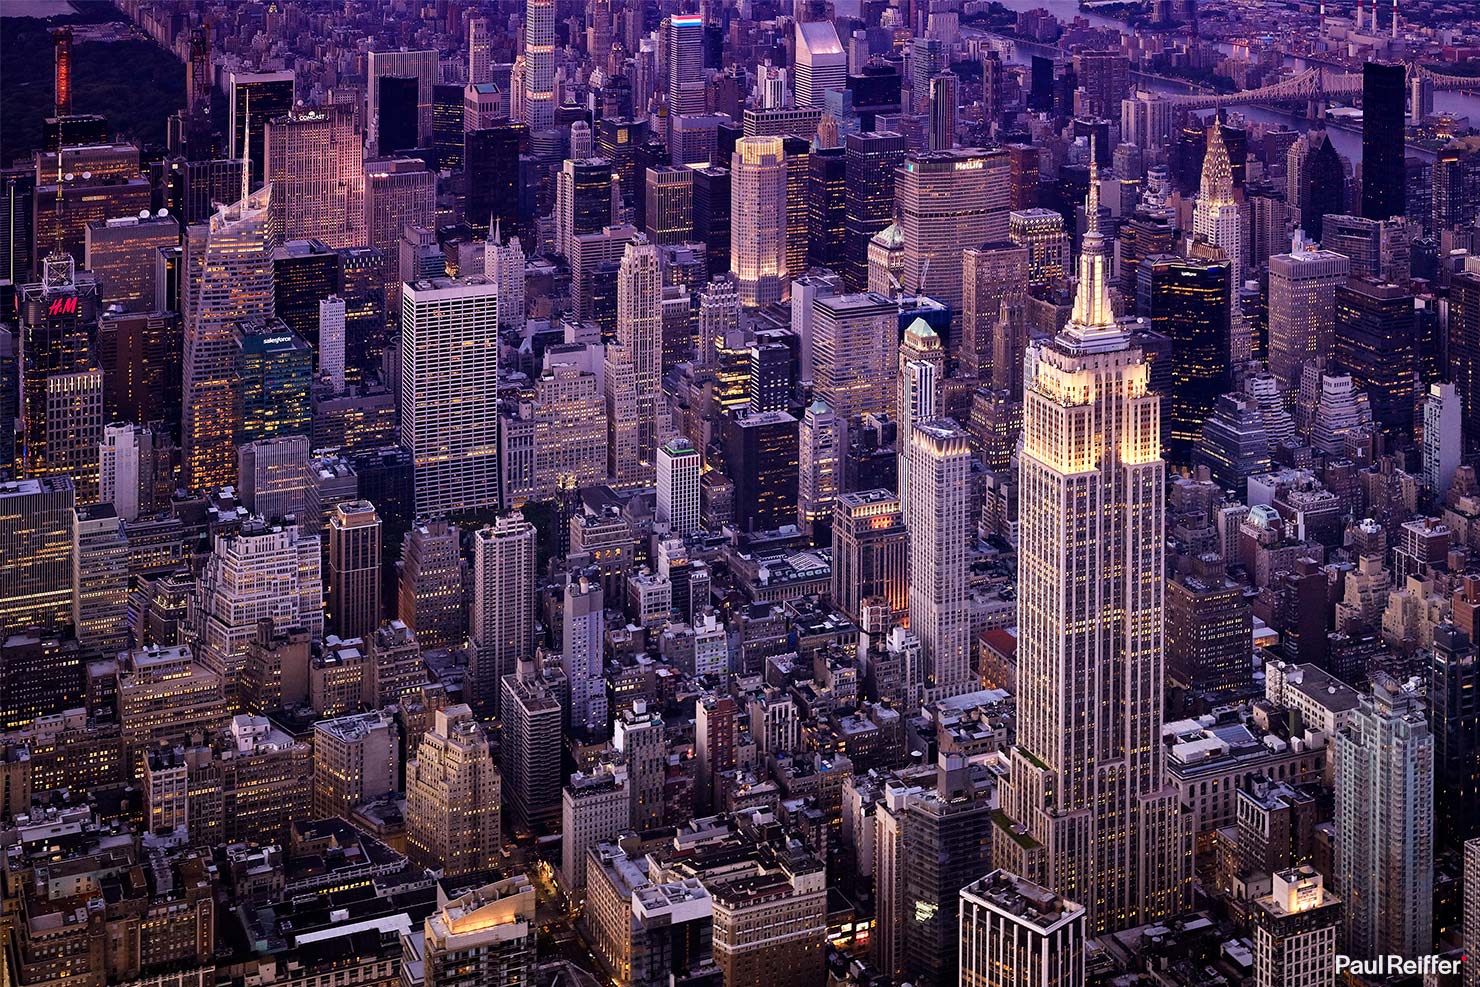
Leave the Earth.
It can sometimes feel like drones now “own the sky” when it comes to aerial photography – but that’s far from the truth.
With limitations on how high they can operate, there’s also a special connection and feeling that can only be had while flying over a city with the doors-off in a helicopter: The image needs to remind you of a moment, as much as it does a place.
Many cities have options for heli-tours, but see if you can get them to take the doors off if you’re comfortable with it; you might just be surprised.

Cities are wonderful places to capture – the energy that comes with constant change, always-on neighbourhoods and endless photographic opportunities make them a playground for creativity.
As many often quote, “the best camera in the world is the one you have with you” and the best camera on paper doesn’t necessarily make for the best pictures – for that, you need to have timing, patience and an inquisitive eye.
So get out there, explore your own urban hotspots, get to know your camera inside out – and then enjoy capturing the moods and tones of the world’s cities.
